How to Transplant Culantro?
For culantro, the optimal period for relocation is from mid-spring to early summer, once the ground has adequately warmed, facilitating root development. Preferably, select a bright spot with effective water runoff. Growing medium that holds moisture without becoming saturated is conducive to culantro's thriving.
What Preparations are Needed Before Transplanting Culantro?
What is the Ideal Time for Transplanting Culantro?
The optimal period for relocating culantro is from mid-spring to early summer. During this timeframe, moderate temperatures and consistent moisture create perfect conditions for root development, allowing culantro to flourish. Transplanting then ensures your culantro benefits from prime growing circumstances, promoting vigorous growth. Furthermore, mild weather reduces transplant shock, giving culantro the best start in its new spot.
How Much Space Should You Leave Between Culantro Plants?
Before you begin, remember to space out the planting spots for your culantro plant. An appropriate distance is about 1-2 feet (30-60 cm) apart. This enables the plant to grow without competing for nutrients and sunlight. It's like giving each plant its own personal space to develop!
What is the Best Soil Mix for Culantro Transplanting?
For your culantro plant, a rich, well-draining soil is essential. Garden soil enriched with compost works wonderfully. Just before planting, incorporate a slow-release base fertilizer to ensure a strong start for your plant. Similar to a balanced diet for us, the correct soil helps the plant grow healthy and robust.
Where Should You Relocate Your Culantro?
Finally, your culantro plant loves sunlight, so find a bright location in your garden for it. It requires at least 6 hours of direct sunlight daily. Just like us enjoying the sun, plants use sunlight to produce food, making this step extremely important!
What Equipments Should You Prepare Before Transplantation Culantro?
Gardening Gloves
To safeguard your hands while handling soil and culantro.
Trowel
A small hand tool utilized for digging, scooping, or otherwise manipulating soil in various gardening tasks.
Spade
Used for lifting and moving earth, especially during the removal and relocation process.
Watering Can
For moistening soil and hydrating the culantro plant after transplantation.
Pruning Shears
These are excellent for trimming any damaged roots of culantro prior to transplantation.
Mulch
Applied to help maintain stable ground temperature and reduce water evaporation post-transplantation.
Compost
To help enrich the soil where you will be transplanting culantro.
How Do You Remove Culantro from the Soil?
How Do You Remove Culantro from the Soil?
From Ground: First, put on your gloves and water the culantro plant to moisten the soil, making it easier to excavate. Using a spade, dig a wide circle around the plant to ensure the root ball remains intact. Begin to work the spade underneath, lifting the plant from its original spot. Be careful to avoid damaging the plant's roots.From Pot: Water culantro before extracting it from the pot to minimize stress on the plant. Place your hand on top of the soil, with the stem between your fingers. Invert the pot and allow the plant to slide into your hand, shaking gently if needed. Be careful not to pull on the stem or leaves.From Seedling Tray: Once the culantro seedlings have grown a few inches tall and developed a couple of true leaves, they are ready to be moved. Start by watering the seedlings to reduce root damage during removal. Gently loosen the soil with a small tool or stick and lift the seedling, avoiding damage to the delicate stem and roots.
Step-by-Step Guide for Transplanting Culantro
Hole Preparation
Excavate a hole that is twice as wide and the same depth as the culantro's root ball. If your soil is poor, improve it by incorporating well-rotted compost.
Placement
Position culantro in the hole. Adjust the depth until the top of the root ball is level with or slightly above the surrounding soil. The plant should stand upright and straight.
Backfilling
Fill in around the plant using the excavated soil mixed with compost. Gently firm the soil around the base of the culantro, eliminating any air pockets.
Watering
Water culantro thoroughly using a watering can. The water will help settle the soil around the roots. Do not overwater as it can drown the plant.
Mulching
Apply a layer of mulch around the plant's base. This will help retain moisture and regulate soil temperature, minimizing transplant shock.
How Do You Care For Culantro After Transplanting?
Watering
For the initial week or so after transplanting, water culantro daily to aid its establishment in the new location. Subsequently, water regularly, but do not allow the plant to sit in heavy, waterlogged soil.
Pruning
After a couple of weeks, inspect the culantro for any signs of stress or damage, such as yellowing or wilting leaves. If present, use your pruning shears to remove these parts, which will encourage new growth.
Feed
After approximately one month, culantro will benefit from some fertilization. Use a general-purpose, slow-release fertilizer. Follow package instructions for application rates and methods.
Shielding
Excessive direct sunlight immediately after transplant might cause stress to the culantro. You may want to consider a temporary shield to protect your new transplants from afternoon sun for the first few days.
Troubleshooting Common Issues with Culantro Transplantation.
What is the optimal season for transplanting culantro?
The best time for transplanting culantro falls in the second to fourth seasons. This provides the plant ample time to settle roots before the onset of tougher conditions.
What's the ideal spacing for transplanting culantro?
Give each culantro about 1-2 feet (0.3-0.6 meters) space when transplanting. This promotes healthy growth without overcrowding.
My culantro leaves are wilting after transplanting. What can I do?
Wilting could indicate plant stress. Ensure it's not experiencing extreme temperatures, and keep its soil adequately moist. Remember, roots need time to adjust post-transplant.
What should I do if the culantro is not growing after transplanting?
Check if the culantro has sufficient sunlight, water, and nutrients. Additionally, it might need some time to recover from transplant shock, so give it a few weeks.
How deep should I plant culantro when transplanting?
The hole needs to be as deep as the root ball of your culantro and twice as wide. This ensures the roots spread comfortably in the new location.
What soil type is suitable for transplanting culantro?
Culantro prefers well-drained, loamy to sandy soil. Choosing the right soil will provide your plant with the necessary nutrients and support it needs to thrive post-transplant.
I just transplanted my culantro, how should I care for it post-transplant?
Keep soil consistently moist but avoid waterlogging. Provide optimal sunlight and protect your culantro from harsh weather conditions. Keep a check on pests or diseases.
Should I prune culantro after transplanting?
Pruning is not necessary right after transplanting. Let culantro set new roots first. Once established, especially if it gets leggy, gentle pruning would help in bushier growth.
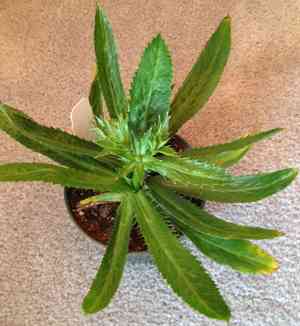
Can I transplant culantro in a container?
Absolutely! Culantro can thrive in containers. Ensure the container is deep enough for roots to grow and has good drainage to prevent waterlogged soil.
Is it normal for culantro to drop leaves after transplanting?
A small amount of leaf drop is normal; it's a common reaction to transplant stress. If extreme leaf drop occurs, check for optimal light, water, and temperature conditions.


