How to Transplant Annual fleabane?
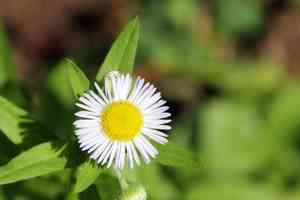
The most suitable period for relocating annual fleabane is within the pleasant warmth of late spring through mid-summer. Select a location offering abundant sunlight to partial shade and damp, adequately draining earth to ensure annual fleabane flourishes. Careful handling during this phase yields vigorous development.
What Preparations are Needed Before Transplanting Annual Fleabane?
What is the Ideal Time for Transplanting Annual Fleabane?
The optimal period for relocating annual fleabane is mid-summer. This timeframe, spanning early to mid-summer, guarantees prime growth due to favorable temperatures. Moving annual fleabane during these warmer months capitalizes on the plant's natural growth cycle, leading to strong establishment and development. Undertaking this gardening task now ensures annual fleabane benefits from the season's consistent warmth, which is crucial for its flourishing. Your efforts during this season will be rewarded as annual fleabane quickly roots and thrives, thanks to the longer, sun-filled days.
How Much Space Should You Leave Between Annual Fleabane Plants?
When moving annual fleabane, ensure each plant has sufficient room to flourish. Aim for a separation of approximately 1-2 feet (30-60 cm). This provides them with ample space to expand and spread their root systems comfortably.
What is the Best Soil Mix for Annual Fleabane Transplanting?
For annual fleabane, utilize fertile, well-draining soil. It can tolerate various soil types, so no concerns there! Incorporating a foundational fertilizer like compost or manure beforehand will give your plant an excellent start. Always blend the fertilizer into the soil prior to planting.
Where Should You Relocate Your Annual Fleabane?
Select a site for annual fleabane that receives full sun to partial shade. These plants are not overly particular about sunlight, but they do require at least a few hours of direct light daily. So choose a location that meets these requirements.
What Equipments Should You Prepare Before Transplantation Annual Fleabane?
Gardening Gloves
To safeguard your hands while handling soil and plants.
Spade or Shovel
Required for excavating the plant from its original spot or creating a hole in the new location.
Trowel
A small hand tool essential for safely extracting the plant from a pot or tray.
Pruning Shears
You might need to trim the plant for its health and survival during and after the relocation process.
Watering Can
Needed for hydrating the plant before and after the transfer. It helps prevent the roots from drying out.
How Do You Remove Annual Fleabane from the Soil?
How Do You Remove Annual Fleabane from the Soil?
From Ground: Begin by watering the annual fleabane plant to moisten the soil. Using a spade or shovel, dig a wide trench around the plant, ensuring the root ball remains intact. Gently work the spade beneath the root ball and lift the plant from its initial location. Exercise extreme caution when detaching an annual fleabane from the ground, as its roots can be sensitive to disruption.From Pot: Water the annual fleabane in the pot to hydrate the plant and facilitate easier removal. Carefully turn the plant sideways, hold it gently by the stems or leaves, and tap the bottom of its pot. Slide the annual fleabane out from the pot. If the plant is stuck, use a trowel to loosen the soil and roots along the edge.From Seedling Tray: If annual fleabane seedlings are to be moved, use a trowel or similar tool to carefully loosen the soil around the seedling. Gently hold the seedling by its leaves (not the stem) and lift it from the tray. Be careful to keep as much soil around the roots as possible to minimize disturbance.
Step-by-Step Guide for Transplanting Annual Fleabane
Digging a Hole
Excavate a hole that is twice the width and slightly deeper than the root ball of your annual fleabane. This provides ample space for the plant's roots to spread and grow.
Placing the Plant
Position your annual fleabane in the hole, ensuring the top of the root ball is level with the soil surface.
Filling the Hole
Backfill the hole with the native soil you previously removed. Lightly compact the soil around the plant to ensure stable support.
Watering
Thoroughly water the annual fleabane after planting. This aids in settling the soil.
Adjustment
If necessary, make adjustments to stabilize your plant. It's crucial that it's not leaning or unstable, as this can hinder the plant's growth.
Give it a Trim
Depending on the condition of your annual fleabane, you may need to lightly prune it after transplanting. Remove any damaged or broken branches to encourage healthy and vigorous growth.
How Do You Care For Annual Fleabane After Transplanting?
Watering
Continue to irrigate the annual fleabane regularly to promote root development. However, avoid excessive watering as it can lead to root rot.
Observation
Monitor the annual fleabane plant for indications of transplant shock, such as wilted, yellowing, or drooping leaves. If these symptoms appear, try to provide additional care and attention.
Pruning
Regular trimming can help the annual fleabane establish more quickly after being relocated. It reduces the plant's need to sustain unnecessary leaf areas while it's developing new roots.
Disease and Pest control
Keep an eye out for any signs of disease or pest infestation. Early detection can help in taking appropriate measures before it can harm your annual fleabane.
Troubleshooting Common Issues with Annual Fleabane Transplantation.
When is the perfect time to transplant annual fleabane?
The ideal time to relocate annual fleabane would be during 'S4-S5', which is in the latter part of the plant's growing season.
How should I space annual fleabane when transplanting?
For optimal development, annual fleabane should be spaced approximately 1-2 feet (30-60 cm) apart. This provides the plant with ample room to grow.
What type of soil should I use when transplanting annual fleabane?
Annual fleabane can tolerate various soil types. However, well-drained soil rich in organic matter is most suitable for it. Avoid waterlogged areas.
How should I prepare the transplant hole for annual fleabane?
Dig a hole twice the width and the same depth as your plant's root ball. This ensures roots can easily spread in the new location.
What's the best procedure for removing annual fleabane from its current pot?
Gently hold the plant at its base, invert the pot, and lightly tap it. The plant should slide out. Be careful not to harm the roots.
What depth should annual fleabane be planted at when transplanting?
Relocate annual fleabane at the same depth it was in its previous pot. This helps prevent stem rot or buried foliage issues.
Should I prune annual fleabane before transplanting?
It's not essential to prune annual fleabane before relocating, but removing some of the plant's upper growth can lessen stress and improve root establishment.
How much should annual fleabane be watered after transplanting?
After relocating, thoroughly water annual fleabane, then adjust to a regular watering schedule based on the plant's needs and weather conditions.
What to do if the leaves of annual fleabane turn yellow after transplanting?
Yellowing leaves after relocation can indicate water stress. Check root moisture levels, provide ample shade during the hottest part of the day, and adjust watering as needed.
Should I fertilize annual fleabane immediately after transplanting?
It's not typically necessary to fertilize annual fleabane immediately after relocating. You can wait a few weeks to allow the plant to acclimate to its new environment.



