How to Transplant Ladys paintbrush?
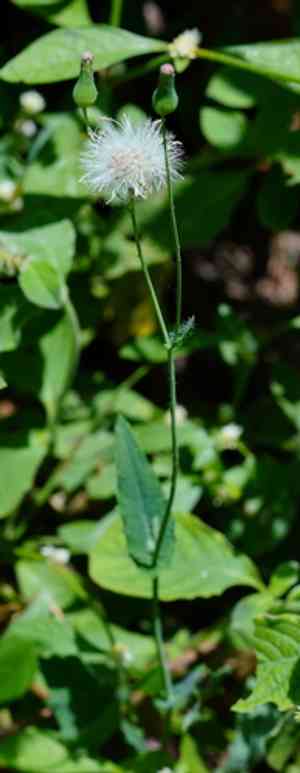
The ideal period to relocate ladys paintbrush is during the peak of spring, which facilitates a smooth establishment phase. Select a bright location featuring soil that drains effectively, and for plants that are somewhat sensitive, offer partial shade until their root systems are firmly established.
What Preparations are Needed Before Transplanting Ladys Paintbrush?
What is the Ideal Time for Transplanting Ladys Paintbrush?
The optimal period for relocating your ladys paintbrush spans from the core of spring to the onset of early summer. This timeframe offers a perfect mix of mild temperatures and extended daylight, creating an ideal environment for ladys paintbrush's development. Moving them during these months maximizes root establishment prior to the summer heat, ensuring your ladys paintbrush flourishes with vivid colors and robust vitality. Embrace this season for a successful relocation, capturing the essence of spring's rejuvenation in your garden.
How Much Space Should You Leave Between Ladys Paintbrush Plants?
For your beautiful ladys paintbrush, aim for a separation of approximately 6-12 inches (15-30 cm). This provides each plant sufficient room to thrive without crowding, ensuring they receive ample nutrients and air circulation.
What is the Best Soil Mix for Ladys Paintbrush Transplanting?
Prepare a comfortable bed by selecting well-draining soil rich in organic material. A gentle incorporation of compost into the soil works wonders. A balanced, slow-release fertilizer will supply a consistent flow of nutrients to your ladys paintbrush seedlings.
Where Should You Relocate Your Ladys Paintbrush?
Choose a location where your ladys paintbrush can absorb the sun, as they enjoy basking in full sunlight. A spot that receives at least 6 hours of direct sunlight daily will make your ladys paintbrush happiest and support vigorous growth.
What Equipments Should You Prepare Before Transplantation Ladys Paintbrush?
Gardening Gloves
To safeguard your hands while handling soil and plants.
Garden Trowel
For digging and moving the ladys paintbrush to its new spot.
Watering Can
To hydrate the ladys paintbrush before and after its relocation.
Gardening Fork
To assist in loosening the soil around the ladys paintbrush's roots during extraction.
Pruning Shears
To trim any damaged roots or foliage.
Garden Spade or Shovel
For excavating the transplant hole and helping lift the plant if necessary.
Garden Hose or Bucket
For supplying adequate water to the plant's new site.
Wheelbarrow or Plant Tray
To transport the ladys paintbrush to its new location without causing harm.
How Do You Remove Ladys Paintbrush from the Soil?
How Do You Remove Ladys Paintbrush from the Soil?
From Pot or Seedling Tray: Gently compress or tap the container's sides to loosen the soil and roots. Tilt the pot slightly and support the ladys paintbrush with one hand as you carefully slide the rootball out. If there's resistance, use a gardening fork to aid separation.From Ground: First, water the ladys paintbrush to moisten the soil. Then, use a gardening fork to carefully loosen the soil around the plant, ensuring to stay a few inches from the main stem to prevent root damage. Once the soil is loose, slide a trowel or spade beneath to lift the root ball from the ground.
Step-by-Step Guide for Transplanting Ladys Paintbrush
Preparation
Water the ladys paintbrush thoroughly before transplanting to ensure the soil is cohesive and the roots are hydrated.
Digging Hole
Use a garden spade to excavate a hole in the new location that is twice the width of the ladys paintbrush's root ball and of the same depth, to avoid planting the specimen too deep.
Root Pruning
Examine the ladys paintbrush's roots and use pruning shears to snip off any damaged or excessively long roots. This encourages healthy root development in the new spot.
Positioning
Place the ladys paintbrush in the center of the hole and adjust it so it sits at the same level it grew at previously. Fill in around the plant with the excavated soil, gently compacting it to eliminate large air pockets.
Watering
After planting, water the ladys paintbrush generously to settle the soil and provide moisture. Use a watering can or garden hose to gently saturate the area without causing erosion.
Support Installation
If the ladys paintbrush requires it, install stakes or supports around the plant to help it maintain an upright posture and shield it from strong winds.
How Do You Care For Ladys Paintbrush After Transplanting?
Regular Watering
Ensure the ladys paintbrush's soil remains consistently moist, watering deeply when the top inch of soil feels dry to the touch.
Mulching
Apply a layer of organic mulch around the base of the ladys paintbrush, avoiding direct contact with the stem, to help retain moisture and suppress weeds.
Staking
For tall varieties of ladys paintbrush, provide stakes or a trellis to support growth and prevent damage from wind or heavy rain.
Monitoring
Keep an eye out for indications of stress or disease. Yellowing leaves or wilting can signal that the ladys paintbrush needs more water or is experiencing shock.
Adjusting Care
Modify your care routine as the ladys paintbrush adapts to its new location, gradually reducing watering frequency as it establishes a strong root system.
Troubleshooting Common Issues with Ladys Paintbrush Transplantation.
Why is my ladys paintbrush's growth stunted after transplanting?
Ensure your ladys paintbrush isn't planted too deeply. The root crown should be just at soil level. Also, avoid compacting the soil around the plant, as this can hinder root expansion.
What's the best time to transplant ladys paintbrush for optimal growth?
Transplant ladys paintbrush during mid to late spring, when conditions favor root establishment without the harsh summer heat.
How far apart should I space my ladys paintbrush when transplanting?
Space your ladys paintbrush about 6-12 inches (15-30 cm) apart. This allows adequate airflow and growth room.
How much should I water ladys paintbrush after transplanting?
Water thoroughly after transplanting to settle the soil around the roots, then maintain consistent moisture without overwatering.
What kind of light conditions does ladys paintbrush need after transplanting?
Place ladys paintbrush in a spot where it will receive full sun to partial shade for best growth post-transplant.
Why are the leaves of ladys paintbrush wilting after transplanting?
Wilting after transplanting might indicate water stress. Make sure to keep the soil moist, especially in the first few weeks after moving ladys paintbrush.
Is there a specific soil type that ladys paintbrush prefers?
Opt for well-draining soil with ample organic matter to provide a nurturing environment for ladys paintbrush post-transplant.
What should I do if my ladys paintbrush isn't thriving in its new location?
Check for proper sunlight, soil conditions, and water availability. Adjust care as necessary, or consider a more suitable transplant site.
Can ladys paintbrush be transplanted on a cloudy day?
Transplanting ladys paintbrush on a cloudy day can reduce transplant shock, as the plant will be less stressed by the sun.
How do I protect ladys paintbrush after transplanting?
Provide a layer of mulch around ladys paintbrush to retain moisture and regulate soil temperature, aiding recovery post-transplant.



