How to Transplant Shortpod draba?
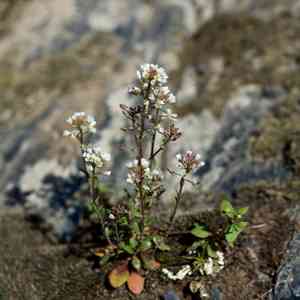
The most suitable period for relocating shortpod draba is during the initial to concluding stages of spring, guaranteeing its prosperity in bright, adequately drained environments. This timeframe offers perfect circumstances for its rooting and development.
What Preparations are Needed Before Transplanting Shortpod Draba?
What is the Ideal Time for Transplanting Shortpod Draba?
The best time to move shortpod draba is from the beginning to the end of spring. This period allows the annual to settle in mild conditions, promoting optimal growth. Transplanting shortpod draba then maximizes its chances for a successful life cycle and abundant blooms before summer's heat.
How Much Space Should You Leave Between Shortpod Draba Plants?
For shortpod draba, position your plants 6-12 inches (15-30 cm) apart. This spacing ensures adequate room for growth and prevents overcrowding.
What is the Best Soil Mix for Shortpod Draba Transplanting?
For shortpod draba, utilize well-draining, sandy or rocky soil. Prior to transplanting, incorporate a balanced base fertilizer to support robust development.
Where Should You Relocate Your Shortpod Draba?
Place shortpod draba in a location that receives full sun, as it requires ample light to thrive. Aim for at least 6 hours of direct sunlight daily.
What Equipments Should You Prepare Before Transplantation Shortpod Draba?
Gardening Gloves
To safeguard your hands while handling soil and plants.
Hand Trowel
For excavating the plant and preparing the new planting site.
Shovel or Spade
To lift the plant from its current spot or container and dig a new hole.
Watering Can
For hydrating the plant before and after its relocation.
Wheelbarrow (optional)
To move the plant if it's large or to transport soil.
Mulch
To aid in moisture retention and protect the soil post-transplant.
How Do You Remove Shortpod Draba from the Soil?
How Do You Remove Shortpod Draba from the Soil?
From Ground: First, moisten the shortpod draba plant's soil. Then, dig a wide trench around the plant using a shovel or spade, ensuring the root ball remains intact. Carefully work the spade beneath the root ball to lift the plant from its original spot.From Pot: Ensure the soil is slightly damp. Gently invert the pot, supporting the plant with your other hand. Tap the pot's base to loosen the plant and slide it out, making sure to support the root ball.From Seedling Tray: Water the seedlings to facilitate removal. Use a hand trowel or your fingers to gently lift and separate each seedling, keeping as much of the root ball intact as possible.
Step-by-Step Guide for Transplanting Shortpod Draba
Prepare New Site
Dig a hole at the new location that is twice as wide and equally deep as the shortpod draba plant's root ball. This will allow roots to spread easily.
Transfer the Plant
Position the shortpod draba plant into the hole, ensuring the top of the root ball is level with the surrounding soil. Backfill around the plant with soil, pressing gently to eliminate air pockets.
Watering
Water the shortpod draba plant immediately after transplanting to help settle the soil around its roots. Ensure thorough watering to reach deep into the root zone.
Mulching
Apply a layer of mulch around the plant's base to retain moisture and suppress weeds. Keep the mulch a few inches away from the plant's stem.
How Do You Care For Shortpod Draba After Transplanting?
Monitoring
Regularly inspect the shortpod draba plant for signs of transplant shock, such as wilting or yellowing leaves. Address any issues promptly.
Watering
Maintain consistently moist, but not waterlogged, soil around the shortpod draba for the initial weeks post-transplant to encourage strong root establishment.
Protection
Shield the newly transplanted shortpod draba from harsh weather, pests, and animals. Consider using a temporary barrier or cover if needed.
Pruning
If necessary, trim any damaged or dead leaves to promote healthy new growth.
Troubleshooting Common Issues with Shortpod Draba Transplantation.
When is the best time to transplant shortpod draba?
The ideal period to transplant shortpod draba is from early spring to late spring.
How far apart should I space shortpod draba plants?
Space shortpod draba plants 6-12 inches (15-30 cm) apart for proper growth and development.
What type of soil is best for transplanting shortpod draba?
Shortpod draba thrives in well-draining, sandy or loamy soil for optimal results.
How should I prepare the soil before transplanting shortpod draba?
Loosen the soil and incorporate compost to enrich it for shortpod draba plants.
What is the ideal temperature for transplanting shortpod draba?
Transplant shortpod draba when temperatures are consistently between 50-70°F (10-21°C).
How do I ensure shortpod draba transplants successfully?
Water thoroughly after transplanting and avoid disturbing the roots.
How much water does shortpod draba need after transplanting?
Keep the soil consistently moist but not waterlogged for the first few weeks.
Should I fertilize shortpod draba after transplanting?
Use a balanced, all-purpose fertilizer a few weeks after transplanting shortpod draba.
What are common pests that affect shortpod draba when transplanting?
Watch out for aphids and flea beetles; use organic pest control if needed.
Can shortpod draba be transplanted in the fall?
Itâs best to transplant shortpod draba in early to late spring for optimal growth.



