How to Transplant Water purslane?
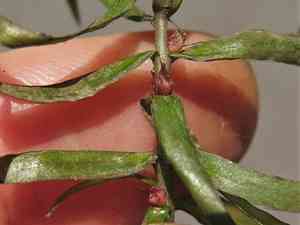
Water purslane, a adaptable annual/perennial, flourishes when relocated during the balmy period of late spring. It prefers bright or partially shaded spots with damp earth. Ensure careful handling to lessen root disruption for the best possible growth.
Essential Preparations Before Relocating Water Purslane
Optimal Timing for Water Purslane Relocation?
The prime window for moving water purslane spans from mid-spring through its conclusion. This period offers the increasing warmth and sunlight vital for vigorous development. Transplanting water purslane at this time promotes strong root establishment and vitality, capitalizing on the natural growth surge of the season, ensuring a flourishing and well-adapted plant.
Recommended Spacing Between Water Purslane Plants?
When relocating water purslane, ensure a separation of 6-8 inches (15-20 cm) between each plant. This spacing provides ample room for individual growth and prevents overcrowding.
Ideal Soil Blend for Water Purslane Relocation?
For water purslane, opt for loamy or sandy soil with efficient drainage. Prior to transplanting, enrich the soil with a foundational fertilizer, such as balanced compost or a slow-release, all-purpose feed, to support healthy growth.
Optimal Location for Your Water Purslane?
Water purslane thrives best in areas receiving full sun to partial shade. Aim for a spot that gets at least 4-6 hours of daily sunlight to ensure healthy development.
Equipment Needed Before Relocating Water Purslane
Gardening Gloves
To safeguard your hands while handling soil and plants.
Hand Trowel
For digging and loosening soil around the plant for easy removal.
Shovel or Spade
Used for creating planting holes or extracting plants from the ground.
Watering Can or Hose
To maintain soil moisture throughout the relocation process.
Wheelbarrow or Container
For moving the plant if the new site is distant from its original spot.
Pruners or Scissors
To trim any damaged roots or foliage.
Mulch
To aid in moisture retention and encourage root establishment post-transplant.
How to Extract Water Purslane from the Soil?
How to Extract Water Purslane from the Soil?
From Ground: First, moisten the water purslane plant to damp the soil. Next, excavate a wide trench around the plant using a shovel or spade, ensuring the plant's root ball remains intact. Carefully work the spade beneath the root ball to lift the plant from its original position.From Pot: Thoroughly water the water purslane plant. Gently tilt the pot sideways and carefully slide the plant out, supporting the root ball with your hand. If the plant is root-bound, gently loosen the roots with your fingers.From Seedling Tray: Water the seedlings well before removal. Use a hand trowel or your fingers to gently lift the seedlings out, taking care to keep the roots undamaged. Handle by the leaves rather than the stem to prevent harm.
Step-by-Step Guide for Relocating Water Purslane
Prepare the Planting Site
Before extracting your water purslane, prepare its new home. Dig a hole slightly larger than the plant's root ball to allow ample room for root expansion.
Remove the Plant
Follow the appropriate method to carefully extract your water purslane from its initial location.
Position the Plant
Place the water purslane into the new hole at the same depth it was previously growing. The top of the root ball should be level with or just below the ground surface.
Backfill and Firm the Soil
Refill the hole with soil, gently firming it around the plant to eliminate air pockets. Ensure the plant is stable and upright.
Water Thoroughly
Water the water purslane thoroughly to help settle the soil around its roots. A slow, deep watering is ideal after relocation.
Post-Transplant Care for Water Purslane
Watering
Keep the soil around the water purslane consistently moist, but not waterlogged, for the initial weeks after transplanting to promote strong root development.
Mulching
Apply a layer of mulch around the base of the water purslane to help retain soil moisture and regulate temperature. This also aids in weed suppression.
Monitoring
Observe your water purslane for signs of stress, such as wilting or yellowing leaves. Provide additional water if necessary and shield from strong winds or pests.
Resolving Common Issues with Water Purslane Relocation.
When is the best time to transplant water purslane?
Relocating water purslane is best from mid-spring to late spring for optimal growth.
How much space should be between each water purslane?
Ensure each water purslane is spaced 6-8 inches (15-20 cm) apart for healthy growth.
How do I prepare the soil for water purslane?
Use well-draining, nutrient-rich soil, and loosen it to about 6 inches (15 cm) deep.
What should I do if water purslane looks wilted after transplanting?
Water it thoroughly and provide partial shade until it recovers.
Why are the leaves of water purslane turning yellow?
Yellow leaves may indicate overwatering or poor drainage; adjust watering habits accordingly.
How deep should I plant water purslane?
Plant water purslane at the same depth it was growing in its original container.
How can I protect water purslane from transplant shock?
Water the plants well before and after transplanting and avoid disturbing the roots.
What is the ideal light condition for water purslane post-transplant?
Place water purslane in a location with bright, indirect light to help it establish.
Can I transplant water purslane on a windy day?
Avoid transplanting on windy days as it can stress the plants and dry out the soil.
How often should I water water purslane after transplanting?
Water water purslane regularly, keeping the soil consistently moist but not waterlogged, especially during the first few weeks.



