How to Transplant Lowland bladder fern?
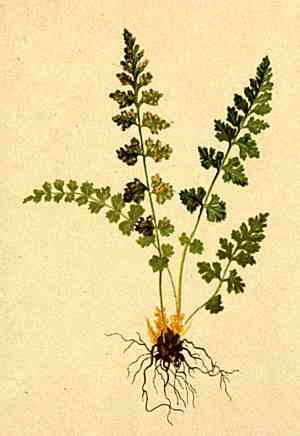
The ideal period for relocating lowland bladder fern is when winter's cold recedes, generally from the onset of early spring through the beginning of summer's heat. Select a shaded location with damp earth to foster vigorous development after transplantation.
Necessary Preparations Before Relocating Lowland Bladder Fern?
Optimal Period for Relocating Lowland Bladder Fern?
The ideal window for relocating lowland bladder fern spans from early spring to its peak. During this time, moderate temperatures and increasing daylight foster robust root growth, enabling lowland bladder fern to establish itself effectively before the rigors of summer heat. By transplanting in this favorable season, you provide lowland bladder fern with the gentle start it needs for thriving development and resilience, ensuring a lush, healthy fern.
Recommended Spacing Between Lowland Bladder Fern Plants?
When preparing to introduce your lowland bladder fern to its new spot, remember they prefer close proximity! Aim for a snug spacing of less than 12 inches (30 cm) apart so they can flourish in friendly company.
Best Soil Mixture for Lowland Bladder Fern Relocation?
Before your lowland bladder fern can establish roots, prepare a site with rich, well-draining soil. Incorporate some compost as an initial fertilizer to provide a nourishing welcome to their new home.
Where to Replant Your Lowland Bladder Fern?
Locate a pleasant spot for your lowland bladder fern where sunlight is gentle. Filtered or partial shade will make them happiest, mimicking their natural woodland habitat. Avoid the intensity of direct, afternoon sun.
Equipment Needed Before Relocating Lowland Bladder Fern?
Gardening Gloves
To safeguard your hands while handling soil and plants.
Shovel or Spade
For excavating around and beneath the plant to extract it with its root ball intact.
Watering Can or Hose
To hydrate the plant before and after relocation to reduce stress and aid establishment.
Pruners or Sharp Knife
To trim any damaged roots or foliage prior to transplanting.
Wheelbarrow or Plant Cart
To move the plant from its original spot to the new planting site without causing harm.
Root Stimulator
A product designed to encourage root development in the relocated lowland bladder fern.
Mulch
To help maintain soil moisture and regulate temperature around the newly planted area.
How to Extract Lowland Bladder Fern from the Soil?
How to Extract Lowland Bladder Fern from the Soil?
From Ground: First, water the lowland bladder fern plant to moisten the soil, making it easier to manage. Use a shovel or spade to dig a trench around the plant, at least 6 inches from the base to prevent damage to the root system. Gently work the tool under the plant to loosen the root ball, then carefully lift the plant from its position.From Pot: Water the lowland bladder fern to dampen the soil and make the roots more flexible. Turn the pot on its side and tap the bottom to dislodge the root ball. If the plant doesn't come out easily, gently slide a knife between the pot and the root ball to help ease it out.From Seedling Tray: Water the seedlings gently to avoid disturbing the delicate roots. Use a spoon or similar utensil to carefully scoop out individual lowland bladder fern plants, ensuring a cluster of soil remains around the roots for protection.
Step-by-Step Guide for Relocating Lowland Bladder Fern
Prepare the New Location
Identify the spot in the ground where the lowland bladder fern will be replanted. Ensure the hole is pre-dug to prevent prolonged root exposure. The hole should be twice as wide and the same depth as the root ball.
Root Preparation
Examine the root ball of the lowland bladder fern, removing any damaged or dead roots with pruners or a knife. If the roots are very dense or pot-bound, gently separate them without causing excessive damage.
Positioning the Plant
Place lowland bladder fern in the center of the hole so it sits at the same level it occupied in its previous location. The transition should be smooth, without burying the plant too deeply or leaving roots exposed.
Fill the Hole
Backfill the hole with soil, firming it around the roots of lowland bladder fern to eliminate air pockets. Water the plant thoroughly at this stage to settle the soil and provide moisture.
Adding Mulch
Spread a layer of mulch around the base of the lowland bladder fern to help retain soil moisture and temperature, but keep it from directly touching the plant's base to prevent rot.
How to Care For Lowland Bladder Fern After Relocation?
Watering Frequency
For the initial weeks after relocating the lowland bladder fern, ensure consistent watering to keep the soil uniformly moist to a depth of several inches. This aids the plant's recovery and establishment.
Pruning
Trim any damaged or yellowing foliage to redirect the lowland bladder fern's energy towards developing new growth.
Monitoring for Stress
Observe the lowland bladder fern for indications of transplant shock, such as wilting or discolored leaves. Provide shade and increased humidity if the plant appears stressed.
Root Stimulator Application
Consider applying a root stimulator according to product directions to encourage lowland bladder fern's root development in its new environment.
Addressing Common Issues with Lowland Bladder Fern Relocation.
What's the optimal time to relocate lowland bladder fern for successful growth?
The best period for relocating lowland bladder fern is from the beginning of spring to its final weeks.
How much space should I allow between lowland bladder fern when relocating?
Plant lowland bladder fern with close spacing, not exceeding 12 inches (30 cm) apart, to encourage cohesive growth.
Why is my relocated lowland bladder fern wilting after transplant?
Wilting may be due to shock. Ensure careful handling, adequate watering, and protection from intense sun post-transplant.
What soil type is ideal for relocating lowland bladder fern?
A loamy, well-draining soil rich in organic matter is best for lowland bladder fern, promoting strong root development.
How can I tell if lowland bladder fern is ready for relocation?
Signs lowland bladder fern is prepared include vigorous growth, an active root system, and mild weather conditions.
Should I fertilize lowland bladder fern immediately after relocating?
Avoid immediate fertilization. Allow lowland bladder fern to establish for several weeks, then use a balanced, mild fertilizer.
How much should I water lowland bladder fern after relocating?
Water thoroughly after relocating and maintain consistently moist soil without waterlogging for the initial few weeks.
How deep should I plant lowland bladder fern during relocation?
The root ball of lowland bladder fern should sit level with the soil surface, ensuring roots are neither too shallow nor too deep.
Can lowland bladder fern tolerate sun immediately after relocating?
Provide lowland bladder fern with filtered sunlight or partial shade initially to prevent stress from direct sun exposure.
What should I do if lowland bladder fern's leaves turn yellow after relocating?
Yellowing might indicate stress or over-watering. Ensure proper soil moisture and consider a location with sufficient light.



