How to Transplant Shortleaf Spikesedge?
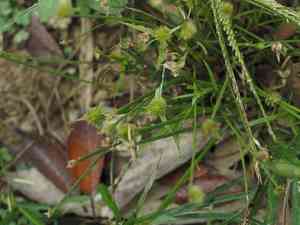
The most favorable period for relocating shortleaf Spikesedge is from early to mid-spring, fostering vigorous development. Select a location that receives abundant sunlight and possesses soil with good drainage. Should it be necessary, amend the soil with organic material to facilitate a seamless adjustment.
What Preparations are Needed Before Transplanting Shortleaf Spikesedge?
What is the Ideal Time for Transplanting Shortleaf Spikesedge?
Transplanting shortleaf Spikesedge is most successful when performed as late spring's warmth arrives or mid-spring is well underway. This period leverages moderate temperatures and stable weather, promoting strong root development. By transplanting then, shortleaf Spikesedge gains a head start on the growing season, crucial for a perennial's successful establishment and vigor. With consistent seasonal moisture, shortleaf Spikesedge can easily adapt to its new location with less stress, leading to lush growth and resilience.
How Much Space Should You Leave Between Shortleaf Spikesedge Plants?
Start by positioning shortleaf Spikesedge approximately 1-2 feet (30-60 cm) apart. This spacing allows ample room for growth without overcrowding. Remember, they require space for their roots to expand, just as we need room to stretch!
What is the Best Soil Mix for Shortleaf Spikesedge Transplanting?
For shortleaf Spikesedge, you need soil that drains well and is enriched with organic matter. A good foundation could be a compost-based fertilizer. It helps maintain moisture levels and provides a steady supply of nutrients. It's beneficial for your plant!
Where Should You Relocate Your Shortleaf Spikesedge?
Shortleaf Spikesedge thrives with abundant sunlight, so seek out a location that receives at least 6 hours of direct sun daily. However, it can also tolerate some partial shade. Keep in mind, more sun generally leads to happier shortleaf Spikesedge blooming at your home!
What Equipments Should You Prepare Before Transplantation Shortleaf Spikesedge?
Gardening Gloves
To safeguard your hands from irritation or injury caused by soil or plants, and to keep them clean.
Garden Spade
To excavate the new planting hole in the ground and to lift your shortleaf Spikesedge plant from its current spot.
Pruning Shears
To trim any dead or damaged roots from the shortleaf Spikesedge plant prior to transplanting.
Trowel
To precisely adjust the size and shape of the planting hole, ensuring it has the correct depth and width for your shortleaf Spikesedge plant.
Gardening Fork
To gently loosen the soil within and around the planting hole, which aids the roots of the shortleaf Spikesedge plant in spreading and growing after transplantation.
Watering Can
To hydrate your plant before and after transplanting, which assists the roots in establishing themselves in their new environment.
Wheelbarrow
To effortlessly move the shortleaf Spikesedge plant from its original position to its new spot.
How Do You Remove Shortleaf Spikesedge from the Soil?
How Do You Remove Shortleaf Spikesedge from the Soil?
From Ground: To loosen the soil, water the shortleaf Spikesedge plant. Then, using your garden spade, dig a generous trench around the plant, ensuring the root ball remains intact. Carefully work the spade beneath the root ball to extract the plant from the ground.From Pot: Begin by watering the pot to make the root ball and surrounding soil moist and easier to manage. Invert the pot while gently supporting the shortleaf Spikesedge plant at the base of its stem â the plant should slide out with its root ball and attached soil. If it's stuck, tap the sides and bottom of the pot to loosen it.From Seedling Tray: Moisten the tray's soil to facilitate the extraction of shortleaf Spikesedge seedlings. Push up from the bottom of the seedling cell or use a spoon or similar tool to carefully lift the seedlings out, making sure to hold them by their leaves, not their delicate stems.
Step-by-Step Guide for Transplanting Shortleaf Spikesedge
Identify Planting Location
Ensure the chosen garden spot meets all specific requirements for your shortleaf Spikesedge plant.
Prepare the New Hole
Using your garden spade and trowel, dig a hole at the selected location that is sufficiently wide and deep to accommodate the root ball of your shortleaf Spikesedge plant.
Prepare the Plant
Before placing your shortleaf Spikesedge plant into the hole, trim away any roots that are dead or damaged.
Plant
Carefully position your shortleaf Spikesedge plant in the prepared hole. Ensure the top of the root ball is level with the ground surface, then backfill the hole with soil, gently pressing it down around the root ball.
Water
After transplanting, water the shortleaf Spikesedge generously, but be careful not to overwater. This will help the soil settle around the plant's base.
How Do You Care For Shortleaf Spikesedge After Transplanting?
Immediate Aftercare
Apply another round of water to the newly-planted shortleaf Spikesedge a few hours after transplanting if the soil appears to require additional moisture.
Monitoring Growth
Observe the growth of the shortleaf Spikesedge. It should soon exhibit signs of new growth, indicating successful adaptation to its new location.
Pruning
You might need to perform some light pruning on the above-ground growth in the weeks following transplantation. This helps the shortleaf Spikesedge direct its energy towards establishing its root system in its new location rather than maintaining unnecessary foliage.
Staking
Depending on the size and stability of the shortleaf Spikesedge, you may wish to stake it to provide support as it establishes itself. Be sure to tie the plant loosely to the stake to prevent any harm.
Seasonal Care
Different seasons necessitate varied care routines. Ensure you adjust your watering, fertilizing, and pruning schedules as needed for the shortleaf Spikesedge's first year in its new location.
Troubleshooting Common Issues with Shortleaf Spikesedge Transplantation.
When is the best time to transplant shortleaf Spikesedge?
The optimal period to transplant shortleaf Spikesedge is during its second or third growth season for best results.
How much space should I leave between each shortleaf Spikesedge plant?
A spacing of approximately 1-2 feet (30-60 cm) between each shortleaf Spikesedge plant is advised. This allows for proper development and prevents overcrowding.
What should be the condition of the soil for transplanting shortleaf Spikesedge?
Shortleaf Spikesedge prefers soil that drains well. Ensure it is fertile and free of weeds. It's also beneficial to enrich the soil with compost before transplantation.
Do I need to prune shortleaf Spikesedge before transplanting?
Yes, you should trim off any damaged or diseased parts of the shortleaf Spikesedge plant before transplantation. Remember to only prune essential sections, avoiding excessive removal.
How should I water shortleaf Spikesedge after transplantation?
After transplantation, water shortleaf Spikesedge thoroughly. Subsequently, keep the soil slightly moist, but avoid waterlogging. Overwatering can lead to root rot.
What's the ideal depth for the transplantation hole?
For shortleaf Spikesedge, the hole should ideally be twice the width of the root ball and equally deep. This ensures ample space for root expansion.
How do I handle transplantation shock in shortleaf Spikesedge?
After transplanting, shortleaf Spikesedge may experience shock. Water consistently, provide shade, and potentially use a root stimulant to aid recovery.
What type of light conditions do shortleaf Spikesedge need after transplantation?
Shortleaf Spikesedge thrives in full sun to partial shade. Ensure your transplanted shortleaf Spikesedge receives at least 4-6 hours of sunlight daily for healthy growth.
My transplanted shortleaf Spikesedge is wilting, what should I do?
Wilting often indicates either over or under watering. Regularly check the soil moisture levels. Adjust the watering schedule based on the season and weather.
Can shortleaf Spikesedge be transplanted in a pot?
Yes, shortleaf Spikesedge can be successfully transplanted into pots. Ensure good drainage and use pots large enough for shortleaf Spikesedge's mature size.



