How to Transplant Pencil cholla?
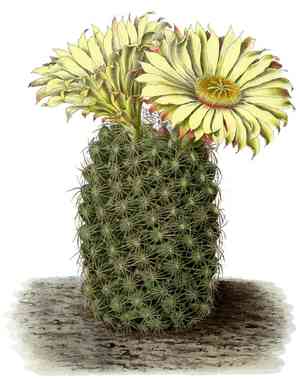
The most favorable period for relocating pencil cholla is when the environment consistently offers warmth, typically spanning from the close of spring to the middle of summer. This timeframe guarantees pencil cholla establishes firmly in bright, well-drained spots, leveraging the season's robust development stage.
Essential Preparations Before Relocating Pencil Cholla?
Optimal Period for Moving Pencil Cholla?
The most favorable time for relocating pencil cholla is from late May through June, when temperatures are consistently warm. This warmth encourages robust root development, ensuring a successful move. Transplanting when the soil is warm and gentle breezes are present helps the plant adapt to its new environment, promoting better root establishment and overall hardiness. Proper timing is vital for pencil cholla's post-transplant success, utilizing the season's stable climate for optimal adjustment.
Recommended Spacing Between Pencil Cholla Plants?
When transplanting pencil cholla, allow ample room for future growth. Aim for a distance of 36-60 inches (91-152 cm) between individual plants. This spacing ensures each pencil cholla has sufficient area to mature and expand.
Ideal Soil Mixture for Pencil Cholla Transplanting?
Prepare a soil blend that drains effectively, as pencil cholla flourishes in gritty, sandy substrates. Before planting, incorporate a cactus-specific or low-nitrogen fertilizer into the soil to provide your pencil cholla with a healthy start without over-fertilizing.
Optimal Location for Your Pencil Cholla?
Choose a site that receives abundant sunlight for your pencil cholla. These plants thrive in locations offering at least 6 hours of direct sun daily. The more sun exposure, the more content your pencil cholla will be!
Tools Required Before Transplanting Pencil Cholla?
Garden Spade
For digging around and beneath the pencil cholla to ensure safe extraction.
Trowel
Useful for more precise digging tasks and assisting in lifting smaller plants.
Pruning Shears
To trim any damaged roots or overgrown stems prior to transplanting.
Gardening Gloves
To safeguard your hands while handling soil and the plant.
Watering Can or Hose
For hydrating the pencil cholla both before and after its relocation.
Wheelbarrow or Garden Cart
To move the pencil cholla from its original spot to the new planting location.
Measuring Tape
To accurately determine the correct spacing for transplanting.
Burlap or Tarp
To transport the plant's root ball without losing soil.
Soil Amendment
Such as compost or sand, to blend with the existing soil if needed.
How to Extract Pencil Cholla from the Soil?
How to Extract Pencil Cholla from the Soil?
From Ground: Thoroughly water the pencil cholla to moisten the soil, making it easier to work with. Carefully dig a circular trench around the plant, leaving a generous margin to protect the root system. Gently loosen the soil beneath the plant using a spade or fork, then steadily lift the pencil cholla by its base.From Pot: Water the pencil cholla and gently tap the pot's sides to loosen the soil. Tilt the pot and carefully ease the plant out by its base. Support the root ball to prevent it from breaking apart.From Seedling Tray: If the pencil cholla is a seedling, carefully slide a trowel or spoon under the root ball. Lift with care, supporting the soil and roots, striving to avoid disturbing the root structure.
Step-by-Step Guide for Relocating Pencil Cholla
Prepare the New Location
Begin by digging a hole at the chosen site that is twice the width of the root ball and of equal depth. Loosen the soil at the bottom of the hole.
Root Examination
Take a moment to inspect the pencil cholla's roots. Trim any broken or dead roots to encourage healthy development.
Positioning
Place the pencil cholla in the center of the hole, ensuring it is neither too deep nor too shallow compared to the surrounding ground level.
Refill the Hole
Carefully backfill the hole with the soil you previously removed, or with a mixture of soil and compost. Gently firm the soil around the base to eliminate air pockets.
Watering the pencil cholla
After planting, water the pencil cholla generously to settle the soil and hydrate the roots. Ensure proper drainage and prevent water from accumulating.
Stabilize
If necessary, provide support with stakes or pebbles around the pencil cholla to prevent it from leaning.
Post-Transplant Care for Pencil Cholla?
Consistent Watering
Maintain a regular watering schedule to keep the soil slightly moist, but be careful not to overwater.
Mulching
Apply a layer of mulch around the plant's base to help retain soil moisture and regulate temperature.
Observation
Monitor the pencil cholla for any signs of stress, such as leaf drop or wilting, which may indicate a need for adjustments.
Protection
Provide some shade or wind protection if required during the initial weeks following transplanting.
Fertilizing
Wait a few weeks before applying any fertilizer to allow the pencil cholla time to establish itself in its new spot.
Addressing Common Issues with Pencil Cholla Transplantation.
When is the best time to transplant pencil cholla for optimal growth?
The ideal transplanting period for pencil cholla is from late spring to mid-summer when it is actively growing.
How can I determine if pencil cholla is ready for transplanting?
Examine the root system; if the roots are dense but healthy, it's a good time to transplant pencil cholla.
What spacing should I use when transplanting pencil cholla?
Space pencil cholla approximately 36-60 inches (91-152 cm) apart to allow ample room for growth and spread.
Why is my transplanted pencil cholla wilting?
Pencil cholla may be experiencing transplant shock. Ensure adequate watering and initially avoid direct sunlight.
Can pencil cholla be transplanted during other seasons?
It's best to adhere to the recommended period for better resilience and root establishment; late spring to mid-summer.
What soil conditions are preferred for transplanting pencil cholla?
Pencil cholla thrives in well-drained soil; amend with sand or grit if necessary to prevent waterlogging.
How much sunlight does pencil cholla need after transplanting?
After transplanting, pencil cholla requires full sun exposure to flourish. Gradually introduce it to direct sunlight if it was initially shaded.
What is the recommended watering schedule for pencil cholla post-transplant?
Water pencil cholla just enough to moisten the soil, approximately once a week, allowing the soil to dry out between waterings.
How deep should the planting hole be for pencil cholla?
Dig a hole slightly larger than the root ball, with a depth that matches its original growing conditions.
Is fertilization necessary after transplanting pencil cholla?
Fertilization is not immediately required post-transplant. Wait until pencil cholla is established and shows active growth before considering a mild, balanced feed.



