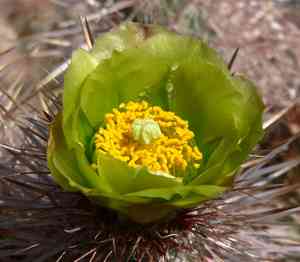
How to Transplant Wiggins' cholla?
The peak of the warm season, often called summer, is ideal for transplanting wiggins' cholla, leveraging its robust development. Optimal placement requires locations that receive ample sunlight and drain effectively. A friendly reminder: reduce root disruption to guarantee a smooth acclimation.
What Preparations are Needed Before Transplanting Wiggins' Cholla?
What is the Ideal Time for Transplanting Wiggins' Cholla?
The optimal period for relocating wiggins' cholla is just prior to its active growth phase, typically in late spring. This season offers a balance of warm soil and moderate temperatures, fostering effective root establishment without the stress of intense summer heat. Moving wiggins' cholla at this time capitalizes on its natural growth cycle, boosting root development. This prepares wiggins' cholla for a successful and robust emergence in summer, ensuring a healthier and more resilient plant. Embrace this window for transplanting to witness your wiggins' cholla truly flourish in its new spot!
How Much Space Should You Leave Between Wiggins' Cholla Plants?
When relocating wiggins' cholla, ensure each plant has approximately 5-6 feet (1.5-1.8 meters) of space. This allows each specimen to develop freely without competing for essential resources.
What is the Best Soil Mix for Wiggins' Cholla Transplanting?
Select soil that drains well, as wiggins' cholla dislikes 'wet feet'. Before planting, incorporate a foundational fertilizer such as compost or aged manure to enrich the soil and supply necessary nutrients to your plant.
Where Should You Relocate Your Wiggins' Cholla?
The new location for wiggins' cholla should receive full daily sunlight, as these are sun-loving plants. Confirm your chosen spot gets at least 6-8 hours of direct sun each day.
What Equipments Should You Prepare Before Transplantation Wiggins' Cholla?
Gardening Gloves
To safeguard your hands from the sharp spines of the wiggins' cholla.
Shovel or Spade
For excavating the soil to remove and replant the wiggins' cholla.
Garden Trowel
To manage smaller soil volumes and delicate root handling.
Watering Can
To hydrate the wiggins' cholla before and after its relocation.
Wheelbarrow or Container
To cleanly and efficiently transport the wiggins' cholla from one place to another.
How Do You Remove Wiggins' Cholla from the Soil?
How Do You Remove Wiggins' Cholla from the Soil?
From Ground: Thoroughly water the wiggins' cholla to moisten the surrounding soil. Proceed by digging around the cactus base with a shovel or spade, ensuring the root ball remains intact. Carefully lift the cactus from the ground using gloved hands or a folded newspaper, taking care to avoid injury from its spines.From Pot: Water the wiggins' cholla extensively while it's in the pot. Lay the pot on its side, then gently tap the rim to loosen the soil. Finally, place your fingers carefully around the base of the wiggins' cholla and slide it out of the pot.From Seedling Tray: Use your garden trowel to delicately scoop out the wiggins' cholla seedling, making sure the roots are undamaged and intact.
Step-by-Step Guide for Transplanting Wiggins' Cholla
Preparation
Ensure the new planting area is well-watered. Prepare a hole for the wiggins' cholla that is twice as wide and the same depth as its root ball.
Placement
Carefully position the wiggins' cholla into the hole. Adjust the cactus within the hole so it stands upright.
Soil Backfill
Refill the hole with the original soil, and use your hands to gently firm the soil around the base of the wiggins' cholla.
Water
Water the wiggins' cholla generously after planting, re-wetting the soil without making it soggy.
How Do You Care For Wiggins' Cholla After Transplanting?
Light
Following the transplanting process, place wiggins' cholla in partial shade for a few days, then gradually move it to a sunnier spot to prevent sunburn.
Watering
Once wiggins' cholla is firmly established, allow the soil to dry out between waterings. Never let wiggins' cholla sit in waterlogged soil.
Protection
Utilize a fabric cover to shield wiggins' cholla from freezing temperatures or strong winds. Remember to remove the cover when weather conditions are favorable.
Troubleshooting Common Issues with Wiggins' Cholla Transplantation.
What's the ideal season to transplant wiggins' cholla?
The optimal season for transplanting wiggins' cholla falls between the fourth and sixth seasonal periods. This provides an excellent environment for root establishment.
How far apart should I space wiggins' cholla when transplanting?
Each wiggins' cholla should be spaced approximately 5-6 feet (1.5-1.8 meters) apart. This guarantees ample room for growth and minimizes resource competition.
What is the correct soil type for transplanting wiggins' cholla?
Wiggins' cholla thrives best in well-draining soil. Preferably sandy or rocky soil that does not retain excess water, as this could lead to root rot.
How deep should I dig the hole when transplanting wiggins' cholla?
When transplanting wiggins' cholla, excavate a hole that is roughly 2 feet (60 cm) deep. This ensures the roots are securely anchored and have space to expand.
Should I water wiggins' cholla immediately after transplanting?
Yes, provide wiggins' cholla with a thorough watering right after transplanting. This helps settle the soil. However, be cautious, as excessive watering can cause root rot.
What care is needed after transplanting wiggins' cholla?
After transplanting wiggins' cholla, ensure it receives indirect sunlight and infrequent watering. Closely monitor the plant for any indications of stress or disease.
How big should wiggins' cholla be before it's ready to transplant?
Wiggins' cholla should be around 6-10 inches (15-25 cm) tall before transplanting. Smaller plants may struggle to establish and are more susceptible to pests.
What should I do if wiggins' cholla looks unhealthy after transplanting?
If wiggins' cholla appears unhealthy, it might be due to overwatering or sunburn. Adjust your watering schedule and move the plant to a location with indirect sunlight.
Can I transplant wiggins' cholla in a container?
Absolutely! Ensure the container has adequate drainage to prevent excess moisture. Wiggins' cholla grow quite large, so select a spacious pot.
Should I fertilize wiggins' cholla immediately after transplanting?
Avoid fertilizing wiggins' cholla right after transplanting; it could overwhelm the plant. Wait a few weeks until the plant has acclimated to its new environment.


