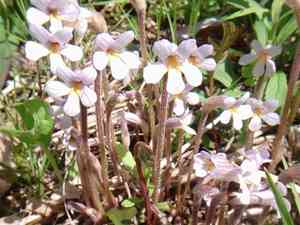
How to Transplant Pennell's bird's beak?
Pennell's bird's beak flourishes when relocated during the lively period of early to mid-spring, facilitating prime root development. Select a bright area with soil that drains effectively. Limiting disruption during the transfer will aid the plant's success in its new environment.
Essential Preparations Before Relocating Pennell's Bird's Beak
Optimal Period for Relocating Pennell's Bird's Beak?
The best time to move pennell's bird's beak, an annual, is from early to mid-spring. This timeframe provides cooler temperatures and increased moisture, which aids root establishment. Moving it then encourages robust growth and resilience against summer heat. Correct timing ensures a strong start and maximizes its growth potential.
Recommended Spacing Between Pennell's Bird's Beak Plants?
When relocating pennell's bird's beak, ensure a distance of 9-12 inches (23-30 cm) between plants. This spacing supports healthy development by providing ample room for root expansion and air circulation.
Ideal Soil Mixture for Pennell's Bird's Beak Relocation?
Pennell's bird's beak flourishes in soil that drains well. Prior to planting, enrich the soil with a balanced fertilizer, such as a 10-10-10 (N-P-K) blend, to supply vital nutrients. Ensure the soil is loose and free of rocks or debris to facilitate quick root establishment.
Optimal Location for Your Pennell's Bird's Beak?
Place pennell's bird's beak in a sunny spot where it receives at least 6 hours of direct sunlight daily. Full sun helps these annuals thrive and bloom beautifully. Avoid shaded areas as they can lead to weak growth and fewer flowers.
Tools Required for Pennell's Bird's Beak Transplantation
Gardening Gloves
To safeguard your hands while handling soil and plants.
Trowel
For digging small holes and managing soil.
Shovel or Spade
For excavating larger holes and trenches.
Watering Can
To irrigate the plant and soil during the relocation process.
Garden Fork
To loosen the soil surrounding the plant.
Bucket or Container
To move the plant if necessary.
Method for Extracting Pennell's Bird's Beak from the Ground
Method for Extracting Pennell's Bird's Beak from the Ground?
From Ground: First, moisten the soil around the pennell's bird's beak plant. Next, use a shovel or spade to dig a wide trench around the plant, ensuring the root ball remains intact. Carefully work the spade beneath the root ball to lift the plant from its original spot.From Pot: Begin by watering the pennell's bird's beak plant to soften the soil, making removal easier. Gently tilt the pot and tap its sides to loosen the soil. Support the plant at its base and carefully slide it out of the pot, keeping the root ball whole.From Seedling Tray: Water the seedlings in the tray initially. Use a trowel or your fingers to gently lift each seedling by supporting the soil around its roots. Be careful to maintain the root system's integrity as you proceed.
Detailed Steps for Relocating Pennell's Bird's Beak
Site Preparation
Prepare the new planting site by clearing any debris and loosening the soil to allow for easy root penetration.
Hole Excavation
Dig a hole that is both wide and deep enough to comfortably accommodate the root ball of pennell's bird's beak. Ensure the hole is slightly wider but the same depth as the original root ball.
Removing pennell's bird's beak
Carefully extract pennell's bird's beak from its initial location as outlined in the removal instructions.
Positioning pennell's bird's beak
Gently place pennell's bird's beak into the prepared hole, ensuring it sits at the same soil level as it was previously. Avoid burying the stem too deeply.
Backfilling the Hole
Fill the hole with soil around the root ball. Gently press the soil with your hands to eliminate air pockets without compacting it too tightly.
Initial Watering
Immediately water pennell's bird's beak thoroughly after planting to settle the soil and promote root-to-soil contact.
Post-Transplantation Care for Pennell's Bird's Beak
Watering
Keep the soil around pennell's bird's beak consistently moist, but not waterlogged, for the first few weeks after relocation to encourage strong root development.
Mulching
Apply a layer of mulch around the base of pennell's bird's beak to help retain moisture and stabilize soil temperature.
Monitoring
Closely observe pennell's bird's beak for signs of transplant shock, such as wilting or yellowing leaves, and provide extra water or shade as needed.
Support
If pennell's bird's beak appears unstable, consider offering temporary support with stakes to help it remain upright until its roots are more established.
Addressing Common Issues During Pennell's Bird's Beak Relocation.
When is the best season to move pennell's bird's beak?
Relocate pennell's bird's beak in early to mid-spring for optimal results.
What is the ideal spacing for pennell's bird's beak?
Space them 9-12 inches (23-30 cm) apart for healthy development.
How should I prepare the soil for pennell's bird's beak relocation?
Ensure the soil drains well and is enriched with compost.
How deep should I plant pennell's bird's beak seedlings?
Plant seedlings at the same depth they were in their original containers.
How can I reduce transplant shock for pennell's bird's beak?
Move them on a cloudy day or in the evening to lessen stress.
What soil pH is best for pennell's bird's beak?
A slightly acidic to neutral pH (6.0-7.0) is most suitable.
How often should I water pennell's bird's beak after relocation?
Water thoroughly right after moving, then keep the soil consistently moist.
Can I relocate pennell's bird's beak in full sun?
Yes, pennell's bird's beak thrives in full sun but can tolerate some partial shade.
What common pest should I watch for after moving pennell's bird's beak?
Look out for aphids and treat them with insecticidal soap if necessary.
Is it necessary to fertilize pennell's bird's beak after relocation?
Add a balanced fertilizer when planting to support vigorous growth.


