How to Transplant Climbing dayflower?
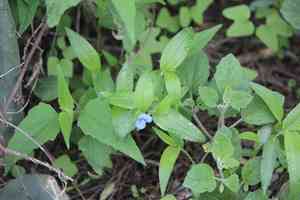
Optimal transplantation for climbing dayflower occurs during the period of rejuvenation, specifically from mid to late spring. Select a site providing filtered sunlight and, ideally, consistently damp, adequately draining earth. Bear in mind that careful manipulation aids this resilient plant's successful establishment.
What Preparations are Needed Before Transplanting Climbing Dayflower?
What is the Ideal Time for Transplanting Climbing Dayflower?
The optimal period for relocating climbing dayflower is during the mild warmth of mid to late spring. Moving climbing dayflower at this time encourages vigorous development, as soil temperature and moisture levels are perfect for root establishment. By transplanting climbing dayflower then, you enable it to fully benefit from a growth cycle, ensuring stronger, more abundant development. Seize this opportunity to transplant climbing dayflower and enjoy a vibrant garden!
How Much Space Should You Leave Between Climbing Dayflower Plants?
Initially, ensure proper spacing between climbing dayflower plants when transplanting. An interval of 1-2 feet (30-60 cm) between each plant is ideal. This guarantees each plant has ample room to grow without competing for resources.
What is the Best Soil Mix for Climbing Dayflower Transplanting?
For climbing dayflower, utilize well-draining soil to prevent waterlogging around the roots. Prior to planting, mix compost or an organic slow-release fertilizer into your soil. This will supply essential nutrients required for growth.
Where Should You Relocate Your Climbing Dayflower?
Select a site for climbing dayflower that receives ample sunlight. Ideally, a spot with 6-8 hours of direct sun daily is best. Sunlight plays a crucial role in the photosynthesis vital for plant health.
What Equipments Should You Prepare Before Transplantation Climbing Dayflower?
Gardening Gloves
To safeguard your hands while handling soil and climbing dayflower.
Gardening Shovel
Crucial for excavating holes and manipulating climbing dayflower's root ball.
Garden Fork
To assist in loosening the soil around climbing dayflower when extracting it from its original spot.
Planting Trowel
To dig a small, precise hole for climbing dayflower if you are moving a tiny seedling.
Watering Can
To hydrate the plant both before and after the transplanting procedure.
Gardening Scissors or Pruning Shears
Useful for trimming any damaged roots during transplantation.
Measuring Tape
To ensure the hole is dug to the correct depth and width for climbing dayflower's root ball.
Garden Spade
It can be used to loosen and prepare the soil for receiving the transplant.
Stakes and Gardening Wire
If climbing dayflower is a vine or climbing plant, these will be necessary to offer support post-transplanting.
How Do You Remove Climbing Dayflower from the Soil?
How Do You Remove Climbing Dayflower from the Soil?
From Ground: First, water your climbing dayflower to moisten the surrounding soil. This facilitates digging and helps keep the root ball intact. Use your garden fork to gently loosen the soil around the plant, avoiding the roots. Then, use your spade to dig a wide trench around climbing dayflower, carefully keeping the root ball undamaged. Gently lift the plant from its initial location.From Pot: Start by watering your climbing dayflower to ensure the soil is damp. Carefully invert the pot. Hold the plant at its base, near the soil line, and pull gently. The root ball should slide out easily.From Seedling Tray: Check the bottom of the seedling cells—if roots are emerging from the drainage holes, the seedling is ready for transplant. Gently hold climbing dayflower by the stem, flip the tray, and allow it to fall out naturally.
Step-by-Step Guide for Transplanting Climbing Dayflower
Preparation
Water your climbing dayflower thoroughly a few hours before you plan to transplant it. This reduces stress for the plant. Clear the new site of any weeds or debris and loosen the soil with your gardening fork.
Digging
Excavate a hole as deep as the root ball and twice its width. Use your hands to loosen the bottom and sides of the hole, creating an easier environment for roots to expand.
Placement
Carefully position climbing dayflower in the hole, ensuring it is not planted deeper than its previous growing depth. The top of the root ball should be level with or slightly below the surrounding soil.
Backfill
Gently refill the hole with soil, firming it around the base of climbing dayflower to provide support and eliminate air pockets.
Watering
Water thoroughly, ensuring the moisture reaches the roots. Add more soil if needed once the water has drained.
Settling In
If your climbing dayflower requires staking, install your supports now.
How Do You Care For Climbing Dayflower After Transplanting?
Watering
It is crucial to keep the soil around climbing dayflower moist (but not waterlogged) for the initial couple of weeks post-transplantation. This will aid the roots in establishing well in their new environment.
Checking
Once climbing dayflower begins to grow, watch for any signs of transplant shock, such as wilting, yellowing, or leaf drop. If this occurs, ensure climbing dayflower has shade, adequate watering, and consider a plant recovery solution.
Pruning
If your climbing dayflower is a climbing variety, you will need to prune it to encourage growth in the desired direction. Begin this a few weeks after transplanting, once you are certain the plant has properly rooted.
Feeding
Four to six weeks after transplanting, depending on growth, you might consider feeding your climbing dayflower with a standard garden plant food. Always adhere to the manufacturer's instructions.
Troubleshooting Common Issues with Climbing Dayflower Transplantation.
What's the best time of the year to transplant climbing dayflower?
Late spring to early summer (S2-S3) is the optimal period to transplant climbing dayflower when the plant initiates vigorous growth.
How far apart should I space climbing dayflower during transplantation?
Climbing dayflower should ideally be spaced 1-2 feet apart (30-60 cm). This provides them with ample room to grow and spread.
Why is climbing dayflower wilting after transplantation?
Wilting may be due to transplant shock. Minimize this by watering climbing dayflower regularly, especially for the first few weeks following transplantation.
Can climbing dayflower thrive if I transplant it in a container?
Absolutely, climbing dayflower can adapt well in a container. Ensure there are sufficient drainage holes to prevent waterlogging.
What type of soil is best for transplanting climbing dayflower?
Climbing dayflower prefers well-draining, fertile soil. If your garden soil is poor, consider adding compost or organic matter to enhance its fertility.
How deep should I plant climbing dayflower during transplantation?
Dig a hole deep enough to fully cover the root ball of climbing dayflower. This is typically the same depth as the container it was previously in.
Why is my transplanted climbing dayflower turning yellow?
Yellowing may indicate overwatering, disease, or nutrient deficiency. Review your watering routine and inspect plants for signs of pests or diseases.
Should I prune climbing dayflower before transplanting?
Yes, lightly pruning climbing dayflower before transplanting can help it redirect energy towards root development. Just ensure you do not remove more than a third of the foliage.
Does climbing dayflower require any special care immediately following transplantation?
After transplanting, water climbing dayflower generously. For the initial couple of weeks, keep the soil consistently moist, but not waterlogged, to aid root establishment.
How to prevent transplant shock in climbing dayflower?
Try to transplant climbing dayflower on a cloudy day to minimize stress. Keep it well-watered and monitor closely during the first few weeks for any signs of distress.



