How to Transplant Redspot clarkia?
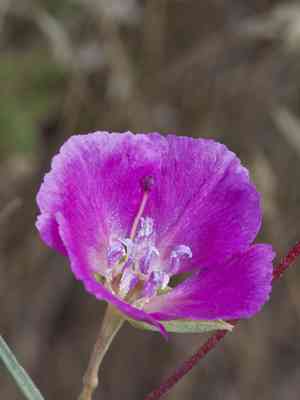
Redspot clarkia flourishes most effectively when relocated in the revitalizing phase of early spring, providing sufficient development time prior to the warmth of summer. Select a bright, adequately drained spot to guarantee peak growth and robustness.
Preparations Required Before Relocating Redspot Clarkia?
Optimal Period for Relocating Redspot Clarkia?
Redspot clarkia, an annual, flourishes when moved 'during the initial stages of spring.' This timing ensures new development benefits from ideal soil warmth and increased daylight. By relocating at this time, redspot clarkia establishes robust roots, guaranteeing strong blooms and enhanced resilience throughout its growing cycle.
Recommended Spacing Between Redspot Clarkia Plants?
For a thriving garden, ensure redspot clarkia are spaced 6-8 inches (15-20 cm) apart. This provides ample room for each plant to expand without competing for resources.
Best Soil Mixture for Redspot Clarkia Relocation?
Prepare soil that drains well, enriched with a balanced foundational fertilizer. Ensure the soil is loose and rich in nutrients to support redspot clarkia's development.
Ideal Location for Your Redspot Clarkia?
Select a sunny spot for relocating redspot clarkia, as this plant thrives best in full sun. Aim for at least 6-8 hours of direct sunlight daily.
Equipment to Prepare Before Relocating Redspot Clarkia?
Gardening Gloves
To safeguard your hands while handling soil and plants.
Shovel or Spade
For excavating and lifting the plant from its initial position.
Watering Can
To hydrate the plant before and after relocation.
Trowel
For smaller digging tasks and creating depressions in the new site.
Plant Marker
To identify your plant following relocation.
How to Extract Redspot Clarkia from the Soil?
How to Extract Redspot Clarkia from the Soil?
From Ground: First, moisten the redspot clarkia plant by watering the soil. Then, dig a wide trench around the plant using a shovel or spade, ensuring the plant's root ball remains intact. Carefully work the spade beneath the root ball to lift the plant from its original location.From Pot: Gently tap the sides and bottom of the container to loosen the soil. Tilt the pot and carefully pull the redspot clarkia plant out, ensuring the root ball stays whole. You can use your hand or a trowel to assist in easing it out if necessary.From Seedling Tray: Water the seedling tray to make the soil easier to manage. Use a trowel or your fingers to gently lift the redspot clarkia seedlings out, ensuring to keep as much of the root mass as possible intact.
Step-by-Step Instructions for Relocating Redspot Clarkia
Preparing the New Site
Dig a hole in the new location that is slightly larger than the redspot clarkia plant's root ball. Ensure the hole is deep enough to accommodate the plant without burying the stem more than necessary.
Removing the Plant
Follow the specific removal procedure based on the redspot clarkia plant's current location (from ground, pot, or seedling tray). Handle the plant gently to prevent root damage.
Placing the Plant
Position the redspot clarkia plant in the prepared hole, ensuring it sits at the same depth as it was in its original spot. Carefully backfill the hole with soil, gently pressing it around the plant's base to eliminate air pockets.
Watering the Plant
Thoroughly water the redspot clarkia plant after relocation to help settle the soil around the roots and minimize transplant shock.
Mulching (Optional)
You may apply a layer of mulch around the redspot clarkia plant's base to help retain moisture and suppress weeds, but avoid piling mulch against the stem.
Post-Relocation Care for Redspot Clarkia
Watering
Keep the soil around the redspot clarkia consistently damp, but not waterlogged, for the initial weeks after relocation to aid in establishing strong roots.
Monitoring
Regularly inspect the redspot clarkia plant for any indications of stress, such as wilting or yellowing foliage, and adjust care as needed.
Pruning
If the redspot clarkia plant appears leggy or damaged, consider light trimming to encourage healthy growth and reduce stress.
Resolving Common Issues with Redspot Clarkia Relocation.
When is the best time to transplant redspot clarkia?
Early spring is ideal for transplanting redspot clarkia to ensure healthy growth.
How much space should I leave between redspot clarkia plants?
Plant redspot clarkia with a spacing of 6-8 inches (15-20 cm) to promote air circulation.
What soil type is best for transplanting redspot clarkia?
Use well-draining soil rich in organic matter for successful transplanting of redspot clarkia.
How should I prepare redspot clarkia for transplanting?
Water redspot clarkia thoroughly before transplanting to reduce root stress and ensure a smooth transition.
What should I do if redspot clarkia wilts after transplanting?
Keep the soil consistently moist but not waterlogged to help redspot clarkia recover from wilting.
How deep should I plant redspot clarkia seedlings?
Plant redspot clarkia seedlings at the same depth they were growing in their original containers.
How can I avoid transplant shock in redspot clarkia?
Transplant redspot clarkia on a cloudy day or in the evening to minimize stress and shock.
Is it necessary to fertilize redspot clarkia after transplanting?
Apply a balanced, all-purpose fertilizer lightly after transplanting to support the growth of redspot clarkia.
What temperature is ideal for transplanting redspot clarkia?
Transplant redspot clarkia when soil temperatures are around 60°F (15°C) for optimal growth conditions.
Can I transplant redspot clarkia directly from seeds?
Although possible, it's best to start redspot clarkia seeds indoors and transplant seedlings for better success.



