How to Transplant Yellow pincushion?
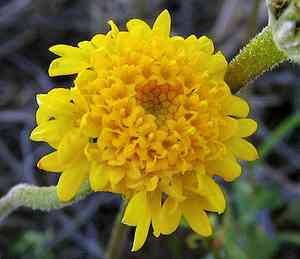
The optimal period for relocating yellow pincushion spans from the beginning of temperate conditions until the conclusion of the chilly months. Select a location with good drainage and ample sunlight to foster its robustness. Gentle manipulation during the transplanting process improves its chances of thriving.
What Preparations are Needed Before Transplanting Yellow Pincushion?
What is the Ideal Time for Transplanting Yellow Pincushion?
The best time to move yellow pincushion is from the beginning to the end of spring. This period is perfect as the ground starts to warm, promoting root development and avoiding the intensity of summer heat. Moving them during this window guarantees strong growth, high survival rates, and ample opportunity for the plant to flourish throughout its active season.
How Much Space Should You Leave Between Yellow Pincushion Plants?
When relocating yellow pincushion, make sure to position them 6-12 inches (15-30 cm) apart. This will provide each plant with sufficient room to expand and thrive without competing for nutrients.
What is the Best Soil Mix for Yellow Pincushion Transplanting?
For yellow pincushion, select soil that drains well and incorporate a balanced base fertilizer to enrich it. Aim for a light, sandy or loamy soil type to prevent water accumulation.
Where Should You Relocate Your Yellow Pincushion?
Choose a sunny location for moving yellow pincushion. These plants prefer full sunlight for at least 6-8 hours daily, which aids in their robust and vibrant development.
What Equipments Should You Prepare Before Transplantation Yellow Pincushion?
Gardening Gloves
To safeguard your hands while handling soil and plants.
Shovel or Spade
For digging around the plant and preparing a new spot for it.
Trowel
Useful for carefully lifting smaller plants from containers or seed trays.
Watering Can or Hose
To hydrate the plant before and after its relocation.
Compost or Mulch
To enrich the soil and help retain moisture post-transplant.
How Do You Remove Yellow Pincushion from the Soil?
How Do You Remove Yellow Pincushion from the Soil?
From Ground: First, moisten the yellow pincushion plant's soil. Then, dig a wide trench around the plant using a shovel or spade, ensuring the root ball stays intact. Carefully work the spade beneath the root ball to lift the plant from its original spot.From Pot: Gently tap the pot's sides to loosen the soil. Invert the pot, supporting the plant with your hand. Carefully pull the pot away from the plant, taking care to keep the root ball whole.From Seedling Tray: Use a trowel or small tool to carefully lift the seedlings from the tray. Make sure to lift them by the root ball, not the stems, to avoid damage.
Step-by-Step Guide for Transplanting Yellow Pincushion
Site Selection
Pick a spot with adequate sunlight and room for your yellow pincushion plant to reach its full size.
Dig the Hole
Excavate a hole in the ground slightly larger than the yellow pincushion plant's root ball. The hole should be deep enough to fully cover the root ball.
Add Compost or Mulch
Before placing the plant, mix some compost or mulch into the soil to enrich it and improve drainage.
Place the Plant
Carefully position the yellow pincushion plant into the hole, ensuring the top of the root ball is level with the surrounding ground.
Backfill and Firm the Soil
Refill the hole with soil, gently pressing it down around the plant to remove air pockets. Be careful not to compact the soil too much.
Water Thoroughly
Water the yellow pincushion plant generously to help settle the soil around the root ball and provide initial hydration for the plant.
How Do You Care For Yellow Pincushion After Transplanting?
Watering
Keep the soil around the yellow pincushion consistently damp, but not waterlogged, for the first few weeks post-transplant to aid in strong root development.
Mulching
Apply a layer of mulch around the base of the yellow pincushion plant to retain moisture and stabilize soil temperature.
Protection
If moving in a windy area or during the hottest parts of the day, consider providing temporary shade or wind protection to help the plant adapt.
Monitoring
Observe your yellow pincushion plant for signs of distress, such as wilting or yellowing leaves, and adjust watering as necessary.
Troubleshooting Common Issues with Yellow Pincushion Transplantation.
When is the best time to transplant yellow pincushion?
Move yellow pincushion from early spring to late spring for optimal growth and establishment.
What spacing should I maintain when transplanting yellow pincushion?
Space yellow pincushion 6-12 inches (15-30 cm) apart to ensure adequate room for growth.
How deep should I plant yellow pincushion seeds?
Sow yellow pincushion seeds shallowly, just barely covering them with soil.
What type of soil is ideal for yellow pincushion?
Well-drained, sandy or loamy soil is perfect for yellow pincushion's healthy development.
How often should yellow pincushion be watered after transplanting?
Water yellow pincushion moderately, keeping the soil moist but not waterlogged during the establishment period.
Can yellow pincushion handle full sun exposure?
Yes, yellow pincushion thrives in full sun or partial shade for best growth outcomes.
Should I fertilize yellow pincushion after transplanting?
Light fertilization with a balanced, slow-release fertilizer can promote yellow pincushion's growth.
How can I protect yellow pincushion from pests after transplanting?
Use organic insecticides or natural predators to keep pests at bay without harming yellow pincushion.
What should I do if yellow pincushion shows signs of wilting?
Ensure adequate watering and check soil drainage to revive wilting yellow pincushion.
Can I transplant yellow pincushion in high humidity areas?
Yellow pincushion can tolerate higher humidity but ensure proper air circulation to prevent fungal issues.



