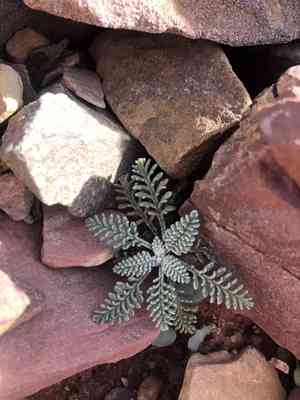
How to Transplant Douglas' dustymaiden?
Relocate douglas' dustymaiden during nature's reawakening period, generally as the cold weather recedes. Select a brightly lit location featuring soil that drains effectively. A thorough watering after transplantation helps douglas' dustymaiden settle into its new environment, facilitating a smooth adjustment.
What Preparations are Needed Before Transplanting Douglas' Dustymaiden?
What is the Ideal Time for Transplanting Douglas' Dustymaiden?
The perfect time for moving douglas' dustymaiden is when winter transitions into the gentle warmth of early to mid-spring. This period avoids harsh frosts, allowing douglas' dustymaiden to adapt easily to its new spot and establish roots effectively before summer's heat. Placing douglas' dustymaiden during this season ensures they benefit from longer days and mild temperatures, crucial for strong growth. Transplanting within this window guarantees robust development, utilizing naturally moist soil and cool air, reducing transplant shock and boosting survival rates.
How Much Space Should You Leave Between Douglas' Dustymaiden Plants?
When relocating your douglas' dustymaiden, aim for a comfortable distance between them. A good guideline is to allow approximately 8-12 inches (20-30 cm) from plant to plant. This provides your douglas' dustymaidens ample room to flourish without excessive competition for nutrients.
What is the Best Soil Mix for Douglas' Dustymaiden Transplanting?
Your douglas' dustymaiden will thrive in soil that drains well, so a sandy or loamy base is an excellent starting point. Before transplanting, enrich the soil with a balanced, slow-release fertilizer to give your douglas' dustymaiden a nutritional boost as they settle into their new home.
Where Should You Relocate Your Douglas' Dustymaiden?
Choose a sunny location for your douglas' dustymaiden as they enjoy soaking up the light! Aim for a spot that receives at least 6 hours of sunlight daily. Morning sun is particularly beneficial to help your douglas' dustymaiden start each day bright and vigorous.
What Equipments Should You Prepare Before Transplantation Douglas' Dustymaiden?
Gardening Gloves
To safeguard your hands while handling soil and plants.
Garden Trowel
For digging and refining the planting hole.
Spade or Shovel
To excavate douglas' dustymaiden from its current position.
Pruning Shears
To trim any dead or excess growth prior to transplanting.
Watering Can or Hose
To hydrate douglas' dustymaiden before and after relocation.
Wheelbarrow or Bucket
To transport douglas' dustymaiden and soil.
Garden Fork
To loosen soil and assist in carefully lifting the plant.
How Do You Remove Douglas' Dustymaiden from the Soil?
How Do You Remove Douglas' Dustymaiden from the Soil?
From Ground: Water douglas' dustymaiden beforehand to moisten the soil. Dig a wide circle around the plant with a shovel or spade, far enough to avoid damaging the root ball. Gently slide the spade beneath the root ball to lift douglas' dustymaiden from the ground.From Pot: Tilt the pot sideways, tap the bottom, and gently ease douglas' dustymaiden out while supporting the plant's base. If the roots are circling the pot, carefully tease them out to encourage outward growth.From Seedling Tray: Use a garden trowel or your fingers to carefully pry the seedling of douglas' dustymaiden out of the tray cell. Support the root ball to prevent it from breaking apart.
Step-by-Step Guide for Transplanting Douglas' Dustymaiden
Digging the Hole
Use a garden trowel to create a hole in the planting site that is twice the width and the same depth as the root ball of douglas' dustymaiden.
Root Ball Preparation
Inspect the root ball of douglas' dustymaiden and prune any broken or excessively long roots. Ensure not to over-trim as it might stress the plant.
Positioning douglas' dustymaiden
Place douglas' dustymaiden in the center of the hole. The top of the root ball should be level with the surrounding soil surface.
Filling the Hole
Gently backfill the hole with soil, tamping down lightly to remove air pockets. Ensure that douglas' dustymaiden is upright and stable.
Watering After Transplant
Water douglas' dustymaiden thoroughly after transplanting to settle the soil around the roots and help with the shock of transplanting.
Supporting douglas' dustymaiden
If douglas' dustymaiden is tall or the area is windy, stake the plant gently to ensure it remains upright and secure as it establishes.
How Do You Care For Douglas' Dustymaiden After Transplanting?
Watering
Ensure douglas' dustymaiden receives regular watering to keep the soil moist, especially during dry spells, to support root establishment.
Mulching
Apply a layer of organic mulch around douglas' dustymaiden to help retain soil moisture and moderate soil temperature.
Observation
Monitor douglas' dustymaiden for signs of stress, such as wilting or discolored leaves, and respond accordingly.
Protection
Guard douglas' dustymaiden against pests and diseases by checking regularly and using appropriate measures, like removal of affected parts or use of organic pest control if necessary.
Troubleshooting Common Issues with Douglas' Dustymaiden Transplantation.
How far apart should I space my douglas' dustymaiden when transplanting?
Space your douglas' dustymaiden ideally 8-12 inches (20-30 cm) apart to ensure they have enough room to grow.
What's the best season for transplanting douglas' dustymaiden?
Transplant douglas' dustymaiden during the prime window of early to mid-spring for optimal root establishment.
Why are my transplanted douglas' dustymaiden wilting?
Wilting can occur if they're not adequately watered after transplanting, or due to transplant shock. Ensure consistent moisture and avoid direct sunlight initially.
How deep should I plant douglas' dustymaiden when transplanting?
Dig a hole that's as deep as the root ball and twice as wide, allowing the roots to spread out.
Can I transplant douglas' dustymaiden during the summer?
It's best to avoid summer transplantation to prevent heat stress. Early to mid-spring offers a milder climate for better root development.
What soil conditions does douglas' dustymaiden prefer when transplanting?
Preferably, use well-draining soil amended with organic matter to provide douglas' dustymaiden a healthy start in its new location.
How often should I water douglas' dustymaiden after transplanting?
Water your newly transplanted douglas' dustymaiden to keep the soil moist but not waterlogged, adjusting based on rainfall and temperature.
How do I minimize transplant shock in douglas' dustymaiden?
Keep the roots moist during transplantation, plant quickly, and water thoroughly afterward to reduce the risk of transplant shock.
Should I prune douglas' dustymaiden when transplanting?
Trimming damaged or excessively long roots before planting can encourage healthy growth, but avoid unnecessary pruning above the soil.
My douglas' dustymaiden isn't thriving post-transplant, what could be wrong?
Ensure proper planting depth, soil moisture, and check for signs of pests or disease. Adapting to a new spot can take time.


