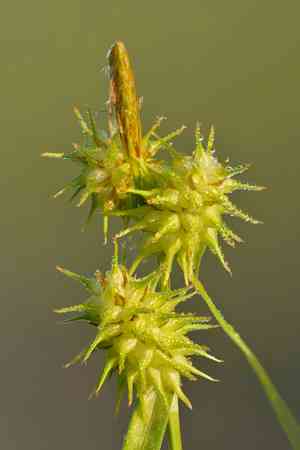
How to Transplant Common sedge?
Relocate common sedge when its development is most vigorous, from the middle of spring through the beginning of summer, or during the height of autumn's colors as they soften. Select a damp, shaded location and incorporate organic material to facilitate common sedge's adjustment, ensuring its elegant foliage thrives.
What Preparations are Needed Before Transplanting Common Sedge?
What is the Ideal Time for Transplanting Common Sedge?
For common sedge, the prime period for relocation is early to mid-spring or late fall. This timing aligns with its natural growth cycle, promoting strong establishment and minimizing stress.
How Much Space Should You Leave Between Common Sedge Plants?
To allow common sedge to flourish, ensure adequate spacing. Aim for approximately 6-12 inches (15-30 cm) between plants. This provides ample root room, preventing overcrowding and fostering robust growth.
What is the Best Soil Mix for Common Sedge Transplanting?
Prepare a loamy, well-draining soil base for common sedge. Incorporate a balanced granular fertilizer, following package directions, to provide initial nutrients. This will support the plant's early development!
Where Should You Relocate Your Common Sedge?
Select a location that receives partial to full sunlight for optimal common sedge health. These adaptable plants can tolerate some shade, so a less sunny garden spot is acceptable. A balanced environment is crucial!
What Equipments Should You Prepare Before Transplantation Common Sedge?
Gardening Gloves
To safeguard your hands while handling soil and plants.
Spade or Shovel
For excavating the common sedge and preparing the new planting site.
Hand Trowel
For more precise digging and placement tasks, especially in confined areas.
Garden Fork
To loosen the soil surrounding the plant, facilitating easier root ball removal.
Watering Can
To hydrate the common sedge before and after its relocation.
Wheelbarrow or Garden Cart
To move the common sedge from its original spot to the new planting area if the distance is considerable.
Pruning Shears
To trim any damaged roots or foliage.
How Do You Remove Common Sedge from the Soil?
How Do You Remove Common Sedge from the Soil?
From Ground: First, moisten the soil around the common sedge to ease removal. Use a garden fork or spade to gently loosen the soil in a circle around the plant. Dig a trench wide enough to avoid root damage, then carefully work beneath the root ball to lift the common sedge from the ground.From Pot: Begin by watering the common sedge for smoother extraction. Turn the pot on its side and tap the edges to dislodge the plant. You can press the pot's bottom to help push it out. Hold the plant's base and gently pull it free while supporting the root ball.From Seedling Tray: Water the cell containing the common sedge to help the root ball stay intact. Use a hand trowel or similar tool to carefully lift the plant from the cell, keeping the soil and roots as a single unit.
Step-by-Step Guide for Transplanting Common Sedge
Preparation
Start by thoroughly watering the common sedge in its current location a day prior to transplanting to minimize shock and help soil adhere to roots.
Lifting the Plant
Employ the appropriate method from the Removal Process section to extract the common sedge from its present spot without harming the roots.
Transport
If the new site isn't directly adjacent, use a wheelbarrow or garden cart to move the common sedge, preventing damage during transit.
Planting Hole
Excavate a hole at the new location that is twice the width of the root ball and of equal depth, ensuring the common sedge is planted at its original growing level.
Placing the Plant
Center the common sedge's root ball in the newly dug hole. Backfill with soil around the roots, gently firming it down without over-compacting to eliminate air pockets.
Watering In
Generously water the common sedge after planting to settle the soil around the roots and help remove any remaining air pockets.
Adjustment
Monitor the common sedge for the initial few weeks. If necessary, prune any damaged or unhealthy parts to encourage new growth and aid recovery from the transplanting process.
How Do You Care For Common Sedge After Transplanting?
Consistent Moisture
Maintain consistent soil moisture around the common sedge, avoiding saturation, to promote root development.
Mulching
Apply a layer of mulch around the base of the common sedge to help retain soil moisture, regulate soil temperature, and suppress weed growth.
Minimal Disturbance
Avoid disturbing the soil around the common sedge's roots as they establish. This allows delicate new roots to grow unimpeded.
Observation
Regularly inspect the common sedge for signs of transplant shock, such as wilting leaves or lack of new growth, and adjust care as needed.
Troubleshooting Common Issues with Common Sedge Transplantation.
When is the best time to transplant common sedge?
Relocate common sedge during the mild conditions of late spring or as autumn approaches, avoiding extreme temperatures.
How far apart should I space common sedge when transplanting?
Ideally, space common sedge approximately 6-12 inches (15-30 cm) apart to provide ample room for healthy growth.
Why are my transplanted common sedge wilting after planting?
Wilting may indicate transplant shock. Keep the soil consistently moist and offer shade for a few days.
How deep should I plant common sedge's roots?
Plant common sedge's roots at the same depth they were previously growing to ensure optimal development.
Should I fertilize common sedge immediately after transplanting?
Wait several weeks after transplanting common sedge before fertilizing to prevent root burn.
Can common sedge be transplanted in the rain?
Light rain can assist common sedge in settling, but avoid heavy downpours that might disrupt root placement.
What soil type is best when transplanting common sedge?
Utilize well-draining soil rich in organic matter to maintain common sedge's root health and prevent rot.
Is it necessary to trim common sedge before transplanting?
Trimming isn't mandatory, but removing damaged or elongated stems can encourage healthier post-transplant growth.
How much water does common sedge need after transplanting?
Keep the soil moist but not waterlogged, and reduce irrigation as common sedge becomes established.
Can common sedge be transplanted into pots?
Certainly! Ensure the pot is sufficiently sized and has proper drainage to accommodate common sedge's growth.


