How to Transplant Littlepod false flax?
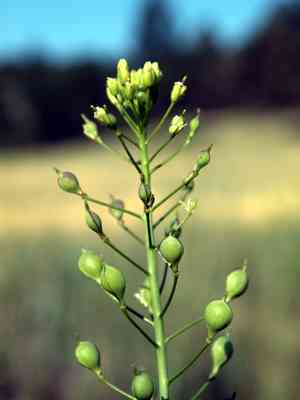
For littlepod false flax, the ideal time for relocating is from mid-spring through late spring, leveraging mild temperatures for root development. Select a bright location with soil that drains effectively and gradually introduce to external environments for the best outcome.
What Preparations are Needed Before Transplanting Littlepod False Flax?
What is the Ideal Time for Transplanting Littlepod False Flax?
The prime window for moving littlepod false flax to its new spot is during the spring season, from mid to late spring. This period offers an optimal mix of warmer ground and cooler air, promoting root development before summer's heat. Relocating littlepod false flax at this time leverages its natural growth cycle, fostering strong development and blooming potential. A helpful tip: this timely move significantly boosts littlepod false flax's chances for successful establishment and vigorous life.
How Much Space Should You Leave Between Littlepod False Flax Plants?
When relocating littlepod false flax, aim to provide each plant with adequate room by spacing them 6-12 inches apart (15-30 cm). This spacing prevents competition for nutrients and sunlight.
What is the Best Soil Mix for Littlepod False Flax Transplanting?
For littlepod false flax, a well-draining soil enriched with a balanced, slow-release fertilizer works wonders. Begin by incorporating compost into your garden bed to create a nutrient-rich base.
Where Should You Relocate Your Littlepod False Flax?
Choose a sunny location for littlepod false flax that receives at least 6 hours of daily sunlight. They thrive with ample light, so an open, unshaded area will support their strong and healthy growth.
What Equipments Should You Prepare Before Transplantation Littlepod False Flax?
Gardening Gloves
To safeguard your hands while handling soil and plants.
Shovel or Spade
To excavate the littlepod false flax plant and prepare a hole at the new site.
Watering Can
To hydrate the littlepod false flax before removal and after planting to aid root establishment.
Pruning Shears
For trimming any damaged roots or foliage prior to transplanting.
Garden Trowel
For managing small quantities of soil and refining the transplant hole.
Gardening Fork
To assist in loosening the soil around the littlepod false flax's root ball during extraction.
Wheelbarrow or Plant Caddy
For moving the littlepod false flax if it is too large or heavy to carry.
Mulch
To help maintain soil moisture and regulate temperature after transplant.
Measuring Tape
To ensure correct spacing between transplanted plants.
How Do You Remove Littlepod False Flax from the Soil?
How Do You Remove Littlepod False Flax from the Soil?
From Ground: Hydrate the littlepod false flax to moisten the soil. Carefully dig a wide circle around the plant using a shovel or spade, preserving the root ball's integrity. Gently slide the spade beneath the root ball and lift the littlepod false flax free.From Pot: Ensure the soil is damp and turn the pot on its side, supporting the littlepod false flax with one hand. Lightly tap the pot's edges or press the bottom to loosen the root ball and ease the plant out.From Seedling Tray: Dampen the soil in the tray. Use a garden trowel or your fingers to carefully lift individual littlepod false flax plants, making sure each retains a soil clump around its roots to minimize shock.
Step-by-Step Guide for Transplanting Littlepod False Flax
Prepare the New Site
Dig a hole that is twice as wide and as deep as the littlepod false flax's root ball, ensuring ample room for root expansion.
Root Ball Care
Gently extract the littlepod false flax from its current spot, keeping as much original soil around the roots as possible to lessen stress.
Plant Positioning
Place the littlepod false flax in the center of the hole, confirming it stands upright. The top of the root ball should be level with the surrounding ground.
Backfilling
Refill the hole with the excavated soil, carefully placing it around the root ball without compacting it too much, which can hinder root growth.
Water In
Thoroughly water the littlepod false flax immediately after transplanting, ensuring moisture reaches the roots to help settle the soil and remove air pockets.
Mulching
Spread mulch around the base of the littlepod false flax, keeping it a few inches from the stem to help retain moisture and suppress weeds.
How Do You Care For Littlepod False Flax After Transplanting?
Immediate Watering
Provide the littlepod false flax with a generous amount of water right after transplanting to help reduce shock and settle the soil.
Monitoring
Observe the littlepod false flax for signs of stress, such as wilting or discolored leaves, and ensure it has sufficient support if it is tall or top-heavy.
Additional Watering
Maintain consistent soil moisture for the initial few weeks, allowing the roots to recover and establish well in their new environment.
Protecting
Shield the littlepod false flax from strong winds and extreme weather during the first few days to prevent further stress.
Troubleshooting Common Issues with Littlepod False Flax Transplantation.
Why is my littlepod false flax wilting after transplanting?
Wilting may indicate shock. Ensure adequate watering and keep it out of intense sunlight for several days.
What's the best time to transplant littlepod false flax?
Transplanting littlepod false flax is ideal when the soil is warm, typically from mid to late spring, ensuring better root establishment.
How far apart should I space my littlepod false flax plants?
Space littlepod false flax optimally at 6-12 inches apart (15-30 cm) to allow for sufficient airflow and growth.
Should I amend the soil when transplanting littlepod false flax?
Yes, enriching the soil with organic matter can improve drainage and provide nutrients for littlepod false flax.
Can I transplant littlepod false flax on a rainy day?
Transplanting littlepod false flax on an overcast day with light rain can minimize transplant shock and assist with watering in.
How deep should the transplant hole be for littlepod false flax?
The hole should be as deep as the root ball and twice as wide to encourage root growth.
How do I know if my littlepod false flax transplant is successful?
A successful transplant will show new growth and lack signs of wilting or discoloration after a few days to weeks.
How much water does littlepod false flax need after transplanting?
After transplanting, water littlepod false flax thoroughly to settle the soil around roots and maintain consistent moisture for the first few weeks.
Can littlepod false flax be transplanted in cooler temperatures?
It's best to transplant littlepod false flax when temperatures are consistently above 50°F (10°C) to ensure proper growth.
What should I do if littlepod false flax leaves turn yellow after transplanting?
Yellow leaves could signal overwatering or nutrient deficiency. Adjust watering and consider a balanced liquid fertilizer.



