How to Transplant False flax?
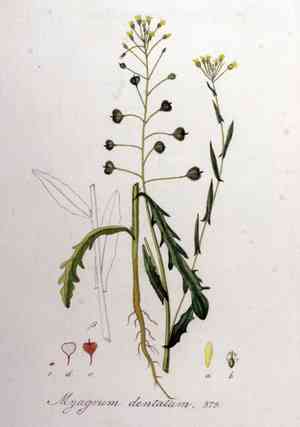
False flax flourishes when relocated from the beginning to the end of spring, benefiting from ideal soil warmth and hydration. A bright, adequately drained spot is crucial for its successful establishment. Handle with care during transplantation to prevent damage to the roots.
What Preparations are Needed Before Transplanting False Flax?
What is the Ideal Time for Transplanting False Flax?
The best period for relocating false flax is from early to late spring. During this time, the ground gradually warms, aiding root establishment and development. Moving false flax in spring leverages the extended daylight hours and rising temperatures, which are ideal for vigorous growth and blooming. Timely relocation improves soil moisture availability and reduces transplant shock, giving false flax a strong start for the growing season.
How Much Space Should You Leave Between False Flax Plants?
Ensure your false flax plants are spaced 2-6 inches (5-15 cm) apart. This provides ample room for growth without excessive competition for resources. A bit of extra room is always beneficial, especially for beginners!
What is the Best Soil Mix for False Flax Transplanting?
Prepare soil that drains well and contains a good amount of organic material. Incorporate a balanced base fertilizer, such as 10-10-10, to enrich the soil for your false flax. Aim for a pH level of approximately 6.0-7.0.
Where Should You Relocate Your False Flax?
Select a sunny location in your garden for false flax. They flourish best with full sun exposure. Target at least 6-8 hours of direct sunlight daily to promote strong and healthy growth.
What Equipments Should You Prepare Before Transplantation False Flax?
Gardening Gloves
To safeguard your hands while handling soil and plants.
Garden Spade
To excavate and extract the plant from its initial spot.
Watering Can or Hose
To hydrate the plant prior to and following its relocation.
Wheelbarrow
To effortlessly move the plant to its new position.
Trowel
To dig the new planting hole for transplantation.
Mulch
To assist in retaining soil moisture and inhibiting weed growth around the newly planted specimen.
Stakes and Twine
To offer support to the plant if it is tall or top-heavy.
How Do You Remove False Flax from the Soil?
How Do You Remove False Flax from the Soil?
From Ground: First, moisten the false flax plant to soften the soil. Then, using a garden spade, dig a wide trench around the plant, making sure the plant's root ball stays intact. Carefully work the spade beneath the root ball to lift the plant from its original spot.From Pot: Thoroughly water the false flax plant. Gently turn the pot on its side and tap the bottom to loosen the plant. Slide the plant out of the pot, supporting the root ball to prevent damage.From Seedling Tray: Water the seedlings well. Using a trowel or your fingers, carefully lift each false flax seedling from the tray, ensuring you extract as much root as possible with each seedling.
Step-by-Step Guide for Transplanting False Flax
Preparation
Prepare the new planting site by digging a hole twice as wide and slightly deeper than the root ball of your false flax plant.
Plant Removal
Carefully extract the false flax plant from its initial location using the techniques outlined in the removal process section.
Plant Placement
Position the false flax plant in the center of the hole at the same depth it was previously growing. Adjust the soil at the bottom if necessary.
Backfilling
Refill the hole around the false flax plant with the excavated soil, gently pressing it down to eliminate air pockets.
Watering
Thoroughly water the plant to help settle the soil and provide moisture to the roots.
How Do You Care For False Flax After Transplanting?
Mulching
Apply a layer of mulch around the base of the false flax, but keep it a few inches away from the stem to prevent rot.
Monitoring
Observe the plant closely for the next few weeks, looking for signs of stress or pests. Provide support if the plant begins to lean.
Troubleshooting Common Issues with False Flax Transplantation.
When is the best time to transplant false flax?
Early to late spring is ideal for transplanting false flax to ensure robust growth.
How far apart should I space false flax?
Space false flax approximately 2-6 inches (5-15 cm) apart for optimal development and air circulation.
What type of soil is best for transplanting false flax?
False flax thrives in well-draining, moderately fertile soil to encourage healthy root growth.
How deep should I plant false flax seedlings?
Plant false flax seedlings at the same depth they were in their original containers.
How do I prevent transplant shock for false flax?
Water the seedlings thoroughly before and after transplanting and avoid disturbing the roots.
What temperature does false flax prefer when transplanting?
Transplant false flax when temperatures are consistently between 50-70°F (10-21°C) to minimize stress.
How much water does false flax need after transplanting?
Keep the soil consistently moist, ensuring it doesn't dry out but isn't waterlogged.
Should I fertilize false flax after transplanting?
Wait about two weeks before applying a balanced fertilizer to allow the plants to establish first.
What should I do if false flax leaves start to yellow after transplant?
Check for overwatering or nutrient deficiencies and adjust watering and fertilizing as needed.
Can I transplant false flax into a container?
Yes, ensure the container is at least 6 inches (15 cm) deep with good drainage.



