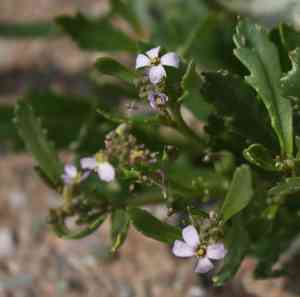
How to Transplant American searocket?
The ideal period to relocate american searocket spans from late spring through mid-summer, leveraging peak growth circumstances. Position american searocket in a brightly lit spot featuring soil that drains effectively. Careful manipulation is essential to prevent damage to the root system.
Preparations Required Before Relocating American Searocket
Optimal Period for American Searocket Relocation?
The best time to move your american searocket is from the warmth of late spring through the sunny early summer. During this period, consistent, rising temperatures and extended daylight hours create ideal conditions for american searocket roots to become established. Transplanting american searocket then allows it to fully benefit from the upcoming growth cycle, ensuring strong development. Moving your american searocket at this time aligns with its natural growth patterns, boosting survival rates and vitality.
Recommended Spacing Between American Searocket Plants?
For american searocket, allow ample room! Position them 6-12 inches (15-30 cm) apart to provide sufficient space for growth and flourishing. Aim for happy, uncrowded plants!
Ideal Soil Blend for American Searocket Transplanting?
To give your american searocket a comfortable start, incorporate some organic compost into sandy, well-draining soil. A balanced, slow-release fertilizer will support their establishment!
Optimal Location for American Searocket Relocation?
Do you enjoy sunbathing? So does american searocket! Select a bright, sunny spot receiving at least 6 hours of sunlight daily. Morning sun, in particular, makes american searocket robust and content!
Equipment Needed Before Transplanting American Searocket?
Gardening Gloves
To safeguard your hands while handling soil and plants.
Trowel
For digging small holes and gently extracting the american searocket plant.
Garden Spade or Shovel
For moving soil and excavating larger holes if transplanting more mature plants.
Watering Can or Hose
To hydrate the american searocket plant before and after transplanting to minimize shock.
Pruning Shears
To trim any dead or damaged roots or foliage prior to transplanting.
Wheelbarrow
For transporting soil or compost around the garden and for moving the american searocket plant if it is large.
Plant Supports or Stakes
If the american searocket plant requires immediate support after transplanting to maintain its structure.
How to Extract American Searocket from the Soil?
How to Extract American Searocket from the Soil?
From Ground: Water the american searocket plant to moisten the soil. Use a garden spade or shovel to dig a wide circle around the plant, being careful to minimize root damage. Remove enough soil to extract the root ball intact, then gently lift the plant.From Pot: Tilt the pot sideways and gently tap its sides to loosen the root ball. Hold the base of the american searocket plant with one hand, and use the other to carefully slide the plant and root ball out.From Seedling Tray: Dampen the soil to facilitate removal. Use a trowel or your fingers to gently remove the american searocket seedling without excessively disturbing the roots; lift by the leaves rather than the stem to prevent harm.
Step-by-Step Guide for Relocating American Searocket
Preparation
Ensure all necessary tools are ready and the workspace is clear. Confirm the new site is prepared and conditions are suitable for transplanting.
Pre-Removal Watering
Water the american searocket at its original location to lessen transplant shock and simplify the removal process.
Root Ball Care
Carefully remove the american searocket from its current spot, ensuring the root ball and as much surrounding soil as possible remain intact.
Hole Preparation
Dig a hole at the new location that is twice the width and the same depth as the root ball. Loosen the soil around the hole to encourage better root penetration.
Plant Placement
Position the american searocket in the center of the new hole. The top of the root ball should be level with the surrounding soil surface.
Backfilling
Gently backfill the soil around the root ball, lightly tamping to eliminate air pockets. Avoid over-compacting, as this can hinder root growth.
Post-Transplant Watering
Water the american searocket thoroughly after transplanting to settle the soil and provide adequate moisture for root recovery.
Support Installation
If needed, insert plant supports or stakes into the ground now to prevent future root damage and help the american searocket maintain its structure.
Post-Transplant Care for American Searocket
Monitoring
Regularly check the american searocket for signs of transplant shock, such as wilting, leaf drop, or discoloration. Respond appropriately with care and adjustments.
Water Management
Provide the american searocket with consistent moisture, monitoring soil dampness and adjusting as needed without overwatering, while the plant establishes.
Stake Adjustment
Keep an eye on any stakes or supports used, adjusting them as the american searocket grows to prevent restriction and provide adequate support.
Root Establishment
Avoid disturbing the american searocket as much as possible, allowing the roots to firmly establish in their new location for several weeks.
Mulching
Apply mulch around the base of the american searocket to retain moisture, suppress weeds, and regulate soil temperature.
Troubleshooting Common Issues with American Searocket Relocation.
What's the ideal time of year for relocating american searocket?
The perfect window for relocating american searocket is during late spring to the beginning of summer when the weather is mild.
How far apart should I space american searocket when relocating?
Space american searocket appropriately by allowing 6-12 inches (15-30 cm) between each plant to provide ample room for growth.
Why is my american searocket wilting after relocating?
Wilting might be due to transplant shock. Ensure gentle handling, proper watering, and initial shade post-transplant to aid american searocket recovery.
What soil conditions are best for american searocket relocation?
For successful relocation, use well-draining soil and avoid overly rich or moist ground, as american searocket prefers sandy or gritty conditions.
How much should I water american searocket after relocating?
Water american searocket generously after relocating to settle the soil, then maintain moderate moisture levels without waterlogging the roots.
Why isn't american searocket growing well after being relocated?
Ensure american searocket isn't planted too deep and the site receives adequate sunlight. Also, avoid over-enriching the soil; american searocket thrives in leaner conditions.
Can american searocket be relocated on cloudy days?
Yes, overcast days are ideal for relocating american searocket to reduce the stress of direct sunlight while the plant establishes.
Should I fertilize american searocket right after relocating?
Refrain from fertilizing right after relocating american searocket, as american searocket does not require high fertility and can thrive in poorer soils.
How do I protect relocated american searocket from pests?
Monitor your american searocket for pests and apply appropriate non-chemical measures like physical barriers. Chemical controls should be a last resort.
Is mulching beneficial for relocating american searocket?
A thin layer of mulch can retain moisture and regulate soil temperature for american searocket, but ensure it's not too thick to prevent rot.


