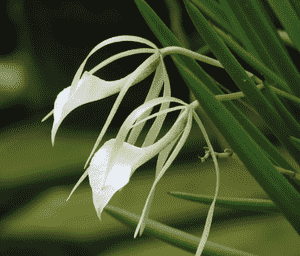
How to Transplant Lady of the night orchid?
For the lady of the night orchid, the commencement of warmer weather, usually as spring starts to emerge, is perfect for repotting. Provide a well-lit location with ample ventilation. It's crucial to preserve consistent surroundings, preventing any sudden shifts during this phase.
What Preparations are Needed Before Transplanting Lady Of The Night Orchid?
What is the Ideal Time for Transplanting Lady Of The Night Orchid?
The start of the active growth phase, typically right after its winter dormancy, offers an excellent opportunity for relocating lady of the night orchid. By moving lady of the night orchid during this period of revival, you align with its natural growth cycle, allowing roots to establish comfortably before summer's peak energy demands. This strengthens the plant's resilience and prepares it for vigorous development in the warmer months ahead. This strategic timing harnesses nature's rhythm, ensuring a smooth transition for your beloved lady of the night orchid.
How Much Space Should You Leave Between Lady Of The Night Orchid Plants?
For lady of the night orchid, ensure a spacing of approximately 1-2 feet (30-60 cm) between each plant. This allows for proper air circulation and prevents the potential spread of diseases. Remember, ample room is always beneficial for healthy development!
What is the Best Soil Mix for Lady Of The Night Orchid Transplanting?
Utilize well-draining soil with a coarse texture. A blend of chunky bark and perlite works wonderfully. Incorporate a nitrogen-rich base fertilizer into the soil, as lady of the night orchid thrives on it. This promotes vigorous growth and enhanced blooming. Happy gardening!
Where Should You Relocate Your Lady Of The Night Orchid?
Select a spot that receives bright, indirect sunlight. Lady of the night orchid appreciates ample light, but direct midday sun might be a bit too intense! Perhaps a sunny windowsill or a shaded patio would be suitable. Sun-loving, yet tolerant of shade, that's our lady of the night orchid!
What Equipments Should You Prepare Before Transplantation Lady Of The Night Orchid?
Gardening Gloves
To safeguard your hands while handling soil and lady of the night orchid.
Gardening Shovel or Spade
A tool useful for excavating a hole at the new site and carefully lifting the lady of the night orchid plant.
Gardening Trowel
A handy tool for loosening and moving soil, especially around delicate root systems.
Pruning Shears
These will be useful for tidying up the lady of the night orchid plant, removing dead or damaged parts both before and after relocation.
Watering Can
To provide water to the lady of the night orchid plant immediately following its transplantation.
Stakes or Supports
Depending on the size and complexity of the lady of the night orchid plant being moved, you might need additional support like stakes or cages to maintain stability.
Mulch
To help retain moisture and suppress weed growth after the transplant.
How Do You Remove Lady Of The Night Orchid from the Soil?
How Do You Remove Lady Of The Night Orchid from the Soil?
From Ground: Start by gently watering the lady of the night orchid to slightly moisten the soil, making it easier to extract and less stressful for the plant. Using a gardening shovel or spade, carefully dig a wide trench around the plant, being cautious not to sever its roots. Slowly work the spade beneath the plant's root ball, then gently lift the lady of the night orchid plant to prevent damage.From a Pot: Lightly water your lady of the night orchid plant to facilitate its removal from the pot. Turn the pot on its side, then gently pull or tap the plant out. If it resists, do not force it. Cut the pot away if necessary to protect the plant's roots.From Tray: If you are dealing with a seedling or young lady of the night orchid from a tray, carefully separate the plant you wish to transplant. Handle it delicately by the leaves, not the stem, and gently untangle the roots if they are intertwined.
Step-by-Step Guide for Transplanting Lady Of The Night Orchid
Site Preparation
Prepare the chosen transplantation site by digging a hole approximately twice as wide and deep as the lady of the night orchid's root ball.
Placing the Plant
Position the lady of the night orchid in the hole at the same depth it was previously growing. Ensure the roots are spread out in the hole and backfill with the original soil.
Watering
Water the lady of the night orchid immediately after transplanting to settle the surrounding soil, but try to avoid wetting the foliage.
Staking
If needed, stake larger lady of the night orchid plants to aid establishment and prevent wind damage.
Mulching
Apply a layer of mulch around the base of the lady of the night orchid, taking care not to pile it against the stem, to help retain moisture and deter weeds.
How Do You Care For Lady Of The Night Orchid After Transplanting?
Watering
Observe the lady of the night orchid and adjust watering as needed to keep the soil moist but not saturated. Excessive watering can lead to root rot.
Pruning
Ensure your lady of the night orchid remains neat by using pruning shears to remove any dead or damaged foliage, but avoid extensive pruning until your plant has fully recovered from the transplant.
Monitoring
Watch for signs of pests or diseases in your lady of the night orchid and take prompt action. These can further stress an already vulnerable plant and potentially be fatal.
Patience
Remember, it may take some time for your transplanted lady of the night orchid to rebound. Don't be alarmed if it doesn't immediately begin growing once in the ground. It might be busy developing its root system.
Troubleshooting Common Issues with Lady Of The Night Orchid Transplantation.
Whatâs the ideal season to transplant lady of the night orchid?
The optimal period to transplant lady of the night orchid is during S1. This allows ample time for a robust root system to develop before harsh weather conditions.
How deep should I plant lady of the night orchid when transplanting it?
Plant the lady of the night orchid so that the top of its root ball is level with the soil surface. This prevents the plant from being set too deeply.
Whatâs the optimal spacing when transplanting lady of the night orchid?
You should maintain a spacing of 1-2 feet (30-60 cm). This provides your lady of the night orchid with sufficient room to thrive without competing for resources.
Do I need to water lady of the night orchid immediately after transplanting it?
Yes, watering lady of the night orchid right after transplanting helps settle the soil and minimizes transplant shock.
What type of soil is best when transplanting lady of the night orchid?
Lady of the night orchid prefers well-draining soil rich in organic matter. Avoid waterlogged conditions as this can cause root diseases.
Should I cut back lady of the night orchid before transplanting?
There's no need for heavy pruning of lady of the night orchid before transplanting. Light trimming is sufficient to remove any damaged or diseased parts.
Do I need to add any fertilizer when transplanting lady of the night orchid?
Yes, incorporating a slow-release fertilizer during transplanting aids in initial growth. However, do not overdo it, as too much fertilizer can harm lady of the night orchid.
Can lady of the night orchid be transplanted in a pot?
Absolutely! Lady of the night orchid can be successfully grown in a pot. Ensure the pot has good drainage, and select one large enough to support its growth.
What if some leaves of lady of the night orchid turn yellow after transplanting?
Some yellowing could indicate transplant shock. Maintain adequate watering and provide ideal conditions for recovery.
How to prevent shock after transplanting lady of the night orchid?
Reduce stress by transplanting in cool, overcast conditions, maintaining proper watering, and avoiding unnecessary disturbance to the roots.


