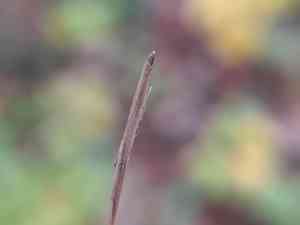
How to Transplant Northern shorthusk?
The ideal period for relocating northern shorthusk spans from late spring through early summer, facilitating robust root development. Select a site that is shaded and damp, replicating its native environment. Verify that the soil possesses ample organic content to foster thriving growth.
What Preparations are Needed Before Transplanting Northern Shorthusk?
What is the Ideal Time for Transplanting Northern Shorthusk?
Moving northern shorthusk during mid to late spring is optimal due to favorable soil temperature and moisture. This timing allows the perennial to establish roots prior to summer's intense heat. A strong foundation in these conditions promotes vigorous growth and resilience, ultimately enhancing its overall health and vitality.
How Much Space Should You Leave Between Northern Shorthusk Plants?
For northern shorthusk, aim to position each plant approximately 12-18 inches (30-45 cm) apart. This provides ample room for growth without overcrowding, ensuring sufficient nutrient and sunlight access.
What is the Best Soil Mix for Northern Shorthusk Transplanting?
Prepare a soil mixture that drains effectively for northern shorthusk. A blend of garden soil and compost works excellently. Incorporate a balanced, slow-release fertilizer to enrich the soil, ensuring it supports the perennial's development.
Where Should You Relocate Your Northern Shorthusk?
Select a site that receives partial to full shade. Northern shorthusk thrives in environments with moderate sunlight exposure, avoiding prolonged periods of intense, direct sun.
What Equipments Should You Prepare Before Transplantation Northern Shorthusk?
Gardening Gloves
To safeguard your hands while handling soil and plants.
Hand Trowel
For excavating small holes and breaking up compacted soil.
Spade or Shovel
For digging larger holes and creating trenches.
Garden Fork
To gently loosen the root system from the surrounding earth.
Watering Can or Hose
For hydrating the plant before and after its relocation.
Pruning Shears
To trim away any damaged roots or foliage.
Mulch
To aid in moisture retention around the newly transplanted plant.
Measuring Tape
To ensure correct spacing between individual plants.
How Do You Remove Northern Shorthusk from the Soil?
How Do You Remove Northern Shorthusk from the Soil?
From Ground: First, hydrate the northern shorthusk plant to moisten the soil. Next, excavate a wide trench around the plant using a shovel or spade, ensuring the root ball remains intact. Carefully work the spade beneath the root ball to lift the plant from its original spot.From Pot: Gently water the potted northern shorthusk plant to soften the soil. Invert the pot onto its side and lightly tap the base to dislodge the plant. Carefully slide the plant out, supporting the root ball to prevent damage.From Seedling Tray: Water the seedlings thoroughly. Gently compress the bottom of the tray cells to loosen the soil. Use a hand trowel or your fingers to carefully lift each seedling, holding it by the leaves (not the stem) to avoid harm.
Step-by-Step Guide for Transplanting Northern Shorthusk
Site Preparation
Prepare the new planting location by digging a hole twice the width and the same depth as the northern shorthusk's root ball.
Soil Preparation
Loosen the earth at the bottom of the hole and incorporate any necessary soil amendments to ensure proper drainage and nutrient availability.
Plant Placement
Position the northern shorthusk in the hole, ensuring the top of the root ball is level with the surrounding ground.
Refill Hole
Gently backfill the hole with soil, pressing lightly around the plant's base to eliminate any air pockets.
Watering
Thoroughly water the northern shorthusk to help settle the soil around its roots and provide initial hydration.
Mulching
Apply a 2-3 inch layer of mulch around the plant's base to help retain moisture and regulate soil temperature. Ensure the mulch does not directly touch the plant's stem.
How Do You Care For Northern Shorthusk After Transplanting?
Watering
Keep the soil around the northern shorthusk consistently damp, but not waterlogged, for the initial weeks post-transplant to aid in root establishment.
Monitoring
Regularly inspect the plant for any indications of transplant shock, such as wilting or yellowing leaves, and adjust care as necessary.
Pruning
Remove any damaged or deceased foliage to encourage robust new growth.
Weeding
Maintain the area around the northern shorthusk free of weeds to minimize competition for nutrients and water.
Troubleshooting Common Issues with Northern Shorthusk Transplantation.
When is the best time to transplant northern shorthusk?
Mid-spring to early summer is ideal for relocating northern shorthusk.
How far apart should I space northern shorthusk?
Space northern shorthusk plants 12-18 inches (30-46 cm) apart.
How do I prepare the soil for northern shorthusk?
Ensure the soil is well-drained and rich in organic matter.
What should I do if northern shorthusk looks wilted after transplanting?
Water the plant thoroughly and keep the soil consistently moist until it recovers.
Can I transplant northern shorthusk during hot weather?
Avoid hot weather; cooler parts of mid-spring to early summer are preferable.
Should I fertilize northern shorthusk after transplanting?
Wait a few weeks before applying a balanced fertilizer to prevent plant stress.
How deep should I plant northern shorthusk's roots?
Plant northern shorthusk at the same depth it was growing prior to transplanting.
How often should I water northern shorthusk after transplanting?
Water northern shorthusk regularly, keeping the soil moist but not saturated.
What if northern shorthusk has yellow leaves after transplanting?
This can indicate transplant shock; ensure proper watering and soil conditions.
How to protect northern shorthusk from pests after transplanting?
Utilize organic pest control methods and routinely check for any signs of pests.


