How to Transplant Hairy grama?
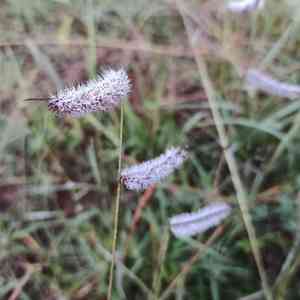
Hairy grama establishes most effectively when transplanted from early to mid-spring, since the mild weather and ample precipitation facilitate root development. Position it in a bright, well-draining spot. Verify that the soil is friable and fertile for peak performance.
What Preparations are Needed Before Transplanting Hairy Grama?
What is the Ideal Time for Transplanting Hairy Grama?
The best period for relocating hairy grama is during the initial to middle spring months. This timing ensures the soil is adequately warm and moist, promoting healthier root development. Transplanting at this time allows hairy grama to establish strong root systems before the more challenging summer conditions, leading to more robust, resilient plants.
How Much Space Should You Leave Between Hairy Grama Plants?
When relocating hairy grama, aim for a separation of 12-18 inches (30-45 cm) between each plant. This guarantees each plant has ample room to grow and receive sufficient nutrients without excessive competition from neighbors.
What is the Best Soil Mix for Hairy Grama Transplanting?
For hairy grama, prepare soil that drains well, with a sandy or loamy consistency. It's beneficial to mix in some compost prior to transplanting to enrich the soil with nutrients. Avoid heavy clay soils, as they can retain too much moisture.
Where Should You Relocate Your Hairy Grama?
Hairy grama thrives in full sunlight, so select a spot that receives at least 6-8 hours of direct sun daily. This will help the plant grow strong and healthy, capturing the energy it needs from the sun.
What Equipments Should You Prepare Before Transplantation Hairy Grama?
Gardening Gloves
To safeguard your hands while working with the soil and plant material.
Hand Trowel
Useful for excavating around the plant and creating the planting cavity.
Shovel or Spade
Essential for digging larger holes and trenching around the plant.
Watering Can or Hose
For hydrating the plant before and after relocation.
Pruning Shears
For trimming any damaged roots or foliage.
Rooting Hormone
Optional, but can encourage quicker root establishment.
How Do You Remove Hairy Grama from the Soil?
How Do You Remove Hairy Grama from the Soil?
From Ground: First, irrigate the hairy grama plant to moisten the soil. Then, dig a wide trench around the plant using a shovel or spade, ensuring the plant's root ball remains intact. Carefully work the spade beneath the root ball to lift the plant from its original spot.From Pot: Water the hairy grama plant thoroughly. Gently compress the sides of the pot to loosen the soil. Tilt the pot and carefully extract the plant by its base, ensuring the root ball stays intact.From Seedling Tray: Lightly water the hairy grama seedlings. Use a hand trowel or your fingers to gently lift each seedling out of the tray, taking care not to harm the roots. If the soil is compacted, use a small stick or pencil to push seedlings up from the bottom.
Step-by-Step Guide for Transplanting Hairy Grama
Site Preparation
Ensure the new location is ready with appropriate soil and conditions, making sure it's well-drained and suitable for hairy grama.
Digging the Hole
Excavate a hole that is twice as wide and the same depth as the root ball of hairy grama. This provides ample space for the roots to spread comfortably.
Plant Placement
Position hairy grama in the hole, ensuring the top of the root ball is level with the surrounding ground. This helps prevent the plant from sinking too deep as the soil settles.
Filling the Hole
Backfill the hole with soil, gently pressing it down to remove air pockets. Avoid over-compacting the soil.
Watering
Water hairy grama thoroughly after planting to help settle the soil and establish initial contact between the roots and the surrounding soil.
Mulching
Apply a layer of mulch around the base of hairy grama to help retain moisture and regulate soil temperature. Keep mulch away from the plant's base to avoid rot.
How Do You Care For Hairy Grama After Transplanting?
Watering
Keep the soil around hairy grama consistently moist, but not waterlogged, for the first few weeks after transplanting to help establish strong roots.
Monitoring
Regularly inspect hairy grama for signs of stress, such as wilting or discoloration. Address any issues promptly to ensure successful establishment.
Pruning
Trim any damaged or dead leaves to direct the plant's energy towards new growth.
Weed Control
Keep the area around hairy grama free from weeds to reduce competition for nutrients and water.
Protection
Provide protection from pests and harsh weather conditions, especially in the first few weeks.
Troubleshooting Common Issues with Hairy Grama Transplantation.
When is the best time to transplant hairy grama?
Ideally early to mid-spring for optimal growth conditions.
How much spacing should I allow between hairy grama plants?
Space plants 12-18 inches (30-45 cm) apart for healthy growth.
How do I prepare the soil for transplanting hairy grama?
Ensure well-drained, slightly sandy soil with good organic content for best results.
Should I water hairy grama immediately after transplanting?
Yes, water thoroughly to help the roots establish in the new location.
What depth should the hole be for transplanting hairy grama?
Dig a hole as deep as the root ball and slightly wider.
Do I need to add fertilizer when transplanting hairy grama?
Incorporate a balanced fertilizer or compost into the soil before transplanting.
How do I prevent shock when transplanting hairy grama?
Handle gently, and ensure consistent moisture levels after transplanting.
Can hairy grama be transplanted in the fall?
It's better to transplant in early to mid-spring for optimal establishment.
What should I do if hairy grama shows signs of stress post-transplant?
Ensure proper watering and consider providing temporary shade to reduce stress.
How much sunlight does hairy grama need after transplanting?
Full sun to partial shade, with at least 6 hours of sunlight per day.



