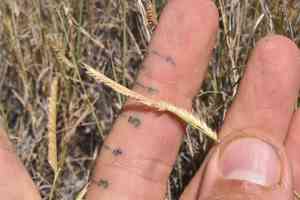
How to Transplant Gypsum grama?
Gypsum grama flourishes most effectively when relocated from the beginning of spring throughout its duration, due to the mild temperatures and period of vigorous development. Select bright, adequately drained sites for successful cultivation. To achieve the best outcomes, guarantee steady hydration during the initial settling phase.
What Preparations are Needed Before Transplanting Gypsum Grama?
What is the Ideal Time for Transplanting Gypsum Grama?
The best time to move gypsum grama is from early to mid-spring. This period aligns with its natural growth cycle, allowing roots to establish before summer's intense heat. Transplanting then provides adequate moisture and moderate temperatures, crucial for successful establishment and strong growth.
How Much Space Should You Leave Between Gypsum Grama Plants?
When relocating gypsum grama, position plants 12-24 inches (30-60 cm) apart to facilitate proper development and a robust root system. This spacing prevents crowding and ensures good air circulation.
What is the Best Soil Mix for Gypsum Grama Transplanting?
For gypsum grama, utilize well-draining soil, a blend of loam and sand. Enhance the soil with compost or a balanced slow-release fertilizer to supply necessary nutrients. Ensure the soil is loose and crumbly to encourage root expansion.
Where Should You Relocate Your Gypsum Grama?
Gypsum grama thrives in full sun, so select a spot that receives at least 6-8 hours of direct sunlight daily. This will ensure the plant grows robustly and healthily, producing vibrant foliage.
What Equipments Should You Prepare Before Transplantation Gypsum Grama?
Gardening Gloves
To safeguard your hands while handling soil and plants.
Shovel or Spade
For excavating the plant and creating a new hole in the ground.
Pruning Shears
To trim any damaged roots or leaves during the relocation process.
Watering Can or Hose
To hydrate the plant before and after moving it.
Trowel
For more precise digging and planting tasks.
Wheelbarrow
To transport the plant if it is large.
How Do You Remove Gypsum Grama from the Soil?
How Do You Remove Gypsum Grama from the Soil?
From Ground: First, moisten the gypsum grama plant to dampen the soil. Then, dig a wide trench around the plant using a shovel or spade, ensuring the plant's root ball remains intact. Carefully work the spade beneath the root ball to lift the plant from its original spot.From Pot: Water the gypsum grama plant to keep the soil moist. Gently squeeze the pot sides or tap it to loosen the soil. Carefully tip the pot and ease the plant out, ensuring you support the base to keep the root ball intact.From Seedling Tray: Water the gypsum grama seedlings to make the soil easier to work with. Use a trowel to gently lift each seedling, ensuring you take a good portion of the soil around the roots to keep them undisturbed.
Step-by-Step Guide for Transplanting Gypsum Grama
Hole Preparation
Excavate a hole in the new location that is twice as wide and the same depth as the gypsum grama plant's root ball.
Amend Soil
Optionally, incorporate compost or organic matter into the hole to enhance soil structure.
Plant Placement
Carefully position the gypsum grama plant in the center of the hole, ensuring it sits at the same depth as it was in its previous spot.
Backfill Soil
Refill the hole with the excavated soil, pressing it down gently but firmly to eliminate air pockets.
Watering
Thoroughly water the relocated gypsum grama plant immediately after planting to help settle the soil around the roots.
How Do You Care For Gypsum Grama After Transplanting?
Watering
Keep the soil around the gypsum grama consistently moist, but not waterlogged, for the initial weeks post-transplant to aid in root establishment.
Mulching
Apply a layer of mulch around the base of the gypsum grama plant to retain soil moisture and regulate temperature.
Monitoring
Regularly inspect the plant for signs of stress like wilting or yellowing leaves and address any issues promptly.
Pruning
Trim any dead or damaged foliage to help the plant direct its energy towards new growth.
Troubleshooting Common Issues with Gypsum Grama Transplantation.
When is the best time to transplant gypsum grama?
Early to late spring is ideal for relocating gypsum grama to ensure healthy growth.
How much space should I leave between gypsum grama plants?
Space gypsum grama plants 12-24 inches (30-60 cm) apart to allow for proper growth.
What soil type is best for transplanting gypsum grama?
Gypsum grama prefers well-draining soil with a sandy or loamy texture for optimal growth.
How should I prepare the soil before transplanting gypsum grama?
Loosen the soil and mix in organic compost to provide essential nutrients for gypsum grama.
How deep should I plant gypsum grama during transplanting?
Place gypsum grama in a hole just deep enough to cover its roots completely.
What should I do immediately after transplanting gypsum grama?
Water gypsum grama thoroughly to establish its roots and ensure it gets a good start.
Is mulching necessary after transplanting gypsum grama?
Mulch around gypsum grama to retain moisture and suppress weeds, but avoid touching the stems.
How often should I water gypsum grama after transplanting?
Water gypsum grama regularly, keeping the soil consistently moist but not waterlogged until established.
What if gypsum grama shows signs of transplant shock?
Continue watering and provide some shade if needed; plants often recover with time.
How can I protect gypsum grama from pests after transplanting?
Keep the area weed-free and inspect regularly for pests; use organic solutions if necessary.


