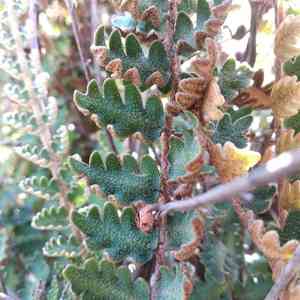
How to Transplant Wavy scaly cloakfern?
Relocate wavy scaly cloakfern during the period of renewal and development, generally from late spring's bloom through the early part of summer, providing a mix of warmth and established sunlight. Select a site that receives partial shade and possesses good drainage. When moving wavy scaly cloakfern to a different spot, guarantee minimal disruption to its root system to foster robust settling.
Necessary Preparations Before Relocating Wavy Scaly Cloakfern?
Optimal Period for Transplanting Wavy Scaly Cloakfern?
The ideal time for moving wavy scaly cloakfern is at the onset of warmer weather, when the sun's intensity is moderate – typically from late spring through the peak of summer. This timeframe provides wavy scaly cloakfern with an excellent balance of mild temperatures and extended daylight, which are vital for the plant's recovery and root establishment after being moved. Additionally, this allows the plant to gain strength before colder months arrive. A helpful tip: this timely relocation ensures your wavy scaly cloakfern gets a strong start in its new spot!
Recommended Spacing Between Wavy Scaly Cloakfern Plants?
When transplanting wavy scaly cloakfern, a good guideline is to position them 12-18 inches (30-45 cm) apart. This spacing ensures each plant has ample room to expand and grow without becoming overcrowded, guaranteeing they receive the necessary nutrients and air circulation.
Best Soil Mixture for Wavy Scaly Cloakfern Transplanting?
For wavy scaly cloakfern, prepare a soil that drains well and is rich in organic material. A light application of a balanced, slow-release fertilizer will give your wavy scaly cloakfern an excellent start. Aim for a soil pH that is slightly acidic to neutral for optimal growth.
Where to Replant Your Wavy Scaly Cloakfern?
Select a site for wavy scaly cloakfern that receives ample sunlight, ideally full to partial sun. Ensuring that wavy scaly cloakfern is exposed to the sun for at least 4-6 hours daily will encourage robust growth and vitality of the plant.
Equipment Required Before Transplanting Wavy Scaly Cloakfern?
Gardening Gloves
To safeguard your hands while handling soil and the plant.
Shovel or Spade
For digging around and beneath the plant's root ball.
Wheelbarrow or Plant Tray
To move the plant from its original spot to the new location.
Watering Can or Hose
To hydrate the plant before and after the transplanting process.
Pruning Shears
To trim any damaged roots or foliage.
Trowel
To assist with creating smaller holes or adjusting soil around the plant.
Measuring Tape
To determine the correct depth and width when preparing the new site.
How to Extract Wavy Scaly Cloakfern from the Soil?
How to Extract Wavy Scaly Cloakfern from the Soil?
From Ground: First, moisten the wavy scaly cloakfern plant's soil to facilitate easier removal. Dig a wide circle around the plant using a shovel or spade, being careful not to harm the root ball. Gently leverage the spade under the root ball to free it from the earth and carefully lift the plant.From Pot: Start by watering the wavy scaly cloakfern to make the soil more pliable. Turn the pot on its side, hold the plant by its base, and gently tap the bottom of the pot to encourage the plant to slide out. If the plant is stuck, use a trowel to loosen the soil around the pot's edges.From Seedling Tray: After watering, carefully use a trowel or your fingers to lift the wavy scaly cloakfern seedling from the tray. Be gentle to minimize root damage and avoid disturbing nearby seedlings.
Step-by-Step Guide for Relocating Wavy Scaly Cloakfern
Preparation
Gather all necessary tools for transplanting wavy scaly cloakfern. Ensure everything is within reach for a smooth and efficient process.
Removal
Follow the appropriate removal procedure based on where the wavy scaly cloakfern is currently planted, making sure to keep as much of the root ball intact as possible.
Transportation
Once removed, promptly place the wavy scaly cloakfern into a wheelbarrow or on a plant tray to move it to the new location, preventing the roots from drying out.
Planting Hole
Dig a hole in the ground that is twice as wide and as deep as the wavy scaly cloakfern's root ball. Loosening the soil around the hole will help the roots spread easily.
Positioning
Place the wavy scaly cloakfern in the center of the hole. The top of the root ball should be level with the surrounding soil surface to ensure proper growth.
Backfilling
Carefully fill the hole around the wavy scaly cloakfern with soil. Gently press down the soil to eliminate air pockets, but avoid compacting it too tightly as this can impede root growth.
Watering
Thoroughly water the wavy scaly cloakfern after planting to settle the soil and hydrate the roots. This will also help remove any remaining air gaps around the roots.
Post-Transplant Care for Wavy Scaly Cloakfern
Monitoring
Regularly observe the wavy scaly cloakfern for indications of stress, such as wilting or discolored leaves, and address its needs promptly.
Watering
Ensure the soil around the wavy scaly cloakfern remains consistently moist but not waterlogged, especially during the initial weeks, to support the development of a strong root system.
Mulching
Apply a layer of mulch around the base of the wavy scaly cloakfern to help retain moisture, regulate soil temperature, and reduce competition from weeds.
Pruning
Trim any damaged or diseased foliage to direct the wavy scaly cloakfern's energy towards establishing new growth.
Support
If the wavy scaly cloakfern is tall or top-heavy, consider providing stakes to protect it from wind or physical damage until it is firmly established in its new location.
Addressing Common Issues During Wavy Scaly Cloakfern Transplantation.
When is the best time to transplant wavy scaly cloakfern for optimal growth?
The prime period is during the cooler days of late spring or the beginning of summer to aid root establishment.
What is the recommended spacing for wavy scaly cloakfern plants when transplanting?
Aim for a generous layout, placing your wavy scaly cloakfern approximately 12-18 inches (30-45 cm) apart, allowing ample room for growth.
Why are my transplanted wavy scaly cloakfern plants wilting?
Wilting after transplanting can indicate water stress; ensure you are providing consistent moisture without overwatering.
What soil conditions are ideal for successful wavy scaly cloakfern transplantation?
Plant wavy scaly cloakfern in well-draining soil enriched with organic matter to encourage healthy root development.
Can I transplant wavy scaly cloakfern in full sun?
While wavy scaly cloakfern prefers some shade, it can tolerate sunnier spots if adequately watered.
How deep should I plant wavy scaly cloakfern during transplantation?
The rootball should be positioned level with the surrounding soil to prevent stem rot or drying roots.
What should I do if transplantation causes wavy scaly cloakfern leaves to turn brown?
Browning leaves may signal shock; try to keep the soil moist and shield the plant from extreme sun or winds.
How often should I water wavy scaly cloakfern after transplanting?
Water newly transplanted wavy scaly cloakfern regularly to maintain consistently moist soil, reducing frequency as the plant establishes.
Is there a specific method for removing wavy scaly cloakfern from its current pot?
Gently loosen the roots and remove wavy scaly cloakfern without excessively disturbing the root ball.
What signs indicate my wavy scaly cloakfern needs a larger space?
If wavy scaly cloakfern appears cramped or its growth is stunted, it's time to transplant it into a larger area.


