How to Transplant Soxman's milkvetch?
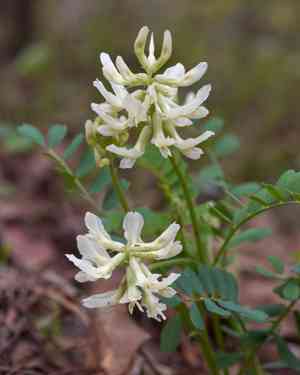
Soxman's milkvetch flourishes when relocated from early to mid-spring. Select a bright spot with soil that drains effectively. Refrain from transplanting while it is blooming to lessen the plant's strain.
What Preparations are Needed Before Transplanting Soxman's Milkvetch?
What is the Ideal Time for Transplanting Soxman's Milkvetch?
The best period to relocate soxman's milkvetch, a Perennial plant, is during early to mid-spring. Moving it at this time ensures the plant benefits from mild temperatures and increased rainfall, allowing its root system to establish before the summer heat. This method promotes robust growth and minimizes transplant shock, guaranteeing a successful move to a new spot.
How Much Space Should You Leave Between Soxman's Milkvetch Plants?
Ensure each soxman's milkvetch plant is spaced 18-24 inches (45-60 cm) apart. This provides ample room for individual growth without excessive competition for resources like sunlight and nutrients.
What is the Best Soil Mix for Soxman's Milkvetch Transplanting?
Prepare soil that drains well and has a low organic matter content. Sandy or rocky soil types are most suitable. Before transplanting, incorporate a balanced base fertilizer to aid in plant establishment. A 10-10-10 NPK ratio is perfect for supporting initial growth.
Where Should You Relocate Your Soxman's Milkvetch?
Select a sunny location where soxman's milkvetch will receive at least 6-8 hours of direct sunlight daily. This promotes vigorous growth and supports its life cycle. Avoid shaded areas to ensure optimal light exposure.
What Equipments Should You Prepare Before Transplantation Soxman's Milkvetch?
Gardening Gloves
To safeguard your hands while handling soil and plants.
Shovel or Spade
Crucial for digging and extracting the plant from its original spot.
Trowel
Useful for manipulating soil and smaller plants.
Garden Fork
Helps to loosen the earth around the plant.
Watering Can or Hose
For hydrating the plant before and after its relocation.
Mulch
To assist in retaining soil moisture around the newly transplanted plant.
Wheelbarrow
For moving the plant and soil if necessary.
Pruning Shears
To trim any damaged roots or foliage.
Stakes and Ties
To support the plant if it is tall or unstable.
How Do You Remove Soxman's Milkvetch from the Soil?
How Do You Remove Soxman's Milkvetch from the Soil?
From Ground: First, hydrate the soxman's milkvetch plant to moisten the soil. Next, excavate a wide trench around the plant using a shovel or spade, ensuring the root ball remains intact. Carefully work the spade beneath the root ball to lift the plant from its initial position.From Pot: Thoroughly water the soxman's milkvetch plant. Gently invert the pot while supporting the plant with your hand. Tap the pot's base to dislodge the plant and slide it out, taking care not to harm the roots.From Seedling Tray: Water the seedlings to facilitate their removal. Use a pencil or small tool to gently push the seedlings up from the tray's bottom. Handle seedlings by their leaves to prevent damage to delicate stems and roots.
Step-by-Step Guide for Transplanting Soxman's Milkvetch
Site Preparation
Prepare the transplanting location by digging a hole twice as wide and equally deep as the plant's root ball.
Soil Amending
Mix the excavated soil with compost or organic matter to enhance nutrient content and drainage.
Transplant Placement
Position the soxman's milkvetch in the hole, ensuring it sits at the same depth as it did in its previous spot. The top of the root ball should be level with the surrounding ground.
Backfilling
Refill the hole with the amended soil, gently pressing it around the plant to eliminate any air pockets.
Watering
Thoroughly water the soxman's milkvetch after planting to help settle the soil around its roots.
Mulching
Apply a layer of mulch around the plant's base to aid in moisture retention and regulate soil temperature.
Staking
If the plant is tall or unstable, use stakes and ties to provide support until it develops stronger roots.
How Do You Care For Soxman's Milkvetch After Transplanting?
Watering
Keep the soil around the soxman's milkvetch consistently moist, but not waterlogged, for the initial weeks post-transplant to encourage robust root development.
Weeding
Maintain the area around the soxman's milkvetch free of weeds to minimize competition for nutrients and water.
Monitoring
Regularly inspect the plant for indications of stress, such as wilting or yellowing leaves, and implement corrective measures as needed.
Protection
Safeguard the soxman's milkvetch from pests and harsh weather conditions by employing suitable methods, such as netting or temporary shading.
Pruning
Remove any damaged or dead foliage to promote healthy growth and prevent disease.
Troubleshooting Common Issues with Soxman's Milkvetch Transplantation.
When is the best time to transplant soxman's milkvetch?
The optimal period to transplant soxman's milkvetch is in early to mid-spring for improved root establishment.
How much space should I give between soxman's milkvetch plants?
Space soxman's milkvetch plants 18-24 inches (45-60 cm) apart to provide them with ample room for growth.
What type of soil is best for soxman's milkvetch?
Soxman's milkvetch thrives in well-drained, sandy or loamy soil with a neutral to slightly alkaline pH.
How deep should I plant soxman's milkvetch's roots?
Plant soxman's milkvetch's roots at the same depth they were in their original location to prevent stress.
How should I water soxman's milkvetch after transplanting?
Water soxman's milkvetch thoroughly after transplanting and maintain consistent moisture until the plant establishes new roots.
How do I prepare soxman's milkvetch for transplanting?
Prepare soxman's milkvetch by gently loosening the soil around the roots, ensuring minimal damage during extraction.
What is the best way to handle soxman's milkvetch during transplanting?
Handle soxman's milkvetch carefully, supporting the root ball to prevent root damage and ensure successful transplantation.
Should I fertilize soxman's milkvetch after transplanting?
Wait a few weeks before applying a balanced fertilizer to soxman's milkvetch to avoid shocking the plant.
How do I protect soxman's milkvetch from transplant shock?
Use a root stimulator and mulch around soxman's milkvetch to retain moisture and reduce transplant shock.
What should I avoid when transplanting soxman's milkvetch?
Avoid disturbing soxman's milkvetch's roots excessively and transplanting during very hot or very cold weather.



