How to Transplant San miguel milk-vetch?
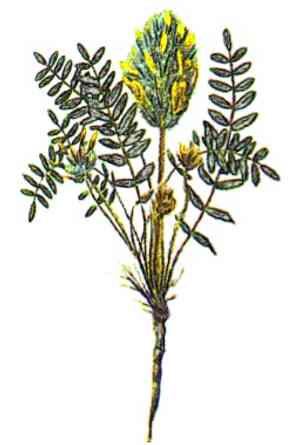
San miguel milk-vetch flourishes when relocated during the pleasant temperatures of early to late spring or the moderate period of mid-autumn. Select a bright, adequately drained spot. Verify that the site replicates its natural surroundings, steering clear of excessively damp conditions.
What Preparations are Needed Before Transplanting San Miguel Milk-vetch?
What is the Ideal Time for Transplanting San Miguel Milk-vetch?
The best time to move san miguel milk-vetch is during early to late spring and mid-fall. These periods offer mild temperatures and adequate moisture, which lessens transplant shock and aids root development. Selecting these seasons aligns with the plant's natural growth cycle, ensuring better survival and strong growth.
How Much Space Should You Leave Between San Miguel Milk-vetch Plants?
For san miguel milk-vetch, maintain a distance of 18-24 inches (45-60 cm) between each plant. This provides ample room for healthy growth without competition for resources.
What is the Best Soil Mix for San Miguel Milk-vetch Transplanting?
Prepare well-draining soil for san miguel milk-vetch with a sandy or loamy texture. Incorporate a balanced fertilizer like 10-10-10 (N-P-K) to provide your plants with a nourishing start.
Where Should You Relocate Your San Miguel Milk-vetch?
Select a sunny location for san miguel milk-vetch that receives at least 6-8 hours of direct sunlight daily. This plant thrives in full sun and blooms beautifully under such conditions.
What Equipments Should You Prepare Before Transplantation San Miguel Milk-vetch?
Gardening Gloves
To safeguard your hands while handling soil and plants.
Shovel or Spade
For excavating around the plant and preparing the new planting site.
Hand Trowel
Useful for precise digging and moving smaller quantities of earth.
Watering Can or Hose
To hydrate the plant before and after its relocation.
Wheelbarrow
To transport the plant and soil if necessary.
Pruning Shears
For trimming any damaged roots or branches.
Garden Fork
Helpful for loosening soil and extracting plants from containers or trays.
Mulch
To assist in retaining moisture post-transplanting.
How Do You Remove San Miguel Milk-vetch from the Soil?
How Do You Remove San Miguel Milk-vetch from the Soil?
From Ground: First, water the san miguel milk-vetch plant to moisten the soil. Next, dig a wide trench around the plant using a shovel or spade, ensuring the plant's root ball stays intact. Carefully work the spade beneath the root ball to lift the plant from its original spot.From Pot: Gently tap the pot's sides to loosen the soil. Turn the pot sideways and carefully slide the plant out, making sure to support the root ball with your hand. If the plant is stuck, use a garden fork to loosen the soil around the edges.From Seedling Tray: Using a hand trowel or a small garden fork, gently lift the seedling from the tray, supporting the root ball. Avoid pulling the plant by its stem to prevent damage. Gently shake off any excess soil.
Step-by-Step Guide for Transplanting San Miguel Milk-vetch
Prepare the new location
Dig a hole twice as wide and as deep as the root ball of the san miguel milk-vetch plant. This ensures ample space for root expansion.
Loosen the soil at the new location
Using a garden fork, gently loosen the soil at the bottom of the hole. This aids in proper root penetration.
Transfer the plant
Place the san miguel milk-vetch plant in the center of the hole, ensuring the root ball is level with the surrounding ground. Adjust the depth if needed.
Backfill the hole
Fill the hole with soil, gently pressing it down around the root ball to remove air pockets. Ensure the plant is stable and upright.
Watering the plant
Water the san miguel milk-vetch plant thoroughly immediately after transplanting to help settle the soil around the roots.
Add mulch
Apply a layer of mulch around the plant's base, keeping it a few inches away from the stem to prevent rot. Mulching helps retain moisture and reduces weed growth.
How Do You Care For San Miguel Milk-vetch After Transplanting?
Watering
Keep the soil around the san miguel milk-vetch consistently moist, but not waterlogged, for the initial weeks post-transplant to encourage strong root development.
Checking plant stability
Regularly verify that the plant is upright and stable, correcting any leaning or movement during the early stages.
Fertilization
Avoid immediate fertilization; wait several weeks until the plant exhibits signs of new growth.
Monitoring for stress
Observe for indications of transplant shock, such as wilting or yellowing leaves, and provide additional care as necessary (e.g., more frequent watering or shading).
Weed control
Regularly remove weeds around the san miguel milk-vetch to minimize competition for nutrients and water.
Troubleshooting Common Issues with San Miguel Milk-vetch Transplantation.
When is the best time to transplant san miguel milk-vetch?
Relocate san miguel milk-vetch from early to late spring or mid-fall for optimal growth.
How much space should I leave between san miguel milk-vetch plants?
Space san miguel milk-vetch plants 18-24 inches (45-60 cm) apart for healthy growth and air circulation.
How should I prepare the soil for san miguel milk-vetch?
Ensure soil is well-draining and enriched with compost to boost fertility and structure.
What are the initial watering needs after transplanting san miguel milk-vetch?
Water thoroughly after transplanting san miguel milk-vetch, keeping the soil consistently moist for the first few weeks.
How do I prevent transplant shock in san miguel milk-vetch?
Gradually acclimate san miguel milk-vetch to its new environment by exposing it to outdoor conditions for a few days.
What is the ideal planting depth for san miguel milk-vetch?
Transplant san miguel milk-vetch at the same depth it was in its original container to prevent root stress.
Can I transplant san miguel milk-vetch in hot weather?
Avoid transplanting san miguel milk-vetch during hot weather; opt for cooler periods in early spring, late spring, or mid-fall.
What should I do if san miguel milk-vetch wilts after transplanting?
Ensure san miguel milk-vetch receives adequate water and some shade to reduce stress and promote recovery.
How do I handle san miguel milk-vetch's roots during transplanting?
Be gentle with san miguel milk-vetch's roots, ensuring they are not damaged or compacted during the process.
When can I expect new growth after transplanting san miguel milk-vetch?
New growth in san miguel milk-vetch typically appears within a few weeks if transplanting conditions are optimal.



