How to Transplant Indian milkvetch?
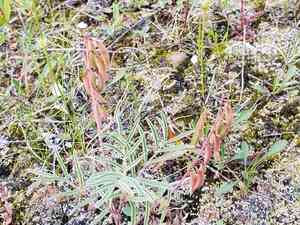
Relocate indian milkvetch from early spring to mid-summer, as this period encourages robust root development. Select a sunny location featuring soil that drains effectively. If moving the plant becomes necessary, proceed with care to protect its fragile root structure.
What Preparations are Needed Before Transplanting Indian Milkvetch?
What is the Ideal Time for Transplanting Indian Milkvetch?
The optimal period to relocate indian milkvetch is during the pleasant warmth of early summer. This timeframe promotes strong root development without the stress of colder temperatures. Moving indian milkvetch in this season allows it to settle in while the ground is warm, accelerating root growth and increasing its chances of survival. Helpful hint: indian milkvetch will flourish with this initial advantage!
How Much Space Should You Leave Between Indian Milkvetch Plants?
Hello, gardening enthusiast! For your indian milkvetch, you'll want to provide ample room for them to thrive. Aim to position them approximately 12-24 inches (30-60 cm) apart. This spacing ensures each plant can grow without competing for essential resources. Happy planting!
What is the Best Soil Mix for Indian Milkvetch Transplanting?
For your indian milkvetch, let's prepare the soil perfectly! A loamy, well-draining soil type is ideal for these perennial plants. Incorporate some organic compost or a balanced, slow-release fertilizer before planting to give them that beneficial nutrient boost they'll appreciate.
Where Should You Relocate Your Indian Milkvetch?
Your indian milkvetch enjoys basking in the sun! Locate a sunny spot in your garden that receives at least 6 hours of direct sunlight daily. This will ensure your indian milkvetch obtains the energy it requires to grow robust and healthy. Remember to water with care!
What Equipments Should You Prepare Before Transplantation Indian Milkvetch?
Gardening Gloves
To safeguard your hands while handling soil and plants.
Shovel or Spade
For digging around and beneath the plant to remove it with minimal root disturbance.
Garden Fork
To loosen the soil surrounding the plant, which aids in gently extracting the root ball.
Trowel
For more precise or delicate work near the plant's roots and for excavating the new planting hole.
Watering Can or Hose
To hydrate the plant before and after its relocation.
Wheelbarrow or Garden Cart
To move the indian milkvetch plant from one spot to another without causing damage.
Pruning Shears
To trim any damaged roots or foliage prior to transplanting.
Plant Support Stakes
If indian milkvetch is large or has a taller growth habit, to offer stability once transplanted.
Mulch
To assist in retaining moisture around the new planting area after transplanting.
How Do You Remove Indian Milkvetch from the Soil?
How Do You Remove Indian Milkvetch from the Soil?
From Ground: First, water the indian milkvetch plant to moisten the soil. Next, dig a wide trench around the plant using a shovel or spade, ensuring the plant's root ball remains whole. Carefully work the spade beneath the root ball to lift the plant from its original position.From Pot: Begin by watering the indian milkvetch to help the roots slide out more easily. Turn the pot on its side and gently tap while supporting the plant's base. As the plant emerges, support its root ball to prevent it from breaking apart.From Seedling Tray: Water the seedlings thoroughly before starting. Using a trowel or your fingers, carefully separate the individual indian milkvetch seedlings by their root clusters. Handle them gently to minimize root disruption.
Step-by-Step Guide for Transplanting Indian Milkvetch
Preparing New Site
Excavate a hole in the ground where the indian milkvetch will be moved. The hole should be twice as wide but equal in depth to the root ball.
Preparing indian milkvetch
Trim any broken or excessively long roots with clean pruning shears. This will encourage new growth and simplify the transplanting process.
Placing indian milkvetch into Hole
Carefully position indian milkvetch in the center of the new hole. Ensure the plant is situated at the same soil depth as it was in its previous location or container.
Backfilling
Gradually backfill soil around the root ball, gently firming it down until the hole is filled and the indian milkvetch is secure.
Watering
Water the indian milkvetch thoroughly to settle the soil and hydrate the roots. This is vital to eliminate air pockets and provide necessary moisture.
Mulching
Apply a layer of mulch around the base of indian milkvetch without touching the stem. This helps to maintain moisture and regulate temperature fluctuations.
Support Installation
If needed, insert support stakes into the ground next to indian milkvetch and loosely tie the plant to them for added stability.
How Do You Care For Indian Milkvetch After Transplanting?
Monitoring
Regularly inspect the indian milkvetch for indications of transplant shock, such as wilting or discolored leaves.
Watering
Continue to water the indian milkvetch plant as required to keep the soil moist, especially during the initial growing season, to aid in root establishment.
Staking
Adjust support stakes as the indian milkvetch grows and becomes more established to prevent damaging the stem or roots.
Pruning
Trim any dead or damaged foliage as necessary to encourage new growth and to maintain plant health.
Protection from Pests
Monitor the indian milkvetch for any signs of pests or diseases, and take appropriate actions to address these issues if they arise.
Troubleshooting Common Issues with Indian Milkvetch Transplantation.
When's the best time to transplant indian milkvetch?
Relocate indian milkvetch when the weather is mild, typically in late spring to midsummer for optimal root establishment.
How far apart should I plant indian milkvetch?
Space indian milkvetch approximately 12-24 inches (30-60 cm) apart to ensure sufficient room for mature growth.
What's the proper depth for transplanting indian milkvetch?
Dig a hole as deep as the root ball and twice as wide to give roots a good start.
What should I do if indian milkvetch wilts after transplanting?
Ensure adequate watering without waterlogging, provide shade if necessary, and avoid immediate fertilization.
Why is my transplanted indian milkvetch not flowering?
It may require time to establish. Ensure it receives full sun and verify if the soil is suitable.
How do I prepare the soil for indian milkvetch before transplanting?
Incorporate compost into the soil to enhance fertility and drainage prior to transplanting indian milkvetch.
Can I transplant indian milkvetch in cooler weather?
Moving indian milkvetch during cooler weather can stress the plant. Adhere to warmer, late spring to midsummer periods.
How often should I water indian milkvetch after transplanting?
Water deeply after transplanting, then regularly, allowing for slight drying between watering sessions.
What should I do if indian milkvetch shows signs of transplant shock?
Keep the soil consistently moist and shield indian milkvetch from extreme temperatures and winds.
How long does it take for indian milkvetch to settle after transplanting?
It varies, but typically indian milkvetch settles within a few weeks to months if conditions are favorable.



