How to Transplant Sonne's arnica?
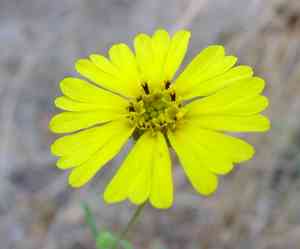
The ideal time to relocate sonne's arnica is from early spring through its latter part, since this timeframe encourages the best root development. Select a location that receives full sun to partial shade and has soil that drains effectively to guarantee a successful move.
What Preparations are Needed Before Transplanting Sonne's Arnica?
What is the Ideal Time for Transplanting Sonne's Arnica?
The best time for relocating sonne's arnica is during early to late spring. This period allows the plant to establish its root system in cool, damp soil before summer's heat. Moving sonne's arnica in spring promotes better root development, minimizes transplant shock, and maximizes growth potential, leading to a strong perennial display.
How Much Space Should You Leave Between Sonne's Arnica Plants?
When moving sonne's arnica, ensure plants are spaced 12-18 inches (30-45 cm) apart. This provides ample room for growth and guarantees adequate air circulation, which is vital for their health.
What is the Best Soil Mix for Sonne's Arnica Transplanting?
For sonne's arnica, use well-draining soil that is slightly acidic to neutral (pH 6.0-7.0). Incorporate compost or aged manure as a foundational fertilizer to supply essential nutrients. This preparation will create a supportive environment for your plant.
Where Should You Relocate Your Sonne's Arnica?
Select a spot that receives full sun to partial shade for transplanting sonne's arnica. This plant thrives in sunlight but can also do well in areas with some afternoon shade, particularly in warmer regions.
What Equipments Should You Prepare Before Transplantation Sonne's Arnica?
Gardening Gloves
To shield your hands while handling soil and the plant.
Small Spade or Shovel
To dig around the plant and lift it from its original spot.
Hand Trowel
Useful for excavating a hole in the new location.
Watering Can or Hose
For hydrating the plant before and after its relocation.
Pruners or Scissors
To trim any damaged roots or stems if necessary.
Wheelbarrow or Bucket
To safely transport the plant to its new position.
How Do You Remove Sonne's Arnica from the Soil?
How Do You Remove Sonne's Arnica from the Soil?
From Ground: First, moisten the sonne's arnica plant's soil. Then, dig a wide trench around the plant with a shovel or spade, keeping the root ball intact. Carefully work the spade beneath the root ball to lift the plant from its initial spot.From Pot: Water the sonne's arnica plant thoroughly before removal. Gently tap the pot's sides to loosen the soil. Carefully tilt the pot and slide the plant out, supporting its base.From Seedling Tray: Water the sonne's arnica seedlings before removal. Use a small tool or your fingers to gently scoop under the seedlings, lifting them without harming the roots.
Step-by-Step Guide for Transplanting Sonne's Arnica
Site Preparation
Ensure the new area is clear of weeds, rocks, or other debris. The soil should be loose and drain well.
Digging the Hole
Using a hand trowel, dig a hole in the new spot that is twice the width and depth of the plant's root ball.
Removing the Plant
Following the appropriate removal method, carefully lift the sonne's arnica plant from its original position.
Inspecting the Roots
Examine the roots for any signs of damage. Trim any broken or injured roots with pruners or scissors.
Positioning the Plant
Place the root ball into the prepared hole, ensuring the top of the root ball is level with the surrounding ground.
Filling the Hole
Fill the hole with soil, gently firming it around the plant's base to remove air pockets. Make sure the plant stands upright.
Watering
Thoroughly water the sonne's arnica plant after transplanting to help settle the soil around its roots.
How Do You Care For Sonne's Arnica After Transplanting?
Watering
Keep the soil around the sonne's arnica consistently damp, but not waterlogged, for the initial weeks post-transplant to encourage strong root development.
Mulching
Apply a layer of mulch around the plant's base to retain soil moisture and prevent weed growth.
Monitoring
Regularly check the plant for any indications of stress or pests. Address any issues promptly to ensure healthy growth.
Support
If necessary, provide support such as stakes or a small trellis to help the plant stay upright, especially if it's tall or in a windy location.
Troubleshooting Common Issues with Sonne's Arnica Transplantation.
When is the ideal time to transplant sonne's arnica?
The best period to relocate sonne's arnica is from early to late spring.
How should I space sonne's arnica when transplanting?
Space sonne's arnica plants 12-18 inches (30-45 cm) apart for optimal growth.
How do I prepare the soil for transplanting sonne's arnica?
Use well-draining soil enriched with organic compost for sonne's arnica transplantation.
What should I do if sonne's arnica shows signs of stress post-transplant?
Water immediately and provide shade until the plant recovers.
How can I prevent root rot when transplanting sonne's arnica?
Ensure good soil drainage and avoid excessive watering to prevent root rot.
What should I consider when choosing a transplant location for sonne's arnica?
Select a site with partial to full sun exposure and well-draining soil.
How deep should I plant sonne's arnica in its new location?
Plant sonne's arnica at the same depth as it was in its previous container.
How often should I water sonne's arnica after transplanting?
Water sonne's arnica regularly, but ensure the soil is only slightly moist, not saturated.
What if sonne's arnica leaves turn yellow after transplanting?
Yellow leaves may indicate overwatering or poor drainage; adjust irrigation practices accordingly.
Can I use fertilizers after transplanting sonne's arnica?
Wait a few weeks before applying a balanced fertilizer to avoid shocking sonne's arnica.



