How to Transplant Inland serviceberry?
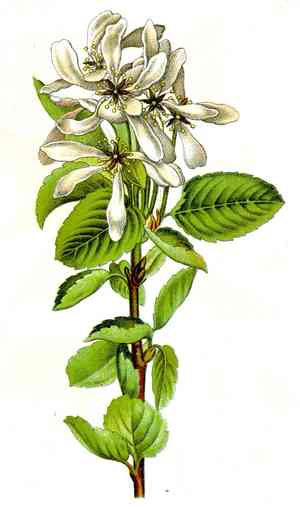
Inland serviceberry flourishes most effectively when relocated during the moderate weather of early to late spring or mid-autumn. Ideal spots offer ample sunlight to partial shade and feature soil that drains efficiently. Think about applying mulch around the plant's base to help preserve hydration.
Essential Preparations Before Relocating Inland Serviceberry?
Optimal Timing for Moving Inland Serviceberry?
The best periods for relocating inland serviceberry are early to late spring and mid-autumn. These seasons provide moderate temperatures and adequate soil moisture, fostering robust root development. Transplanting at these times minimizes heat stress and maximizes growth potential, ensuring inland serviceberry successfully adapts to its new site.
Required Spacing Between Inland Serviceberry Plants?
Ensure each inland serviceberry plant is positioned 12-15 feet (3.6-4.5 meters) apart to provide ample room for growth.
Ideal Soil Mixture for Inland Serviceberry Relocation?
Inland serviceberry thrives in well-draining soil. Incorporate organic compost into the soil to enrich it and add a balanced base fertilizer to encourage healthy development.
Selecting a New Location for Your Inland Serviceberry?
Choose a sunny spot that receives at least 6-8 hours of direct sunlight daily for transplanting inland serviceberry.
Equipment Needed Before Transplanting Inland Serviceberry?
Gardening Gloves
To safeguard your hands while handling soil and the plant.
Shovel or Spade
For carefully excavating the plant and its root ball from its original spot.
Garden Trowel
To assist in digging smaller holes and working around the plant's root system.
Watering Can or Hose
For hydrating the plant before and after its relocation.
Wheelbarrow or Large Container
To move the plant if a significant distance is involved.
Pruning Shears
To trim any damaged roots or branches as needed.
Compost or Well-Rotted Manure
To enrich the soil at the new planting location.
How to Extract Inland Serviceberry from the Ground?
How to Extract Inland Serviceberry from the Ground?
From Ground: First, moisten the inland serviceberry plant's soil. Then, dig a wide trench around the plant using a shovel or spade, ensuring the plant's root ball remains intact. Carefully work the spade beneath the root ball to lift the plant from its initial position.From Pot: Thoroughly water the inland serviceberry plant. Gently tilt the pot to one side and tap its sides to loosen the soil. Support the plant with one hand and carefully ease it out by the base of the stem. If necessary, use a garden trowel to further loosen the edges.From Seedling Tray: Water the seedlings to keep the soil damp. Using a garden trowel or your fingers, gently lift the seedlings from the tray, taking care to handle them by the leaves rather than the delicate stems or roots.
Step-by-Step Guide for Relocating Inland Serviceberry
Hole Preparation
Dig a hole at the new site that is twice as wide and slightly deeper than the inland serviceberry's root ball. Fill the bottom with some compost or well-rotted manure to enrich the soil.
Plant Placement
Position the inland serviceberry in the center of the hole, ensuring it sits at the same depth as it was in its previous location. Backfill the hole with the original soil mixed with compost.
Soil Firming
Gently compact the soil around the base of the plant, eliminating any air pockets which can dry out the roots.
Watering In
Water the plant thoroughly after planting to settle the soil and help the plant establish in its new location.
Post-Transplantation Care for Inland Serviceberry?
Mulching
Apply a 2-3 inch layer of mulch around the base of the inland serviceberry to help retain moisture, suppress weeds, and regulate soil temperature.
Monitoring
Regularly inspect your inland serviceberry plant for indications of stress or pests/diseases. Address any issues promptly to ensure healthy growth.
Support
If your inland serviceberry plant is tall or top-heavy, consider staking it to provide additional support as it becomes established in its new location.
Resolving Common Issues with Inland Serviceberry Relocation.
When is the best time to transplant inland serviceberry?
Early spring to late spring and mid-fall are ideal for transplanting inland serviceberry.
How much space should I leave between inland serviceberry plants?
Space each inland serviceberry plant 12-15 feet (3.6-4.5 meters) apart for optimal growth.
How do I prepare the soil for transplanting inland serviceberry?
Enrich the soil with compost and ensure good drainage before transplanting inland serviceberry.
What size hole should I dig for inland serviceberry transplants?
Dig a hole twice the width and depth of the root ball to accommodate inland serviceberry.
How do I handle inland serviceberry roots during transplant?
Gently untangle and spread out the roots of inland serviceberry before placing them in the hole.
How much water does newly transplanted inland serviceberry need?
Water inland serviceberry thoroughly after transplanting, and keep the soil consistently moist but not waterlogged.
Should I use mulch around inland serviceberry after transplanting?
Yes, apply a 2-3 inch (5-7.5 cm) layer of mulch around inland serviceberry to retain moisture and control weeds.
How can I reduce transplant shock in inland serviceberry?
Keep roots moist, provide shade, and avoid disturbing the roots to minimize transplant shock for inland serviceberry.
What's the ideal temperature for transplanting inland serviceberry?
Transplant inland serviceberry when daytime temperatures are between 55-70°F (13-21°C).
Is fertilizing necessary after transplanting inland serviceberry?
Wait a few weeks after transplanting inland serviceberry before applying a balanced, slow-release fertilizer.



