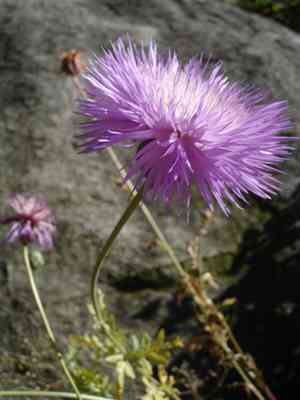
How to Transplant Amberboa moschata?
Amberboa moschata flourishes when relocated from the beginning of spring until its end, owing to ideal growing circumstances. Select a bright spot featuring soil that drains effectively. To achieve superior outcomes, refrain from overly disturbing the root system.
What Preparations are Needed Before Transplanting Amberboa Moschata?
What is the Ideal Time for Transplanting Amberboa Moschata?
The best time to move amberboa moschata is during the shift from early to late spring. This period allows the plant to develop its root system before summer's heat. Transplanting at this time promotes strong root growth, reduces stress, and supports vigorous development, ensuring a thriving and colorful display throughout its growing season.
How Much Space Should You Leave Between Amberboa Moschata Plants?
When relocating amberboa moschata, make sure to space the plants 12-18 inches (30-45 cm) apart. This provides ample room for growth and prevents competition for nutrients and sunlight.
What is the Best Soil Mix for Amberboa Moschata Transplanting?
For amberboa moschata, select a well-draining soil enriched with compost. Incorporate a balanced base fertilizer to supply essential nutrients. The soil should be light and loamy to support healthy root development.
Where Should You Relocate Your Amberboa Moschata?
Position amberboa moschata in a spot that receives full sunlight, ideally 6-8 hours daily. This ensures the plants get sufficient light to flourish and produce vibrant blooms.
What Equipments Should You Prepare Before Transplantation Amberboa Moschata?
Gardening Gloves
To shield your hands while handling soil and plants.
Hand Trowel
For digging small holes and working with soil.
Shovel or Spade
To excavate the plant from its original spot and create new planting holes.
Watering Can or Hose
To hydrate the plant before and after relocation.
Garden Fork
For loosening the soil surrounding the plant.
Wheelbarrow (optional)
For moving heavier plants if necessary.
Mulch
To help retain moisture and prevent weed growth around the newly planted specimen.
Stakes and Ties (if necessary)
To support the plant if it is tall or has weak stems.
How Do You Remove Amberboa Moschata from the Soil?
How Do You Remove Amberboa Moschata from the Soil?
From Ground: First, water the amberboa moschata plant to moisten the soil. Then, dig a wide trench around the plant using a shovel or spade, ensuring the plant's root ball remains intact. Carefully work the spade under the root ball to lift the plant from its original location.From Pot: Water the amberboa moschata thoroughly to ensure the soil is damp. Gently tap the sides of the pot to loosen the soil. Turn the pot sideways and slide the plant out, supporting the root ball with your hand to avoid damaging the roots.From Seedling Tray: Water the seedling tray to ensure the soil is moist. Use a small stick or a hand trowel to carefully lift the seedlings from the tray, ensuring you keep the soil intact around the root ball.
Step-by-Step Guide for Transplanting Amberboa Moschata
Prepare the Site
Dig a hole in the ground that is twice as wide and the same depth as the root ball of the amberboa moschata. Remove any weeds and debris from the area.
Remove the Plant
Follow the appropriate method to carefully remove the amberboa moschata from its original location, ensuring to keep the roots intact.
Place the Plant
Gently place the amberboa moschata into the prepared hole. Ensure that the top of the root ball is level with or slightly above the surrounding soil.
Backfill the Hole
Fill the hole with soil, gently pressing it down around the roots to eliminate air pockets. Avoid compacting the soil too hard.
Water Thoroughly
Give the transplanted amberboa moschata a good watering to help settle the soil and reduce transplant shock.
Mulch Around the Plant
Apply a layer of mulch around the plant, keeping it a few inches away from the stem to prevent rot.
How Do You Care For Amberboa Moschata After Transplanting?
Watering
Keep the soil around the amberboa moschata consistently moist, but not soggy, for the first few weeks after transplanting to help establish strong roots.
Monitoring
Regularly check the plant for signs of stress or transplant shock, such as wilting or yellowing leaves. Adjust care as needed.
Weeding
Keep the area around your amberboa moschata free from weeds to reduce competition for nutrients and water.
Pest Control
Watch for pests that may target your amberboa moschata and take action if needed. Consider using natural pest control methods.
Support
If the amberboa moschata is tall or leggy, use stakes and ties to provide support until it establishes strong, stable growth.
Troubleshooting Common Issues with Amberboa Moschata Transplantation.
When is the best time to transplant amberboa moschata?
Transplant amberboa moschata from early spring to late spring for optimal growth and establishment.
What is the ideal spacing for amberboa moschata when transplanting?
Space amberboa moschata plants 12-18 inches (30-45 cm) apart to allow proper growth and airflow.
How do I prepare the soil for transplanting amberboa moschata?
Loosen the soil 10 inches (25 cm) deep, enrich with compost, and ensure good drainage.
How should I water amberboa moschata after transplanting?
Water thoroughly after transplanting and keep the soil moist, but not waterlogged.
What should I do if amberboa moschata leaves turn yellow?
Check for overwatering or poor drainage and adjust watering habits accordingly.
Why are my amberboa moschata transplants wilting?
Wilting could be due to transplant shock. Ensure proper watering and partially shade the plants initially.
How deep should I plant amberboa moschata transplants?
Plant amberboa moschata transplants at the same depth they were growing in their containers.
What's the ideal temperature for transplanting amberboa moschata?
Transplant amberboa moschata when temperatures range from 55-75°F (13-24°C) to minimize stress.
How can I prevent pests on newly transplanted amberboa moschata?
Use a natural insecticide and check for pests regularly to keep amberboa moschata healthy.
Is mulching necessary for amberboa moschata after transplanting?
Mulching helps retain soil moisture and suppress weeds around transplanted amberboa moschata plants.


