How to Transplant Small flower century plant?
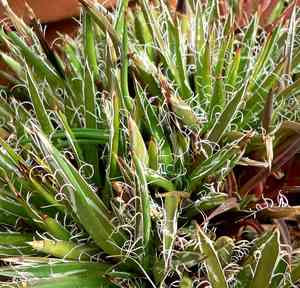
For optimal results, relocate small flower century plant during the mild temperatures of mid-to-late spring, as this period fosters strong root development. Choose a bright spot featuring soil that drains effectively, and perform the transplanting process delicately, prioritizing the safeguarding of the roots to guarantee successful integration.
What Preparations are Needed Before Transplanting Small Flower Century Plant?
What is the Ideal Time for Transplanting Small Flower Century Plant?
The optimal period for relocating small flower century plant is during the mild warmth of late spring. This season provides consistent temperatures conducive to root development without the harshness of summer heat. Moving small flower century plant at this time allows them to acclimate with increasing daylight, promoting robust growth. A friendly reminder: successful small flower century plants begin with thoughtful spring decisions!
How Much Space Should You Leave Between Small Flower Century Plant Plants?
When planting your small flower century plant, aim for a separation of approximately 24-36 inches (61-91 cm). This provides each small flower century plant ample room to flourish without crowding, ensuring sufficient nutrients and air circulation.
What is the Best Soil Mix for Small Flower Century Plant Transplanting?
For your small flower century plant's new location, select a soil that drains effectively. A blend of sand, loamy soil, and a small amount of compost will be perfect. Before transplanting, enrich the soil with a slow-release, balanced fertilizer to give your small flower century plant a healthy start.
Where Should You Relocate Your Small Flower Century Plant?
Choose a site where your small flower century plant will receive ample sunlight. A south-facing spot that gets at least 6 hours of direct sun daily will help your small flower century plant thrive by supplying the energy it requires through photosynthesis.
What Equipments Should You Prepare Before Transplantation Small Flower Century Plant?
Gardening Gloves
To safeguard your hands while handling soil and plants.
Shovel or Spade
For digging and moving the small flower century plant.
Hand Trowel
For more precise tasks and smaller excavation needs.
Watering Can or Hose
To hydrate the small flower century plant before and after relocation.
Pruning Shears
To remove any dead or damaged foliage.
Wheelbarrow or Garden Cart
To transport the small flower century plant and soil.
Measuring Tape
To determine the correct depth and width for the planting hole.
How Do You Remove Small Flower Century Plant from the Soil?
How Do You Remove Small Flower Century Plant from the Soil?
From Ground: First, moisten the small flower century plant's soil by watering. Next, excavate a wide trench around the plant using a shovel or spade, ensuring the plant's root ball remains intact. Carefully work the spade beneath the root ball to lift the plant from its original spot.From Pot: Begin by watering the small flower century plant to facilitate root and soil removal. Tilt the pot sideways and gently tap it to loosen the soil. Gradually extract the small flower century plant from the pot, supporting the plant and being cautious of its delicate roots.From Seedling Tray: Water the soil in the seedling tray. Gently extract the small flower century plant by lifting from its base, using a hand trowel if necessary to loosen the soil around the seedling's roots without causing harm.
Step-by-Step Guide for Transplanting Small Flower Century Plant
Preparation
Ensure all tools and equipment are readily accessible. Put on your gardening gloves, and prepare the small flower century plant for removal from its current location.
Digging Hole
Excavate a hole in the ground that is twice the width of the small flower century plant's root ball and of equal depth to allow ample room for root expansion.
Transplanting
Carefully position the small flower century plant in the center of the hole. Ensure the plant stands upright and at the same depth it was previously growing. Gently backfill the hole with soil, without compacting it excessively, to ensure good soil-to-root contact.
Initial Watering
Thoroughly water the small flower century plant after transplanting to settle the soil around the roots and provide essential hydration for the plant to recover from transplant stress.
Stabilizing
If the small flower century plant is unstable or the area experiences strong winds, temporary staking may be necessary until it is firmly established in its new spot.
How Do You Care For Small Flower Century Plant After Transplanting?
Monitoring
Inspect the small flower century plant daily for signs of transplant shock, such as wilting or discolored leaves, and address issues as needed.
Watering Schedule
Establish a consistent watering routine, aiming for deep, less frequent irrigation to encourage the small flower century plant to develop a robust root system.
Pruning
Remove any dead or damaged foliage to help the small flower century plant conserve energy for root establishment and new growth.
Support
Check any supporting stakes or ties to ensure they are secure but not too tight; adjust as the small flower century plant grows.
Troubleshooting Common Issues with Small Flower Century Plant Transplantation.
When is the best time for transplanting small flower century plant?
Relocate small flower century plant during mid to late spring, when temperatures are favorable for root establishment.
How far apart should I space small flower century plant when transplanting?
Space small flower century plant at intervals of 24-36 inches (61-91 cm) to provide adequate growth room.
How deep should I plant small flower century plant in its new location?
The new hole should match the root ball's depth but be twice its width.
What should I do if small flower century plant wilts after transplanting?
Ensure it's well-watered post-transplant and shielded from intense midday sun.
Why does small flower century plant look limp after transplanting?
Limpness may indicate transplant shock; keep the soil moist and avoid overwatering.
Can I transplant small flower century plant on a hot, sunny day?
Avoid transplanting during hot conditions; choose a cool, overcast day to minimize stress.
How should I prepare the soil for transplanting small flower century plant?
Amend the soil with compost to enhance drainage and nutrient content before transplanting.
Is it necessary to trim small flower century plant before transplanting?
Lightly trim damaged or excessively long roots, but refrain from extensive pruning.
How soon can I fertilize small flower century plant after transplanting?
Wait several weeks before applying a balanced fertilizer to prevent root burn.
What if small flower century plant doesn't stand upright post-transplant?
Gently stake if necessary, but typically small flower century plant will stabilize as it establishes.



