Boost Growth: How and When to Repot Your Strawberry hedgehog cactus Plant
1
Optimal periods for repotting: Spring and Fall.
2
Select a broad, shallow container that drains well.
3
Opt for a coarse, airy potting medium.
Determining the Optimal Period for Repotting Strawberry Hedgehog Cactus
Recognize indicators that your Strawberry hedgehog cactus requires repotting
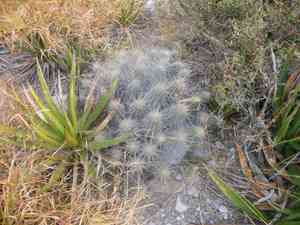
Identifying when your cactus needs a new pot is crucial for its vitality and development. If you observe roots emerging from drainage openings, or if the plant appears to have outgrown its container, these are clear signals that repotting might be necessary. Another clue is the soil drying out too quickly after watering, suggesting root congestion and a need for more space.
Seasonal timing for peak development
The Strawberry hedgehog cactus flourishes best when transplanted during its active growth phases, specifically spring and autumn. These periods offer ideal conditions for recovery and expansion, enhancing the likelihood of successful establishment in a new container. Repotting during extreme temperatures, such as summer or winter, can stress the plant and hinder its growth.
Choosing the Appropriate Container and Substrate for Strawberry Hedgehog Cactus
Selecting a pot with suitable dimensions and drainage
Choosing the correct container is vital for your Strawberry hedgehog cactus's well-being. Size: Opt for a pot only slightly larger than its current one, approximately 2.5-5 cm (1-2 inches) wider in diameter. An excessively large pot can retain too much moisture, leading to root rot. Drainage: Ensure the pot has multiple drainage holes to prevent water accumulation at the bottom. Terracotta or clay pots are preferred due to their porous nature, which aids in evaporating surplus moisture.
Optimal soil blend for Strawberry hedgehog cactus
The Strawberry hedgehog cactus prefers a well-draining, gritty soil mixture that emulates its natural desert habitat. Mix: Utilize a combination of cactus potting soil blended with sand, perlite, or pumice to improve drainage and aeration. This prevents roots from remaining wet for extended periods, which can cause rot. Ratios: A good proportion to follow is 2 parts cactus soil to 1 part sand/perlite/pumice to ensure ideal growing conditions.
Step-by-Step Guide for Repotting Strawberry Hedgehog Cactus
Preparing your work area and supplies
Before commencing the repotting process, it's advisable to gather all necessary items. Workspace: Select a flat surface where you can easily manage your plant and tools without spills or mishaps. Materials: Prepare gloves for hand protection, a new pot, fresh soil mix, a small trowel, and pruning shears if required.
Gently extracting the cactus from its current container
Carefully removing the Strawberry hedgehog cactus from its old pot demands patience. Steps: First, lightly tap the sides of the current pot to loosen the soil. Then, gently tilt the cactus and ease it out by pulling from the base, avoiding its spines.
Inspecting and trimming the root system if necessary
Once the cactus is removed, examine the root system for health issues. Inspection: Look for any signs of decay or disease, such as darkened roots, and trim these sections with sterilized pruning shears. Pruning: Trimming overly long or circling roots can encourage healthier growth in the new pot.
Positioning the cactus in the new pot and filling with soil
Now that the plant is ready, you can place it in its new home. Placement: Center the cactus in the pot, holding it upright as you begin to fill in fresh soil around it. Backfilling: Gently add soil mix around the roots until they are covered. Lightly press down the soil to stabilize the plant but avoid excessive compaction.
Post-repotting care tips for successful acclimation
After repotting, providing proper care will help your Strawberry hedgehog cactus thrive. Watering: Wait one week before watering to allow any root damage to heal. Then resume your regular watering schedule, ensuring excess water drains away. Position: Place the cactus in a location with ample light but shield it from direct, intense sunlight for the initial few weeks. This aids in adaptation without causing sunburn.


