How to Prune Large-flowered golden thistle?
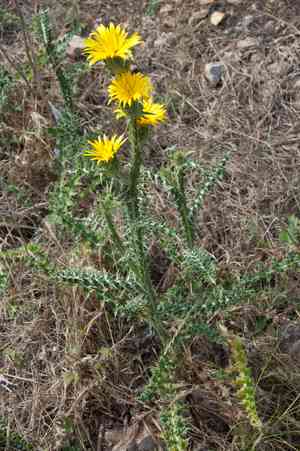
The large-flowered golden thistle, known for its impressive golden blossoms, generally flourishes in adequately draining soil under direct sunlight. The most effective time for trimming is either early Spring or late Summer, which helps eliminate withered or compromised foliage and stimulates fresh development. Removing faded flowers also extends the flowering period. Always use sanitized, sharp implements to avert the spread of pathogens. Regular pruning contributes to the plant's overall well-being and visual attractiveness, leading to more robust and vivid blooms.
Advantages of Trimming Large-flowered Golden Thistle
Advantages of Trimming Large-flowered Golden Thistle
Pruning large-flowered golden thistle encourages robust development, maintains its form, boosts blooming, enhances its overall look, and helps ward off pests and illnesses. Regular trimming prevents legginess and promotes denser, healthier growth, which is vital for preserving the plant's aesthetic appeal.
Optimal Period for Pruning Large-flowered Golden Thistle
Optimal Period for Pruning Large-flowered Golden Thistle
Trimming large-flowered golden thistle during spring and summer is ideal as it coincides with the plant's active growth phase. In these seasons, large-flowered golden thistle can recover quickly and reallocate energy towards healthier growth and flowering. Pruning at this time also aids in managing the plant's shape and size, ensuring proper air circulation and light penetration, which are crucial for its overall health and vigor.
Required Tools for Pruning Large-flowered Golden Thistle
Bypass Pruners
These are perfect for making clean cuts on large-flowered golden thistle stems without crushing them, which helps minimize damage and potential entry points for disease.
Anvil Pruners
Useful for cutting through thicker, woody stems of large-flowered golden thistle that bypass pruners might struggle with.
Loppers
Effective for reaching and cutting larger or higher stems of large-flowered golden thistle. Their extended handles provide leverage for easier, more precise cuts.
Pruning Saw
Essential for removing any large, woody stems of large-flowered golden thistle that cannot be handled with pruners or loppers. A fine-toothed saw ensures clean cuts to reduce harm.
Protective Gloves
Crucial for handling large-flowered golden thistle, as the plant may possess thorns that can cause hand injuries during pruning.
How to Prune Large-flowered Golden Thistle
Inspection
Carefully examine large-flowered golden thistle to identify any diseased leaves, withered leaves, and diseased stems that require removal.
Tools Preparation
Prepare sanitized pruning shears or scissors to prevent the spread of disease during the pruning process.
Remove Diseased Leaves
Cut off any diseased leaves, ensuring clean cuts are made close to the base of each affected leaf.
Remove Withered Leaves
Trim away any withered leaves by cutting near their base, being careful not to harm healthy parts of large-flowered golden thistle.
Remove Diseased Stems
Prune diseased stems by cutting below the affected area, making sure to eliminate all parts of the stem showing signs of illness.
Common Pruning Errors with Large-flowered Golden Thistle
Excessive Pruning
Removing too much foliage can stress large-flowered golden thistle and diminish its flowering capacity.
Incorrect Cuts
Using dull or unclean tools can result in jagged cuts, potentially leading to infections.
Topping
Cutting off the tops indiscriminately can lead to weak new growth and an undesirable shape.
Neglecting Tool Cleaning
Failing to sanitize tools between cuts can facilitate the spread of disease.
General Pruning Advice for Large-flowered Golden Thistle
Use sharp, clean tools
Always ensure your pruning shears are sharp and disinfected to make clean cuts and prevent disease transmission.
Prune strategically
Focus on removing dead, damaged, or diseased stems first to enhance overall plant health.
Selective thinning
Thin out overcrowded areas to allow light and air to penetrate, which promotes healthy growth.
Angle your cuts
Make cuts at a slight angle just above a leaf node to encourage new growth and prevent water from accumulating on the cut surface.



