How to Prune California dwarf flax?
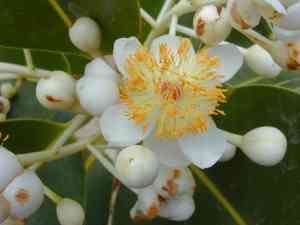
Known for its fine, slender foliage and golden flowers, california dwarf flax thrives with trimming from late winter through early spring. Cut away any lifeless or compromised stalks to foster robust development and enhance air movement. Refrain from severe cutting, as this may cause distress to the plant. Consistently check for any infestations or ailments, since pruning can assist in reducing these problems. Through adhering to appropriate pruning techniques, cultivators can boost the plant's general vigor and flowering excellence.
What Are the Benefits of Pruning California Dwarf Flax?
What Are the Benefits of Pruning California Dwarf Flax?
Trimming california dwarf flax encourages robust development and helps keep its compact form. It promotes healthier foliage, boosts flowering, and stops the spread of diseases and pests, ensuring a strong and attractive plant.
What Is the Best Time for Pruning California Dwarf Flax?
What Is the Best Time for Pruning California Dwarf Flax?
Trimming california dwarf flax in early spring or late winter is optimal because the plant is dormant then. This timing reduces plant stress and allows it to focus energy on new growth when the season starts. Also, pruning before active growth can enhance blooms and overall health by letting more sunlight and air reach inner branches, lowering disease risk and fostering a strong growth cycle.
What Tools Do I Need to Prune California Dwarf Flax?
Hand Pruners
Hand pruners are perfect for cutting small stems and branches of california dwarf flax, enabling precise cuts to shape the plant and remove any dead or diseased parts.
Bypass Pruners
Bypass pruners deliver clean cuts without crushing stems. This is crucial for california dwarf flax to prevent harm to its delicate plant tissues.
Snips
Fine snips are useful for detailed tasks, such as deadheading or removing small, fragile growth. They offer greater control over the pruning process for california dwarf flax.
Sterilizing Solution
Regularly sanitizing pruning tools helps prevent disease spread, which is vital for maintaining the health of california dwarf flax.
How to Prune California Dwarf Flax
Identification
Examine california dwarf flax and pinpoint any diseased or withered leaves. Diseased leaves might show discoloration, spots, or an overall unhealthy look, while withered leaves will appear dry and lifeless.
Sanitization
Sanitize your pruning tools by wiping the blades with rubbing alcohol to prevent disease transmission to the healthy parts of california dwarf flax.
Pruning
Using sanitized pruners, carefully snip away the identified diseased and withered leaves. Make cuts close to the leaf stem's base but avoid harming the main stem of california dwarf flax.
Clean up
Remove and properly dispose of the pruned diseased and withered leaves. Do not leave the debris near california dwarf flax to prevent re-infection or pest problems.
Monitoring
Regularly check california dwarf flax for any new signs of disease or wilting. Repeat the process as needed to maintain plant health and prevent further issues.
Common Pruning Mistakes with California Dwarf Flax
Improper Technique
Using dull or unsuitable tools can cause crushing or tearing of stems and branches, leading to damage and entry points for disease.
Excessive Pruning
Removing too much foliage can stress california dwarf flax and reduce its ability to photosynthesize effectively, resulting in weakened growth and fewer blooms.
Incorrect Timing
Pruning at the wrong growth stage can lead to poor flowering and potential dieback, making the plant vulnerable to stress and pests.
Common Pruning Tips for California Dwarf Flax
Sharp Tools
Always use sharp, clean tools to make precise cuts that minimize damage to the plant tissue.
Moderate Pruning
Avoid over-pruning; remove only what is necessary to maintain the desired shape and encourage healthy growth. Aim to cut around one-third of the plant's growth at most.
Prune Dead or Damaged Parts
Regularly remove any dead, diseased, or damaged stems to prevent disease spread and promote vigorous growth.
Cut at Nodes
Make cuts just above a node (the point where leaves are attached) to encourage new shoots to grow from that node, aiding in a fuller plant appearance.


