How to Prune Didymoglossum tahitense?
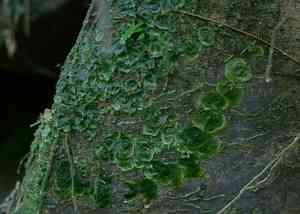
Didymoglossum tahitense, recognized for its fragile leaves and contained development, thrives with trimming in early spring or late winter. Essential methods involve eliminating deceased or injured fronds to foster robust growth and improve air movement. Cut back sprawling portions to preserve form and avert excessive density. Consistent trimming stimulates thicker foliage and can elevate the plant's general appearance. Utilize sanitized, keen implements to avert illness and strain.
What Are the Advantages of Trimming Didymoglossum Tahitense?
What Are the Advantages of Trimming Didymoglossum Tahitense?
Trimming didymoglossum tahitense promotes robust development and helps maintain a desired form, fostering healthier plant growth and improving its look. Regular cutting can also deter pest problems and illnesses, making the plant more resilient.
When Is the Optimal Time for Trimming Didymoglossum Tahitense?
When Is the Optimal Time for Trimming Didymoglossum Tahitense?
Trimming didymoglossum tahitense during early spring and late winter is advisable as this period aligns with the plant's dormant state or just before its growth cycle begins. Pruning in these seasons allows for rapid healing, encourages healthy new growth, and prepares it for the vigorous growing season ahead. Furthermore, avoiding pruning during active growth or flowering ensures the plant's energy is directed towards development and blooming rather than recovering from cuts.
What Tools Are Necessary to Trim Didymoglossum Tahitense?
Hand Pruners
Perfect for making accurate cuts on small stems and delicate foliage, which is typical for didymoglossum tahitense.
Bypass Pruners
These are preferred for clean cuts since didymoglossum tahitense has thin and tender stems that can be easily harmed by other types of pruners.
Snips or Trimming Shears
These provide greater accuracy for shaping and reaching into tight spots within the plant's dense growth habit.
Scissors
A simple yet effective tool for detailed trimming and removing dead or damaged leaves from didymoglossum tahitense.
How to Trim Didymoglossum Tahitense
Inspection
Start by thoroughly examining didymoglossum tahitense to identify any diseased and withered leaves that require removal. Use a magnifying glass if needed to spot early signs of illness.
Sterilization
Sanitize your trimming tools with a solution of one part bleach to nine parts water or rubbing alcohol to prevent disease transmission.
Cutting Diseased Leaves
Carefully cut back the diseased leaves at their base where they meet healthy tissue. Ensure the entire affected area is removed to prevent re-infection.
Cutting Withered Leaves
Remove withered leaves close to their origin pointâtypically near the stem or base of the leaf stalk. Make clean cuts to avoid tearing the plant tissue.
Disposal
Discard all pruned diseased and withered leaves in a sealed bag or burn them if local regulations permit. This ensures that any harmful pathogens are completely removed from the garden.
Common Trimming Errors with Didymoglossum Tahitense
Over-trimming
Excessive removal of foliage can stress didymoglossum tahitense, hindering its growth and vitality. Always aim to trim sparingly.
Incorrect tools
Using dull or unsuitable tools can harm didymoglossum tahitense's delicate structure. Always use sharp, clean tools for precise cuts.
Trimming at the wrong node
Failing to trim just above a node can lead to unsightly die-back and poor regrowth. Always trim just above a healthy node.
Neglecting sanitation
Not cleaning tools between cuts can spread diseases. Sterilize tools before you begin and between different plants.
Timing errors
Trimming at an inappropriate physiological stage can impede didymoglossum tahitense's growth. While the best season is excluded here, timing within the proper period is crucial.
General Trimming Advice for Didymoglossum Tahitense
Examine the plant first
Before trimming, inspect didymoglossum tahitense for any indications of disease or pest infestation. Address these issues before making cuts.
Focus on dead or damaged parts
Remove any dead, diseased, or damaged parts first. This helps didymoglossum tahitense direct its energy towards healthy growth.
Make clean cuts
Ensure each cut is clean and accurate, using sharp tools. This reduces the risk of infections and promotes faster healing.
Angle your cuts
Trim at a slight angle to encourage water runoff and prevent rot, especially in moist environments where didymoglossum tahitense thrives.
Moderate removal
Remove no more than one-third of didymoglossum tahitense at any given time to avoid excessive stress and ensure balanced regrowth.


