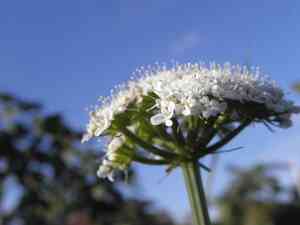
How to Prune Earth-nut?
Earth-nut, recognized for its tuberous root utilized much like chestnuts, needs very little trimming. Trimming should concentrate on eliminating withered or ailing leaves and can be carried out from late spring to early summer. This period coincides with earth-nut's vigorous growth phase, boosting its well-being and yield by fostering strong development. Consistent trimming guarantees excellent air movement and light penetration, vital for the plant's progression.
What Are the Benefits of Pruning Earth-nut?
What Are the Benefits of Pruning Earth-nut?
Trimming earth-nut promotes robust development and maintains its dense form, crucial for optimal growth and output. Consistent cutting helps prevent congestion, fostering healthier, more resilient plants.
What Is the Best Time for Pruning Earth-nut?
What Is the Best Time for Pruning Earth-nut?
Pruning earth-nut in Spring is advantageous as it enables the plant to direct its energy towards developing healthy new shoots and leaves, establishing a strong framework before the active growing period begins. Summer trimming, following the initial Spring growth, assists in managing the plant's shape and eliminating any diseased or surplus growth that could impact overall health and productivity. This timing ensures the plant is vigorous and can recover swiftly, minimizing stress and maximizing yield.
What Tools Do I Need to Prune Earth-nut?
Hand Pruners
Hand pruners are perfect for shaping and trimming the aerial foliage of earth-nut. They allow for accurate cuts, which helps maintain the plant's compact growth habit and encourages healthy development.
Garden Shears
Garden shears are suitable for larger or denser foliage of earth-nut, facilitating even cutting and shaping. They ensure the plant keeps a neat appearance and effectively remove any unwanted or overgrown branches.
Pruning Saw
For older, woodier stems of earth-nut, a pruning saw is essential. It helps cut through thicker stems without harming the rest of the plant, supporting good health and revitalization.
How to Prune Earth-nut
Identify
Locate and mark the diseased and withered leaves, as well as any affected stems on earth-nut. This ensures you only remove parts that could potentially harm the plant's overall well-being.
Sanitize
Disinfect your pruning tools before beginning. Use a bleach or alcohol solution to clean the blades to prevent disease transmission between plants.
Cut leaves
Carefully remove the diseased and withered leaves of earth-nut. Make cuts close to the main stem or the nearest healthy leaf node, ensuring you do not damage the healthy sections.
Cut stems
Trim the diseased stems on earth-nut. Cut back to a healthy portion of the stem, ideally just above a leaf node or bud to encourage healthy regrowth.
Cleanup
Properly dispose of all removed material. Do not compost diseased leaves or stems as they could spread pathogens in the compost. Regularly clear fallen debris around earth-nut to maintain a clean growing environment.
Common Pruning Mistakes with Earth-nut
Overpruning
Removing too much foliage from earth-nut can deplete its energy reserves, as it relies on its leaves for photosynthesis. This stress can weaken the plant and reduce its overall vigor.
Improper tool use
Using dull or unclean pruning tools can result in jagged or torn cuts on earth-nut, which are more vulnerable to disease and pest infestations.
Ignoring plant structure
Pruning without considering the natural growth habit of earth-nut may lead to unbalanced growth or unnecessary damage to productive parts of the plant.
Common Pruning Tips for Earth-nut
Clean cuts
Ensure that any cuts made on earth-nut are clean and at a 45-degree angle to prevent water accumulation, which can lead to rot and disease.
Tool hygiene
Regularly clean and sharpen pruning tools to ensure precise cuts that heal quickly, minimizing the risk of infection.
Selective thinning
Focus on selectively removing crowded or crossed branches to enhance airflow and light penetration throughout earth-nut, which promotes healthier growth and reduces disease pressure.


