How to Prune Jerry-jerry?
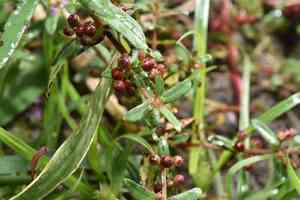
This water-loving perennial is recognized for its vivid stalk and vertical development. To preserve jerry-jerry's brilliance, regular trimming is essential. Remove lifeless or frail stems in the spring to stimulate fresh development. Throughout the summer and autumn, occasional snips enhance light access and air circulation, promoting a dense form. Cut near a joint, being careful not to over-trim to avoid strain. Consistent pruning boosts blooming and sustains jerry-jerry's well-being, preventing congestion to ward off pests and illnesses.
What Are the Benefits of Pruning Jerry-jerry?
What Are the Benefits of Pruning Jerry-jerry?
Trimming jerry-jerry promotes robust development by reallocating energy to new shoots and preserving its desired form. This careful reduction can lead to a denser, healthier plant structure.
What Is the Best Time for Pruning Jerry-jerry?
What Is the Best Time for Pruning Jerry-jerry?
Pruning in Spring enables jerry-jerry to channel its energy into producing fresh growth following its dormant winter phase. Trimming in Early Summer is advantageous as it aids in shaping the plant and fostering a bushier growth habit, while still allowing ample time for recovery before another dormant period. Late Fall pruning, post-flowering, assists in removing spent blooms and preparing jerry-jerry for winter, thereby lowering disease risk. These periods ensure the plant retains its vitality and avoids shock from pruning during its blooming season or extreme weather.
What Tools Do I Need to Prune Jerry-jerry?
Bypass Pruners
Perfect for making precise, clean cuts on jerry-jerry's stems, bypass pruners operate like scissors with two curved blades that slide past each other. This minimizes harm to plant tissues, encouraging healthier regrowth.
Hand Shears
Suitable for shaping and managing jerry-jerry's size, hand shears offer control and accuracy for trimming small to medium-sized stems. Their longer blades simplify achieving a uniform look.
Gardening Gloves
Protecting hands when pruning jerry-jerry is essential to prevent any potential skin irritation and to ensure a secure grip on pruning tools.
How to Prune Jerry-jerry
Clean tools
Before pruning jerry-jerry, ensure all pruning tools are clean and sharp to prevent disease spread and to make clean cuts that will heal more effectively.
Inspect plant
Carefully examine jerry-jerry to identify the withered leaves that require trimming. This allows for targeted pruning without unnecessarily removing healthy foliage.
Cut withered leaves
Using a pair of precision shears, snip off the withered leaves at their base where they meet the stem. Make the cut clean and close to the stem to promote faster healing.
Dispose
Properly dispose of the withered leaves by placing them in a compost bin or discarding them away from the garden to prevent the potential spread of pests or disease.
Clean up
Clean the pruning tools after use with a disinfectant solution to ensure they are ready for the next use and to maintain good plant hygiene.
Common Pruning Mistakes with Jerry-jerry
Over-pruning
Removing too much foliage at once can stress jerry-jerry, leading to poor health and reduced vigor. Gardeners should not prune more than one-third of the plant at any one time.
Improper cut location
Cuts made too far from a bud or node can leave a stub that risks disease or pest infestation. Cuts should be made close to, but not into, the bud or node.
Using dull tools
Pruning with dull tools can cause jagged cuts that harm jerry-jerry and impede healing. Always use sharp, clean pruning shears or scissors.
Disregarding plant structure
Neglecting to consider the natural growth habit of jerry-jerry when pruning can result in an unappealing shape and hinder its growth. Pruning should maintain the plant's natural form.
Pruning without a plan
Random or excessive pruning without understanding the growth pattern can damage jerry-jerry. Gardeners should have a clear goal for shaping and health before starting to prune.
Ignoring diseased material
Failing to remove dead or diseased branches can spread illness throughout jerry-jerry. Always remove unhealthy material promptly.
Common Pruning Tips for Jerry-jerry
Selective pruning
Targeting specific areas for thinning can improve light penetration and air circulation, which are critical for jerry-jerry's health. Thin out crowded branches and remove weak growth.
Clean cuts
Make clean, angled cuts to encourage proper healing and reduce the risk of disease. The angle should slope away from the bud to prevent water accumulation.
Disinfect pruning tools
To avoid transmitting pathogens, disinfect pruning tools before and after use on jerry-jerry with a solution like isopropyl alcohol or bleach.
Encouraging new growth
Prune just above outward-facing buds to encourage jerry-jerry to develop a more open and balanced structure.
Removing suckers and water sprouts
Eliminate suckers from the base and water sprouts from the stems, as these can drain resources from the main part of jerry-jerry.
Pruning for health
Regularly inspect and trim away any dead, damaged, or crossing branches to maintain the overall health and aesthetic of jerry-jerry.
Consistency
Being consistent with maintaining jerry-jerry will prevent the need for drastic pruning. Light, regular pruning is preferable to severe infrequent cuts.


