How to Propagate Parry's townsend daisy?
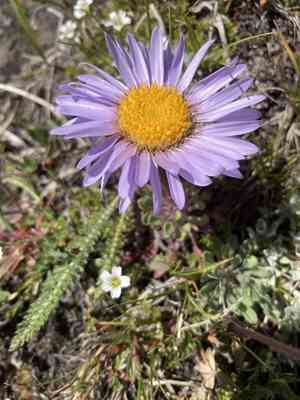
Parry's townsend daisy is a perennial plant that flourishes in stony ground and high-altitude regions. To propagate, scatter seeds on the top layer of porous soil, maintaining consistent moisture without oversaturation. Guarantee adequate airflow to avert fungal diseases. Sprouting may take time, so perseverance is essential. After seedlings are robust, carefully relocate them to prevent root damage, preferably in a bright, protected location to mimic their native environment.
What Is the Best Time To Propagate Parry's Townsend Daisy?
Propagation Type
Sowing
Propagation Season
Spring
What Tools Are Used in Parry's Townsend Daisy Propagation?
Seed Tray
Seed trays are vital for initiating seedlings. They offer a controlled setting for parry's townsend daisy seeds to sprout. Select trays with good drainage to prevent waterlogging and root diseases.
Fine Seed Starting Mix
This specialized soil blend provides the correct balance of nutrients, moisture retention, and air circulation, all crucial for the delicate parry's townsend daisy seeds to germinate and establish roots.
Mister or Spray Bottle
A mister or spray bottle helps maintain surface soil moisture without over-saturating, which is important for successful parry's townsend daisy seed germination.
Grow Lights
Employ grow lights to supply consistent and effective light sources, ensuring parry's townsend daisy seedlings get the necessary light for photosynthesis and robust growth, especially during periods of low sunlight.
Heating Mat
Heating mats keep the soil at a consistent and optimal temperature, encouraging quicker and more uniform germination of parry's townsend daisy seeds.
Propagation Dome
A propagation dome maintains high humidity and stable temperatures, creating an ideal microenvironment for the germination and initial growth phases of parry's townsend daisy seedlings.
Labeling Stakes and Pen
Properly label each tray or pot with the seed type and sowing date. This aids in tracking parry's townsend daisy's progress and ensures correct seedling identification.
Seed Dibber
A seed dibber is used for creating uniform planting holes at the correct depth, improving precision during the sowing process for parry's townsend daisy and ensuring optimal seed-to-soil contact.
How to Propagate Parry's Townsend Daisy?
Propagation Type
Easy
How to Care for Your Newly Propagated Parry's Townsend Daisy?
How to Care for Your Newly Propagated Parry's Townsend Daisy?
Once seedlings have two to three true leaf sets, transplant them into individual pots or directly into the garden. Choose a spot with full sun to partial shade and well-draining soil. Water young plants regularly, allowing the soil to dry slightly between waterings. Avoid overwatering, as parry's townsend daisy tolerates drought. Mulch around plant bases to retain moisture and suppress weeds. Fertilize sparingly with a balanced, slow-release fertilizer. Monitor for pests and diseases, treating promptly if needed. As parry's townsend daisy establishes, it requires minimal upkeep, thriving best in rocky or sandy soils typical of its native habitats.
Common Mistakes to Avoid When Propagating Parry's Townsend Daisy
Overwatering
Excessive moisture can lead to root rot and fungal infections, which are harmful to parry's townsend daisy's health.
Poor Drainage
Using soil that doesn't drain well retains too much water, suffocating roots and causing decay.
Insufficient Light
Inadequate light exposure can hinder growth and impede the development of healthy seedlings.
Incorrect Soil pH
Using soil with an improper pH can limit nutrient availability, leading to stunted growth and weak plants.
Crowded Planting
Placing seeds or seedlings too close together can result in competition for nutrients and light, leading to weaker plants.
Tips For Propagating Parry's Townsend Daisy
Well-Draining Soil
Use a well-draining, gritty mix to prevent waterlogging and root rot.
Moderate Watering
Water sparingly, allowing the soil to dry out between applications to avoid excess moisture.
Adequate Light
Ensure the plants receive plenty of sunlight by situating them in a bright location.
Test Soil pH
A slightly acidic to neutral pH (around 6.0-7.0) is ideal; test and amend the soil as needed.
Spacing
Maintain adequate spacing between seeds or seedlings to prevent overcrowding and ensure each plant has access to sufficient nutrients and light.



