How to Propagate Theobroma?
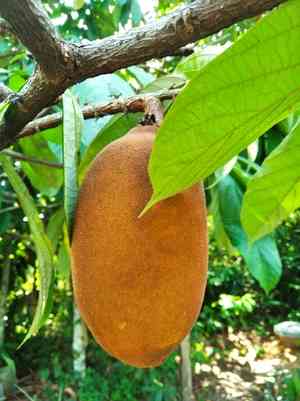
Theobroma flourishes when reproduced via cuttings. For optimal results, employ a sharp, sanitized blade to sever a robust stem, preferably one possessing multiple leaves. Submerge the severed tip into rooting compound prior to embedding it in adequately draining substrate. Maintain consistent moisture in the soil and position the cutting in diffused illumination to encourage root development. This technique yields a high rate of success, duplicating the desired traits of theobroma.
Optimal Period for Theobroma Propagation
Propagation Type
Cutting
Propagation Season
Autumn,Winter
Tools Required for Theobroma Propagation
Sharp Pruning Shears
These are vital for taking clean, precise cuttings from theobroma. Sharp shears ensure a neat cut, minimizing harm to the parent plant and boosting the cutting's rooting success by preventing tissue crushing, which can cause infection or poor growth. Always sanitize shears before use to prevent pathogen introduction.
Rooting Hormone
This compound is utilized to encourage root development from theobroma cuttings. Applying rooting hormone to the freshly cut stem base aids in enhancing root formation, which is critical for the cuttings' survival and establishment. It contains synthetic auxins that mimic natural plant hormones, promoting faster and more dependable rooting.
Sterile Potting Mix
A sterile potting mix offers a disease-free environment for new theobroma cuttings to flourish. This medium should drain well yet retain sufficient moisture to support new root growth. Using a sterile mix also prevents the introduction of soil-borne pathogens that could hinder rooting success.
Humidity Dome or Plastic Cover
Maintaining high humidity around theobroma cuttings is essential for preventing water loss through transpiration, especially before roots are established. A humidity dome or a simple plastic cover over the cuttings helps create a high-humidity micro-environment, aiding in successful rooting and initial growth.
Theobroma Propagation Difficulty
Propagation Type
Moderately Difficult
Post-Propagation Care for Theobroma
How to Care for Your Newly Propagated Theobroma?
Once roots are established, gradually introduce theobroma to drier conditions by opening or removing the plastic cover. Transition to standard care by watering when the top inch of soil is dry and providing moderate sunlight. Regularly check for pests or diseases, and fertilize with a balanced, slow-release feed monthly during the growing season.
Common Errors to Avoid When Propagating Theobroma
Inadequate humidity
When propagating theobroma, a frequent error is failing to maintain sufficient humidity. This impedes the rooting process because theobroma needs a moist environment to develop healthy roots, particularly when propagated from cuttings.
Excessive watering
Overwatering can lead to root rot, a harmful condition for theobroma, especially in its early propagation stages. Theobroma's roots require a balance of moisture and air; too much water reduces oxygen availability, causing root decay.
Poor cutting selection
Using non-viable or diseased theobroma cuttings is a common mistake. This choice often results in poor growth or propagation failure, as unhealthy or weak cuttings lack the necessary vigor to establish new growth.
Advice for Propagating Theobroma
Use of healthy mother plants
Always choose healthy and robust mother plants for taking cuttings. This increases the likelihood of successful propagation, as these cuttings will possess greater vitality and disease resistance, crucial for establishing new theobroma plants.
Maintain optimal humidity
Maintaining a high-humidity environment is vital for the successful rooting of theobroma cuttings. Use a humidity dome or mist frequently to keep the atmosphere moist, aiding the rooting process.
Proper soil mix
Utilizing the correct soil mix that allows for good drainage and aeration promotes healthy root development in theobroma. A blend of peat, perlite, and vermiculite often provides the ideal balance of moisture retention and drainage required.



