How to Propagate Blue woodsorrel?
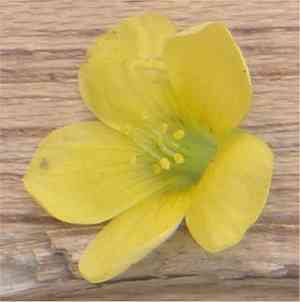
Oxalis adpressa, a fragile perennial, is recognized for its appealing blue blossoms and three-part foliage. It flourishes in soil that drains effectively, favoring locations with partial shade to ample sunlight. Reproduction is typically achieved through splitting the plant or utilizing buds found on the stem, making sure the root system remains undamaged. Keep the soil moderately damp, preventing any oversaturated states. This species may react poorly to severe environmental factors and gains from shelter during inclement periods.
Optimal Period for Blue Woodsorrel Propagation
Propagation Method
BudsOnTheStalk
Propagation Period
Spring,Summer,Autumn
Tools for Blue Woodsorrel Propagation
Pruning Shears
Utilized for severing stem segments containing buds, crucial for obtaining healthy cuttings from blue woodsorrel. Quality shears ensure clean cuts, minimizing harm to the parent plant and boosting cutting viability.
Rooting Hormone Powder
Facilitates root development from blue woodsorrel cuttings. Applying rooting hormone enhances successful rooting by stimulating growth and guarding against decay.
Propagation Trays
Perfect for arranging and nurturing multiple blue woodsorrel cuttings in a controlled setting. These trays guarantee proper spacing, air circulation, and light exposure, vital for thriving cuttings.
Seedling Heat Mat
Delivers consistent warmth to blue woodsorrel cuttings, which can hasten root formation. Maintaining an ideal temperature is critical for the initial propagation phases.
Misting Bottle
Employed to sustain humidity levels around blue woodsorrel cuttings. Regular misting prevents dehydration and ensures cuttings remain damp without becoming waterlogged.
Sterile Scalpel or Knife
Required for making precise, clean incisions on blue woodsorrel cuttings, especially when dealing with delicate buds. Ensures minimal damage and reduces infection risk.
Humidity Dome
Helps establish a humid microclimate over blue woodsorrel propagation trays. This tool is essential for preventing cuttings from drying out while they develop roots.
Perlite or Vermiculite
Integrated into the soil mix to ensure adequate drainage and aeration. These materials prevent waterlogging and root rot, fostering healthier root development in blue woodsorrel.
Label Markers
Important for tracking different batches and dates of blue woodsorrel cuttings. Aids in monitoring the progress and success rate of various propagation efforts.
How to Propagate Blue Woodsorrel?
Propagation Type
Moderately Difficult
Caring for Your Newly Propagated Blue Woodsorrel
Caring for Your Newly Propagated Blue Woodsorrel?
Once the plant has established roots, relocate it to a spot with partial sunlight. Water regularly, allowing the top inch of soil to dry between waterings. Fertilize sparingly with a balanced liquid fertilizer every 4-6 weeks during the growing season. Monitor for pests like aphids and treat them promptly if detected.
Common Errors to Avoid When Propagating Blue Woodsorrel
Overwatering
Excessive moisture can lead to root rot, which is particularly harmful to blue woodsorrel. The plant prefers well-drained soil and can suffer in soggy conditions.
Incorrect Soil Type
Using dense or clay-rich soil restricts root growth and drainage, impeding the propagation success of blue woodsorrel.
Insufficient Light
Placing propagating blue woodsorrel in too much shade can hinder photosynthesis, slowing growth and weakening the plant.
Failure to Maintain Humidity
Lack of adequate humidity during the initial propagation stages can result in wilting and poor root development.
Improper Cutting Technique
Taking cuttings with insufficient nodes or without sterilizing tools can lead to infection and failure of the cutting to root.
Tips For Propagating Blue Woodsorrel
Use Well-Draining Soil
Mix soil with sand or perlite to improve drainage, ensuring roots are not waterlogged.
Adequate Light
Position propagating blue woodsorrel in a location with indirect but bright sunlight to encourage robust growth.
Maintain Humidity
Cover cuttings with a plastic bag or place them in a propagator to create a humid environment, aiding in root formation.
Proper Watering
Water the cuttings lightly but consistently, ensuring the soil is moist but not saturated.
Clean Cutting Tools
Always use sterilized tools for cuttings to prevent disease spread and enhance successful propagation chances.



