How to Propagate Norwegian arctic cudweed?
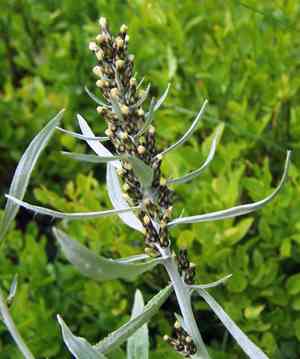
Norwegian arctic cudweed flourishes when reproduced via cuttings. For successful cultivation, select robust, pathogen-free cuttings from an established specimen. Prepare a growing medium that offers good drainage yet holds adequate moisture, as this condition fosters root growth. Position the cuttings in diffused light and sustain steady hydration without oversaturation. Rooting compounds can accelerate root development, though they are not essential for norwegian arctic cudweed. Given proper attention, cuttings usually begin to root within several weeks.
What Is the Best Time To Propagate Norwegian Arctic Cudweed?
Propagation Type
Cutting
Propagation Season
Spring,Summer
What Tools Are Used in Norwegian Arctic Cudweed Propagation?
Sharp pruning shears
These are vital for taking cuttings from norwegian arctic cudweed. The blades must be sharp and clean to ensure a precise cut without crushing plant tissues, which could lead to infection and poor rooting.
Rooting hormone
Applying rooting hormone to the base of cuttings stimulates root development and improves the chances of successful propagation. It ensures a stronger root system, crucial for the survival and growth of norwegian arctic cudweed.
Sterilized potting mix
Using a sterilized, well-draining soil mix prevents disease and supports healthy root growth. For norwegian arctic cudweed, a mix offering good aeration and moisture retention is ideal.
Propagation trays
These trays organize and maintain norwegian arctic cudweed cuttings in a controlled environment. They should have adequate drainage and be shallow enough to support young roots without overcrowding.
Humidity domes
These domes fit over propagation trays to help maintain high humidity around norwegian arctic cudweed cuttings, which is vital for encouraging root growth and preventing them from drying out.
How to Propagate Norwegian Arctic Cudweed?
Propagation Type
Easy
How to Care for Your Newly Propagated Norwegian Arctic Cudweed?
How to Care for Your Newly Propagated Norwegian Arctic Cudweed?
Once norwegian arctic cudweed cuttings have rooted and new growth appears, gradually acclimate them to less humid conditions before transplanting to a larger pot or outdoors. Ensure the plant receives light shade and remains in cool to moderate temperatures. Water regularly to keep the soil consistently moist but avoid waterlogging. Due to its arctic origins, norwegian arctic cudweed may not tolerate high heat or dry conditions well. Enrich the soil with organic matter periodically and protect the plant from strong winds for optimal health and growth.
Common Mistakes to Avoid When Propagating Norwegian Arctic Cudweed
Overwatering
Excess moisture can lead to root rot in norwegian arctic cudweed, which is detrimental as it prefers drier, well-drained conditions. Overwatering reduces oxygen supply to the roots, causing them to decay.
Deep planting
Sowing norwegian arctic cudweed's seeds too deeply can prevent germination due to insufficient light and lower temperatures deeper in the soil. This mistake can drastically reduce the germination rate.
Ignoring soil texture
Using soil that is too dense or clayey can impede root growth and water drainage, creating an unsuitable growing environment for norwegian arctic cudweed, which thrives in lighter, well-drained soil.
Tips For Propagating Norwegian Arctic Cudweed
Light soil mix
Use a light, well-draining soil mix to facilitate better root growth and prevent waterlogging. This ensures that norwegian arctic cudweed's roots receive a balance of moisture and air.
Shallow seeding
Plant seeds shallowly, just covering them with a thin layer of soil. This maximizes their exposure to light, which is critical for the germination of norwegian arctic cudweed.
Moderate watering
Maintain only moderate watering practices, ensuring the soil is moist but not waterlogged. Proper moisture levels are necessary to support germination without risking root diseases in norwegian arctic cudweed.



