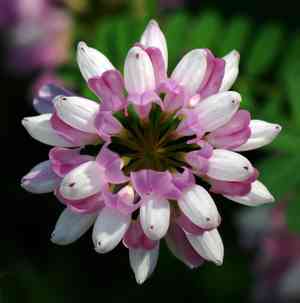
How to Propagate Hosackia rosea?
Hosackia rosea stands out due to its appealing blossoms and is most effectively multiplied by planting seeds. Obtain seeds from fully developed specimens and embed them in a potting mix that drains efficiently. To achieve the best sprouting results, confirm that the seeds are lightly concealed and remain damp. Sustaining steady hydration without oversaturation is vital for young plants. This method guarantees robust, thriving development, consistent with the particular requirements of hosackia rosea.
Optimal Time for Hosackia Rosea Propagation
Propagation Method
Seeding
Propagation Period
Spring
Essential Tools for Hosackia Rosea Propagation
Seed Tray
A seed tray is crucial for initiating hosackia rosea seeds. It offers a controlled setting for initial sprouting and development. Its consistent depth and drainage holes guarantee appropriate moisture levels, vital for seedling vitality.
Seed Starting Mix
Employing a specialized seed starting mix is important for hosackia rosea. It provides a light, sterile medium that encourages robust root growth and minimizes disease risk that could impede seedling development.
Hand Trowel
A hand trowel is useful for filling seed trays with the starting mix and for carefully placing seeds. Its compact size allows for precision, ensuring seeds are positioned at the correct depth, which is key for successful germination.
Humidity Dome
A humidity dome helps maintain ideal humidity levels by covering the seed tray. This creates a microenvironment that prevents seedlings from drying out, which is especially beneficial during the early growth stages for hosackia rosea.
Spray Bottle
A spray bottle is perfect for gently watering seeds without disturbing them. It ensures even moisture distribution without over-saturation, which is critical for the delicate hosackia rosea seedlings.
Labeling Stakes
Labeling stakes are important for tracking different seed batches. By clearly marking the seed trays, gardeners can monitor germination rates and growth progress specific to hosackia rosea.
Grow Lights
Grow lights provide a steady light source, particularly in areas with limited natural sunlight. They ensure that hosackia rosea seedlings receive adequate light for photosynthesis, leading to stronger and healthier plants.
Heating Mat
A heating mat can be beneficial in maintaining a consistent and optimal soil temperature. This can accelerate the germination process and ensure uniform growth, which is particularly useful for hosackia rosea seeds.
How to Propagate Hosackia Rosea?
Propagation Type
Easy
Caring for Your Newly Propagated Hosackia Rosea
Caring for Your Newly Propagated Hosackia Rosea
Post-transplant, water hosackia rosea regularly, allowing the soil to slightly dry between waterings to prevent root rot. Provide full sun to partial shade for optimal growth. Lightly fertilize with a balanced, water-soluble fertilizer every 4-6 weeks during the growing season. Prune spent flowers to encourage continuous blooming and avoid overcrowding by giving each plant ample space to grow freely.
Common Mistakes to Avoid When Propagating Hosackia Rosea
Overwatering
This can lead to root rot and fungal infections, which hinder root development and can kill the plant.
Poor Soil Drainage
Inadequate drainage can cause waterlogged conditions, leading to root suffocation and decreased oxygen availability.
Improper Cutting Technique
Damaging the nodes or using dull tools can hinder root formation and increase disease vulnerability.
Insufficient Light
Lack of adequate light can slow down growth and reduce the plant's ability to photosynthesize, affecting overall health.
Incorrect Planting Depth
Planting cuttings too deep or shallow can prevent proper root establishment and growth.
Tips For Propagating Hosackia Rosea
Use Well-Draining Soil
Ensure the soil mixture promotes good drainage to prevent waterlogging and root rot.
Sterilize Tools
Always use clean, sharp tools to make cuttings to avoid infection and encourage healthy root development.
Monitor Water Levels
Keep the soil consistently moist but not waterlogged to provide an optimal environment for root formation.
Provide Sufficient Light
Place the cuttings in an area with indirect, bright light to support healthy growth and development.
Proper Plant Depth
Insert cuttings at the correct depth, typically one to two inches, to ensure roots can establish efficiently.


