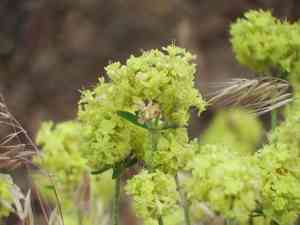
How to Propagate Rock buckwheat?
Rock buckwheat, a member of the Polygonaceae lineage, flourishes in adequately drained ground with ample sunlight. Its primary method of reproduction is via cuttings. For effective root establishment, select robust, non-blooming stems and embed them in a blend of sand and peat for peak development. Consistent irrigation and preventing saturated soil conditions will foster more vigorous root formation.
Optimal Period for Rock Buckwheat Propagation
Propagation Method
Cutting
Propagation Season
Autumn,Winter
Tools Required for Rock Buckwheat Propagation
Sharp pruning shears
These are crucial for obtaining clean, precise cuttings from rock buckwheat. Sharp blades prevent jagged cuts, significantly lowering infection risk and boosting successful rooting.
Rooting hormone
This chemical aids in stimulating root development from rock buckwheat cuttings, accelerating the rooting process and increasing propagation success. It encourages new root tissue formation at the cut end.
Sterilized potting mix
A well-draining, sterile mix is vital for rock buckwheat cuttings to prevent disease and offer an ideal environment for root growth. Sterility ensures no pathogens harm cuttings before root establishment.
Propagation tray
This shallow container holds rock buckwheat cuttings and potting mix. It's designed to maintain adequate moisture and allow air circulation around cuttings, both essential for root development.
Plastic covers or domes
These covers create a greenhouse-like environment over propagation trays, maintaining high humidity and stable temperatures, both beneficial for rock buckwheat cutting rooting.
Heating mats
For cooler climates, heating mats provide gentle warmth to the base of propagation trays. This heat can promote faster root growth in rock buckwheat cuttings by maintaining an optimal temperature.
How to Propagate Rock Buckwheat?
Propagation Type
Moderately Difficult
Caring for Your Newly Propagated Rock Buckwheat
Caring for Your Newly Propagated Rock Buckwheat?
Once roots are established, slowly introduce rock buckwheat to drier conditions by removing the plastic cover for longer periods daily. After 4-6 weeks, when growth is evident, transplant into a larger pot or outdoors if climate allows. Maintain well-draining soil and moderate watering. Rock buckwheat thrives in full sun and needs minimal extra watering once established, adapting well to dry, rocky areas.
Common Errors to Avoid When Propagating Rock Buckwheat
Overwatering
Excessive watering can lead to root rot and fungal issues. Rock buckwheat prefers drier conditions, and too much moisture can severely damage its root system and overall health.
Using rich soils
Planting rock buckwheat in overly fertile or rich soils can result in lush foliage at the expense of blooms and overall stability. Rock buckwheat's natural habitat features poorer, well-drained soils that support its optimal growth.
Ignoring planting depth
Planting rock buckwheat too deep can hinder root and shoot development. Correct depth ensures healthy root expansion and shoot emergence, crucial for successful propagation.
Tips For Propagating Rock Buckwheat
Selective pruning
Prune rock buckwheat selectively to encourage branching and maintain an ideal shape. This helps create a more structurally sound plant that can better support its flowers.
Mimicking natural soil conditions
Use a well-draining, sandy soil mix similar to rock buckwheat's native environment. This supports healthy root growth and prevents waterlogging, vital for rock buckwheat's overall health.
Incremental watering
Water rock buckwheat gradually to allow the plant to adapt and establish itself. This prevents shock and stress, fostering a stronger, more resilient plant.


