How to Propagate Erica dianthifolia?
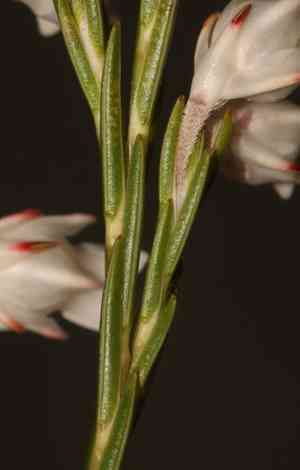
Erica dianthifolia is classified within the Ericaceae family and is a species of the Erica genus. To achieve effective propagation, select semi-hardwood cuttings, immerse them in a rooting compound, and then place them in a substrate that drains efficiently. Ensure continuous dampness without oversaturation, and furnish a moist atmosphere to foster root formation. Place the plant in an area receiving partial sun exposure to guarantee ideal growing circumstances. Proper attention leads to vigorous and thriving specimens.
Optimal Period for Erica Dianthifolia Propagation
Propagation Method
Cutting
Propagation Period
Spring,Summer
Essential Tools for Erica Dianthifolia Propagation
Pruning Shears
Pruning shears are vital for obtaining clean, precise cuttings from erica dianthifolia. Sharp blades prevent harm to the parent plant and the cuttings, reducing infection risk and promoting faster root development.
Rooting Hormone
Rooting hormone speeds up the rooting process for erica dianthifolia cuttings. It contains growth-promoting substances that encourage root formation and boost the likelihood of successful propagation.
Propagation Trays
Propagation trays offer a controlled setting for rooting erica dianthifolia cuttings. These trays often include inserts and covers that help maintain consistent moisture and humidity, which are critical for successful rooting.
Sterile Potting Mix
A well-draining, sterile potting mix minimizes disease risk and provides the ideal medium for erica dianthifolia cuttings to root. The mix should be light and airy to support root growth and prevent waterlogging.
Spray Bottle
A spray bottle is used to mist the cuttings and maintain high humidity around erica dianthifolia cuttings. This is especially important before roots develop, as cuttings absorb moisture primarily through their leaves.
Heating Mat
A heating mat placed beneath propagation trays can provide consistent bottom heat, encouraging quicker root development in erica dianthifolia cuttings. Maintaining optimal soil temperature is crucial for root initiation.
Humidity Dome
A humidity dome helps retain moisture and create a micro-climate with elevated humidity, ideal for erica dianthifolia cuttings. This prevents dehydration and aids in more rapid root formation.
How to Propagate Erica Dianthifolia?
Propagation Type
Moderately Difficult
Caring for Your Newly Propagated Erica Dianthifolia
Caring for Your Newly Propagated Erica Dianthifolia
After propagation, transfer the rooted erica dianthifolia cuttings into individual pots with well-draining, acidic soil. Water regularly, keeping the soil consistently moist but not waterlogged. Position them in a spot with partial sunlight. Continue to care for the young plants by shielding them from extreme temperatures and ensuring they are not exposed to drafts or prolonged direct sunlight. Fertilize sparingly, using a balanced, slow-release fertilizer suitable for acid-loving plants.
Common Errors to Avoid When Propagating Erica Dianthifolia
Overwatering
Excessive moisture can lead to root rot and fungal infections, severely impacting the plant's health and propagation success.
Using Incorrect Soil
Planting erica dianthifolia in heavy or poorly-draining soil can hinder root growth and impair nutrient absorption.
Insufficient Light
Lack of adequate illumination can result in weak, elongated growth, and reduce the success rate of cuttings or seedlings.
Incorrect Cutting Technique
Improperly cut or damaged stems can lead to increased chances of disease and lower propagation success.
Neglecting Humidity
Failing to maintain the necessary humidity levels can result in dehydration and poor root development.
Advice for Propagating Erica Dianthifolia
Use Well-Draining Soil
Ensure the soil mixture is light and porous to prevent waterlogging and allow roots to respire.
Maintain Optimal Humidity
Keep the environment humid by covering cuttings with a plastic dome or utilizing a misting system.
Provide Adequate Light
Place the cuttings or seedlings in a well-lit area with indirect sunlight to encourage healthy development.
Proper Cutting Technique
Use clean, sharp tools to take cuttings just below a node, and remove any lower leaves.
Regular Monitoring
Consistently check for signs of disease, pests, or environmental stress and address issues promptly.



