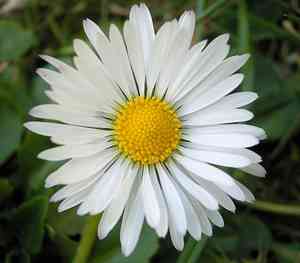
How to Propagate Mount laguna aster?
Mount laguna aster flourishes in porous, sandy substrates, frequently encountered in stony landscapes. For propagation, gather seeds from established specimens and plant them directly into a prepared sowing area. Keep the soil consistently damp, yet prevent saturation, as excessive wetness can cause decay. It thrives optimally in either partial shade or full sunlight, but steer clear of excessively dim locations. Routinely remove weeds surrounding the young plants to reduce rivalry. Perseverance is crucial, as sprouting may take time.
Optimal Period for Propagating Mount Laguna Aster
Propagation Method
Seeding
Propagation Period
Spring
Tools Utilized for Mount Laguna Aster Propagation
Seed Tray
A seed tray offers a regulated setting for planting mount laguna aster seeds. It guarantees uniform soil depth and moisture retention, both vital for sprouting.
Seed Starting Mix
This sterile, light mixture is crucial for mount laguna aster seeds to germinate without obstruction from dense soil. It fosters root growth and lowers disease risk.
Spray Bottle
A spray bottle enables gentle irrigation of mount laguna aster seeds. It prevents the soil from becoming overly wet or the seeds from dislodging.
Humidity Dome
Humidity domes assist in maintaining elevated humidity levels, which is essential for seed germination and the initial growth phases of mount laguna aster.
Heating Mat
A heating mat delivers consistent warmth from below, which can enhance the germination rate and promote even development of mount laguna aster seedlings.
Pencil or Dibber
A pencil or dibber is useful for creating small planting depressions in the seed starting mix, ensuring mount laguna aster seeds are sown at the correct depth.
Labels and Markers
Labels and markers aid in tracking mount laguna aster seeds. Proper labeling ensures accurate identification of different plant stages.
Pruners
Precise pruners are important for harvesting mature seeds from mount laguna aster plants. They allow for clean cuts without harming the plant, ensuring a healthy propagation cycle.
Method for Propagating Mount Laguna Aster
Propagation Type
Simple
Caring for Your Newly Propagated Mount Laguna Aster
Caring for Your Newly Propagated Mount Laguna Aster?
Post-transplant, water seedlings regularly to keep the soil consistently moist but not waterlogged. Provide full sun to partial shade, depending on climate, and allow the soil to dry slightly between waterings. Fertilize sparingly with a balanced, organic fertilizer during the growing season. Mulching around the plant bases can help retain moisture and suppress weeds. Regularly check for pests and diseases, addressing issues promptly for healthy growth.
Common Errors to Avoid When Propagating Mount Laguna Aster
Overwatering
Excessive moisture can lead to root rot and fungal infections, which may hinder growth or kill the plant.
Inappropriate Soil Selection
Using soil that is too dense or retains too much water can impede root development and reduce aeration.
Incorrect Sunlight Exposure
Providing insufficient light can result in weak growth, while too much direct sunlight can scorch the leaves.
Ignoring Soil pH
Failing to check soil pH might lead to nutrient deficiencies if the soil is excessively acidic or alkaline.
Neglecting Hardening Off
Transplanting seedlings directly to outdoor conditions without gradual adjustment can cause transplant shock.
Advice for Propagating Mount Laguna Aster
Moderate Watering
Keep the soil consistently moist but well-drained to prevent oversaturation and root diseases.
Well-Draining Soil
Utilize a sandy or loamy soil mix that provides good drainage to support healthy root growth and prevent waterlogging.
Filtered Sunlight
Mount laguna aster thrives best in partial shade or filtered sunlight. Avoid placing it in intense, direct sunlight.
Soil pH Balance
Aim for a soil pH between 6.0 and 7.5 to ensure optimal nutrient availability and absorption.
Gradual Acclimatization
Gradually acclimate seedlings to outdoor conditions by slowly increasing their exposure to the external environment over one to two weeks.


