How to Propagate Glandular clarkia?
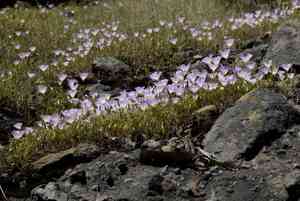
Clarkia glandulosa belongs to the Onagraceae botanical family, recognized for its appealing look featuring elongated blossoms. To propagate, disperse seeds directly into substrate that drains effectively, ideally enhanced with organic material. Sustain steady hydration without oversaturation to aid sprouting. Safeguard nascent plants from insects and powerful gusts. Relocate juvenile specimens once they possess several mature leaves, positioning them with sufficient distance for development and air circulation.
Optimal Period for Glandular Clarkia Propagation
Method of Propagation
Seeding
Propagation Period
Spring
Tools Required for Glandular Clarkia Propagation
Seed Tray
An essential item for germinating glandular clarkia seeds, offering a controlled setting for uniform sprouting and easy handling during initial growth stages.
Seed Starting Mix
A specialized growing medium providing the perfect texture, nutrient balance, and drainage for glandular clarkia seed germination, free from harmful pathogens and pests.
Mister/Spray Bottle
Used to maintain consistent moisture levels in the seed tray, vital for successful glandular clarkia germination, ensuring gentle watering without disturbing seeds or soil.
Heating Mat
Placed beneath the seed tray, a heating mat delivers steady bottom heat, which can speed up glandular clarkia's germination and encourage strong seedling development.
Humidity Dome
Covers the seed tray to maintain high humidity, necessary for glandular clarkia seeds to sprout successfully and to prevent rapid soil drying.
Labels and Markers
Crucial for tracking glandular clarkia seeds' planting dates and varieties. Accurate labeling aids in monitoring growth and ensuring proper care throughout cultivation.
Fine Mesh Sieve
Can be employed to lightly cover glandular clarkia seeds with a thin layer of soil or vermiculite, ensuring even coverage and promoting essential seed-to-soil contact for germination.
Grow Lights
Supply the necessary light spectrum and intensity for glandular clarkia seedlings, especially where natural light is insufficient, fostering healthy, sturdy growth in early stages.
Steps to Propagate Glandular Clarkia
Propagation Difficulty
Simple
Post-Propagation Care for Glandular Clarkia
Post-Propagation Care for Glandular Clarkia
After propagation, apply a light layer of mulch around the base of glandular clarkia to retain soil moisture and stabilize temperature. Ensure full sun to partial shade exposure, providing adequate light. Water moderately, allowing the top inch of soil to dry between waterings. During the growing season, apply a balanced, diluted fertilizer every four to six weeks. Prune spent flowers to encourage new blooms and prevent self-seeding.
Common Errors to Avoid When Propagating Glandular Clarkia
Overwatering
Excessive water can lead to root rot, harming the plant and hindering successful propagation.
Insufficient light
Lack of adequate illumination can result in weak, elongated seedlings that struggle to establish.
Using heavy soil
Dense, clay-like soil can impede root development and drainage, causing poor growth and potential decay.
Neglecting pest control
Failure to monitor and manage pests can lead to infestations that weaken or kill young plants.
Incorrect spacing
Planting too close together can lead to overcrowding, competition for resources, and increased susceptibility to disease.
Advice for Propagating Glandular Clarkia
Well-draining soil
Utilize a soil mix that ensures proper drainage to prevent waterlogging and root rot.
Adequate light
Provide ample indirect sunlight or grow lights to support healthy growth and robust seedlings.
Pest monitoring
Regularly inspect for pests and implement control measures early to safeguard young plants.
Proper spacing
Ensure sufficient space between plants to promote airflow and reduce competition for nutrients.
Consistent watering
Maintain steady but moderate watering, keeping the soil moist but not waterlogged.


