How to Propagate Slender grama?
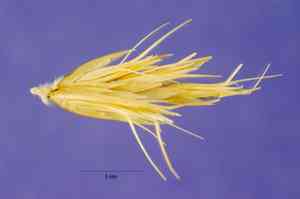
A native American grass, Bouteloua gracilis flourishes in porous ground and requires little irrigation after establishment. Reproduction usually entails splitting, making sure the plant's clusters are divided and transplanted into locations with ample light and room for expansion. Given its resilience and undemanding upkeep, Bouteloua gracilis is an excellent option for water-wise landscaping and erosion control initiatives.
Optimal Time for Slender Grama Propagation?
Propagation Method
Division
Propagation Period
Spring,Autumn
Tools for Slender Grama Propagation
Garden Spade
An essential tool for digging around the slender grama clump to be divided. Its sharp edge ensures clean cuts, minimizing root damage.
Hand Pruners
Useful for trimming old or damaged leaves and roots prior to division. This helps maintain plant health by reducing disease risk.
Garden Fork
Beneficial for gently lifting the plant clump from the soil without significant root disturbance. It prevents excessive root damage, crucial for successful slender grama division.
Root Saw or Sharp Knife
Necessary for cutting the plant clump into smaller sections. These tools provide precise cuts, promoting quicker root establishment and reducing plant stress.
Watering Can
Important for immediately watering newly divided slender grama sections after replanting. Consistent moisture is vital for new root system establishment.
Rooting Hormone (optional)
Can be used to encourage root development in newly divided sections. For slender grama, this can speed up root formation, increasing propagation success.
Plant Labels
Useful for marking new plantings. This helps track divisions, ensuring proper care and monitoring as they establish and grow.
How to Propagate Slender Grama?
Propagation Type
Easy
Caring for Newly Propagated Slender Grama
Caring for Newly Propagated Slender Grama
After propagating slender grama, maintain consistent moisture, especially during initial establishment. Gradually reduce watering as plants settle. Monitor and promptly remove weeds to lessen nutrient competition. Regularly check for pests and diseases, though slender grama is generally robust. Occasionally trim dead or damaged foliage to encourage healthy new growth.
Common Errors to Avoid When Propagating Slender Grama
Improper Soil Conditions
Using heavily compacted or poorly draining soil can impede root development and heighten disease susceptibility.
Overwatering
Providing too much water can lead to root rot and fungal infections, potentially killing the plant.
Insufficient Light
Placing slender grama in shaded areas can result in weak, elongated growth and limit the plant's ability to thrive.
Incorrect Seed Depth
Planting seeds too deeply or too shallowly can hinder germination and lead to poor seedling development.
Neglecting Transplants
Failing to acclimate transplants before moving them outdoors can shock the plants, reducing their chances of survival.
Tips For Propagating Slender Grama
Use Well-Draining Soil
Choose a soil mix that promotes drainage and prevents waterlogging to encourage healthy root development.
Water Sparingly
Ensure watering practices allow the soil to dry out slightly between sessions, mimicking slender grama’s natural environment.
Provide Adequate Sunlight
Position slender grama in a location with full sun exposure to promote vigorous growth and robust health.
Correct Seeding Depth
Place seeds at the appropriate depth, typically about ¼ inch below the soil surface, to facilitate optimal germination conditions.
Harden Off Transplants
Gradually acclimate transplants to outdoor conditions by exposing them to increasing amounts of sunlight and outdoor temperatures over a week to reduce transplant shock.


