How to Propagate Beautiful rockcress?
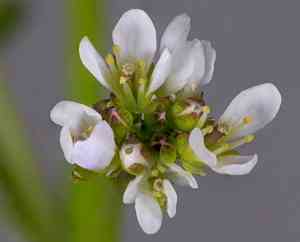
Arabis caucasica, a lovely perennial, originates from stony environments. It flourishes optimally in soil that drains effectively and receives ample sunlight. For propagation through seeding, maintain consistent soil dampness without allowing it to become saturated. Cold stratification of seeds can boost their sprouting success. Due to its affinity for demanding environments, offering a comparable rocky foundation can significantly aid its successful rooting.
Optimal Time for Beautiful Rockcress Propagation
Propagation Type
Seeding
Propagation Season
Spring
Tools for Beautiful Rockcress Propagation
Seed Tray/Starter Pots
Seed trays or starter pots offer a controlled setting for planting beautiful rockcress seeds. They ensure proper spacing and depth, crucial for the delicate initial growth phases.
Seedling Heat Mat
A seedling heat mat helps maintain steady and ideal soil temperatures, which speeds up germination and boosts seedling strength for beautiful rockcress.
Humidity Dome
Humidity domes trap moisture and create a miniature greenhouse effect, vital for maintaining the high humidity levels needed during the early stages of beautiful rockcress's seed germination.
Seedling Mix
A well-draining, nutrient-rich seedling mix encourages robust root development, which is essential for the successful germination and growth of beautiful rockcress.
Spray Bottle
A spray bottle ensures gentle watering without disturbing the seeds, preventing displacement and ensuring even moisture distribution for beautiful rockcress.
Grow Lights
Grow lights provide a consistent light source, crucial for photosynthesis and healthy seedling growth, especially if natural light is insufficient for beautiful rockcress.
Seedling Transplant Tool
A seedling transplant tool allows gardeners to carefully handle and move young seedlings, minimizing root damage and ensuring healthy establishment when relocating beautiful rockcress to larger containers or outdoors.
How to Propagate Beautiful Rockcress?
Propagation Type
Simple
Caring for Newly Propagated Beautiful Rockcress
Caring for Newly Propagated Beautiful Rockcress
Post-germination, gradually introduce seedlings to outdoor conditions by placing them in a sheltered spot and slowly increasing sun exposure. Transplant seedlings to their permanent location in well-draining, rocky soil. Water moderately, providing enough to keep the soil moist but not saturated. Fertilization is generally not needed, as beautiful rockcress thrives in poor soils. Regularly check for pests and diseases, and prune any damaged or dead foliage to promote healthy growth.
Common Errors to Avoid When Propagating Beautiful Rockcress
Overwatering
Excessive moisture can lead to root rot and fungal infections, severely impacting the plant's health.
Poor Drainage
Inadequate drainage can result in waterlogged conditions, causing root suffocation and potential plant demise.
Incorrect Soil Mix
Using heavy or overly rich soil can hinder root development and nutrient absorption.
Lack of Light
Insufficient sunlight can impede growth and diminish the plantâs vitality.
Inconsistent Watering Schedule
Irregular watering can stress the plant, leading to reduced resistance against pests and diseases.
Incorrect Planting Depth
Planting too deep or too shallow can impair root establishment and overall growth.
Tips For Propagating Beautiful Rockcress
Moderate Watering
Ensure a good balance by watering only when the top inch of soil feels dry.
Well-Draining Soil
Use a mix that allows excess water to drain while retaining necessary moisture for root development.
Proper Light Exposure
Provide ample sunlight, ideally in a location where the plant can receive several hours of indirect sunlight daily.
Consistent Watering Routine
Establish a regular watering schedule to promote healthy growth and prevent plant stress.
Correct Planting Depth
Plant beautiful rockcress at a depth where the roots are just covered, ensuring they have enough space to spread and grow.


