How to Propagate Perennial rockcress?
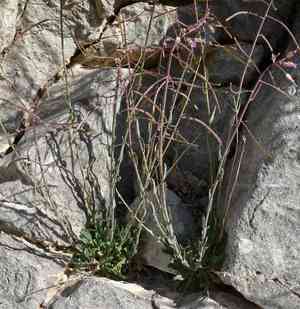
Rockcress, a perennial, flourishes in arid, well-aerated ground, making it perfect for exposed, dry environments. When planting seeds, gently press them onto the soil's surface without deep burial, maintaining consistent dampness but preventing waterlogging. Subjecting seeds to a cold stratification period beforehand can boost their sprouting success. Placing the plant in direct sunlight encourages vigorous development and more vibrant leaves. Reducing interference during the initial growth period aids in strengthening the root structure.
Optimal Time for Perennial Rockcress Propagation
Propagation Method
Seeding
Propagation Period
Spring
Tools for Perennial Rockcress Propagation
Seedling Tray
Utilized for planting seeds in a controlled setting, assisting in the initial phases of propagation by offering ideal spacing and drainage for perennial rockcress.
Seed Starting Mix
This soil-free blend guarantees good air circulation and moisture retention, perfect for effective perennial rockcress seed germination. It's typically sterile to prevent disease.
Misting Bottle
Employed to gently moisten seeds without disruption, maintaining the necessary humidity level for perennial rockcress seed sprouting.
Heat Mat
Delivers consistent warmth from below to encourage quicker and more uniform germination of perennial rockcress seeds, especially beneficial in cooler climates.
Grow Lights
Augment natural light, ensuring perennial rockcress seedlings receive sufficient illumination to prevent stretching, particularly in low-light conditions or during short winter days.
Plastic Dome
Generates a miniature greenhouse effect to retain humidity and warmth, crucial for the successful germination and initial development of perennial rockcress seeds.
Seed Labels
Essential for tracking the various stages and types of perennial rockcress being propagated, ensuring precise information and care.
Fine Sieve
Helps to lightly cover perennial rockcress seeds with a thin layer of soil or vermiculite, providing the correct depth for germination while ensuring good contact with the seed starting mix.
Propagating Perennial Rockcress
Propagation Difficulty
Simple
Caring for Newly Propagated Perennial Rockcress
Caring for Newly Propagated Perennial Rockcress
Post-transplant, keep the soil consistently damp without over-saturating. Gradually introduce the young plants to direct sunlight. Watch for any signs of stress or illness, and apply a balanced, diluted liquid feed to support growth throughout the active season. Prune as needed to maintain healthy growth and encourage fuller plants.
Common Errors to Avoid When Propagating Perennial Rockcress
Excessive Watering
Overwatering can lead to root rot, which can be fatal for perennial rockcress. Ensuring the soil is well-draining and not kept constantly wet is crucial.
Using heavy soil
Dense, compacted soil can restrict root growth and reduce aeration, leading to poor plant development. Perennial rockcress prefers well-draining sandy or rocky soil.
Insufficient light
Providing inadequate sunlight can stunt perennial rockcress, impacting its growth and vigor. This plant thrives in full sun conditions.
Improper cutting technique
Damaging the parent plant or the cutting by using dull tools or incorrect cutting methods can hinder successful propagation and increase the risk of infections.
Advice for Propagating Perennial Rockcress
Utilize well-draining soil
Choose a sandy or rocky soil mixture to ensure proper drainage and root health for perennial rockcress.
Maintain moderate watering
Water perennial rockcress sparingly, allowing the soil to dry out between watering sessions to prevent root rot.
Ensure full sun exposure
Place perennial rockcress in a location that receives full sunlight to promote healthy growth.
Clean cutting tools
Use sterilized, sharp tools to take cuttings, ensuring a clean cut and reducing the risk of disease transmission.


