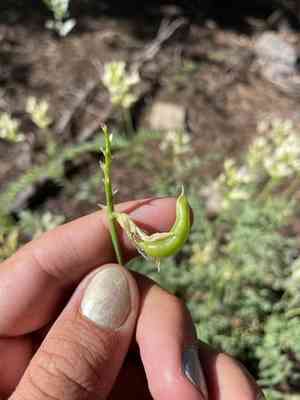
How to Propagate Bolander's milkvetch?
Bolander's milkvetch, flourishing in clearings and grasslands, is effectively propagated through seeding techniques. Verify that the seeds undergo scarification and stratification to overcome dormancy, encouraging vigorous sprouting. Keep the soil consistently damp, and plant in a substrate that drains efficiently. Sufficient sunlight additionally improves the growth potential of bolander's milkvetch, rendering it an excellent inclusion for cultivated plots and wild settings. Consistent observation and tending will support its robust maturation.
When Is the Best Time to Propagate Bolander's Milkvetch?
Propagation Method
Seeding
Propagation Period
Spring
What Equipment Is Used in Bolander's Milkvetch Propagation?
Seeds
Premium seeds are vital for successful propagation via sowing. Ensure they are viable and obtained from a reputable supplier to enhance germination rates and plant vitality.
Seedling Trays
Seedling trays offer a structured environment for initial seed germination and growth. They simplify the management of young plants and help maintain ideal moisture levels.
Seed Starting Mix
A well-draining seed starting mix is crucial for supplying young plants with necessary nutrients while preventing waterlogging. This mix should be pathogen-free to avert plant diseases.
Humidity Domes
Humidity domes are utilized to maintain consistent humidity, which is essential for seed germination and the early growth phases of bolander's milkvetch. They aid in moisture retention and creating a suitable microenvironment.
Misting Bottle
A misting bottle ensures gentle irrigation without disturbing the soil or seeds. Consistent misting keeps moisture levels optimal for seed germination.
Grow Lights
Grow lights provide an adequate light source, especially for indoor propagation. They ensure bolander's milkvetch receives sufficient light for photosynthesis, promoting robust growth.
Heating Mat
A heating mat placed beneath seedling trays can help maintain a consistent and warm soil temperature, which benefits the germination of bolander's milkvetch. It ensures timely sprouting of seeds.
Labeling Stakes
Labeling stakes help track different seed batches and growth stages. Proper labeling is critical for organized and successful propagation.
How to Propagate Bolander's Milkvetch?
Propagation Difficulty
Easy
How to Care for Your Newly Propagated Bolander's Milkvetch?
How to Care for Your Newly Propagated Bolander's Milkvetch?
Once bolander's milkvetch seedlings emerge, thin them to prevent overcrowding, giving each plant ample room to grow. Transplant seedlings to individual pots when they are large enough to handle, and continue to provide bright, indirect light. Gradually acclimate the young plants to outdoor conditions, ensuring they are planted in a well-draining location that receives abundant sun. Water moderately, allowing the soil to dry out between waterings. Avoid overwatering, as bolander's milkvetch is drought-tolerant and prone to root rot if kept too wet.
Common Errors to Avoid When Propagating Bolander's Milkvetch
Overwatering
Excessive watering can lead to root rot, especially since bolander's milkvetch prefers well-drained soil.
Insufficient Light
Providing inadequate light can result in weak and leggy seedlings, as bolander's milkvetch thrives in sunny conditions.
Poor Soil Selection
Using soil that retains too much moisture and lacks drainage can hinder the plant's growth and health.
Neglecting Seed Scarification
Failing to scarify seeds can significantly reduce germination rates, as the hard seed coat of bolander's milkvetch requires nicking or scraping to facilitate moisture absorption.
Transplant Shock
Handling seedlings too roughly during transplantation can damage roots, leading to slower establishment and growth.
Tips For Propagating Bolander's Milkvetch
Optimal Watering
Water plants moderately, allowing the soil to dry out between watering sessions to prevent root rot.
Ample Sunlight
Ensure bolander's milkvetch receives full sunlight by choosing a sunny location, promoting vigorous and healthy growth.
Well-Draining Soil
Utilize sandy or gravelly soil mixes to enhance drainage and avoid waterlogged conditions.
Seed Scarification
Scarify seeds by nicking or lightly sanding the seed coat before sowing to improve germination success.
Gentle Transplanting
Handle seedlings carefully during transplantation to minimize root damage and reduce transplant shock.


