How to Propagate Spearleaf arnica?
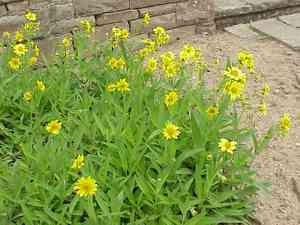
Arnica latifolia flourishes when reproduced via cuttings. The most effective method entails choosing robust, non-blooming stalks for this operation. This guarantees a higher probability of successful root formation and development. Employing a keen, disinfected instrument for severing improves the process's effectiveness, reducing harm and the potential spread of pathogens. Subsequent to cutting, applying a rooting stimulant can considerably boost root growth, preceding placement in a well-draining substrate to encourage vigorous development.
When Is the Optimal Time to Propagate Spearleaf Arnica?
Propagation Method
Cutting
Propagation Period
Spring,Summer
What Equipment Is Used in Spearleaf Arnica Propagation?
Sharp Pruning Shears
These are vital for obtaining healthy spearleaf arnica cuttings. Clean, precise cuts help prevent harm and illness, promoting better rooting. Shears should be sanitized before use to stop pathogen spread.
Rooting Hormone
This encourages root development from cuttings, boosting propagation success. Rooting hormone powders or gels are especially beneficial for spearleaf arnica, fostering quicker, more uniform root growth.
Sterile Potting Mix
This medium is essential for planting cuttings. A sterile, well-draining potting mix prevents fungal and bacterial growth, ensuring a healthy environment for spearleaf arnica's roots to form.
Humidity Dome or Plastic Wrap
Maintaining high humidity around spearleaf arnica cuttings is crucial for preventing moisture loss while roots develop. A dome or loosely draped plastic wrap helps retain moisture and warmth, aiding successful propagation.
Plant Labels
Utilize these to identify and track the growth stage and health of spearleaf arnica during propagation. Labeling helps monitor progress and ensures appropriate care during the critical rooting phase.
How to Propagate Spearleaf Arnica?
Propagation Type
Easy
How to Care for Your Newly Propagated Spearleaf Arnica?
How to Care for Your Newly Propagated Spearleaf Arnica?
After successfully propagating spearleaf arnica, plant the new spearleaf arnica in a location that mimics its natural habitat conditionsâideally in partial shade with well-drained, slightly acidic soil. Water the plant consistently to keep the soil moist, especially during dry spells, but avoid waterlogging. Fertilize lightly each spring with a balanced fertilizer. As spearleaf arnica is adapted to cooler environments, ensure protection from extreme heat. Monitor for pests and diseases regularly and treat as needed to maintain healthy growth.
Common Errors to Avoid When Propagating Spearleaf Arnica
Overwatering
Excessive moisture can lead to root rot and fungal diseases, hindering the plant's growth and propagation success.
Improper Soil Choice
Using heavy, clay-rich soil can impede drainage and root development, which are crucial for successful propagation.
Incorrect Light Exposure
Placing spearleaf arnica in either too much direct sunlight or insufficient light can impede its growth, as it requires a carefully balanced light environment.
Ignoring Pest Control
Failure to monitor and manage pests can result in damaged seedlings and stunted growth.
Neglecting to Prune
Not pruning can lead to overcrowded growth, which can stress the plant and reduce its vitality.
Tips For Propagating Spearleaf Arnica
Optimal Soil Mixture
Use well-draining, sandy or loamy soil to facilitate proper root development.
Controlled Watering
Water moderately, ensuring the soil remains moist but not waterlogged to avoid root diseases.
Light Regulation
Provide spearleaf arnica with partial shade to full sun, ensuring it receives the right amount of light for robust growth.
Pest Monitoring
Regularly check for pests and use organic or chemical treatments as needed to protect young plants.
Routine Pruning
Regularly prune older, diseased, or dead parts of the plant to promote healthy new growth and prevent overcrowding.



